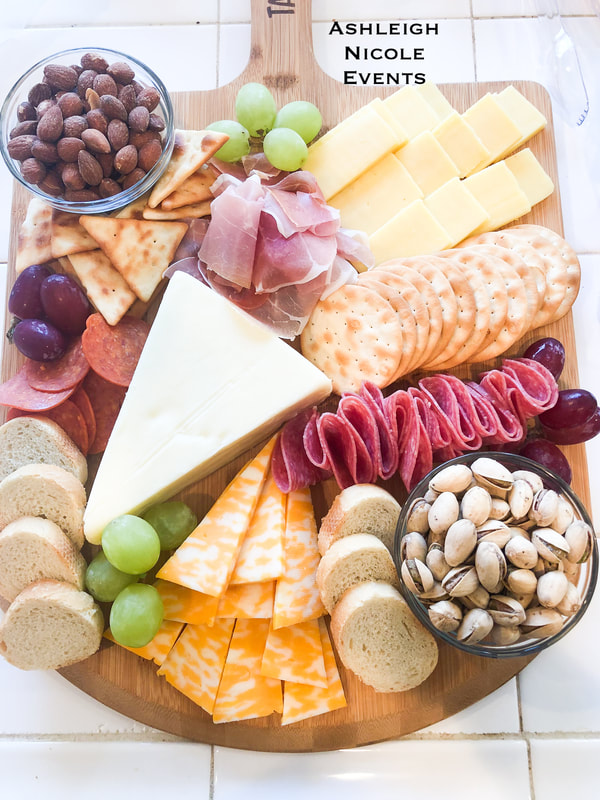
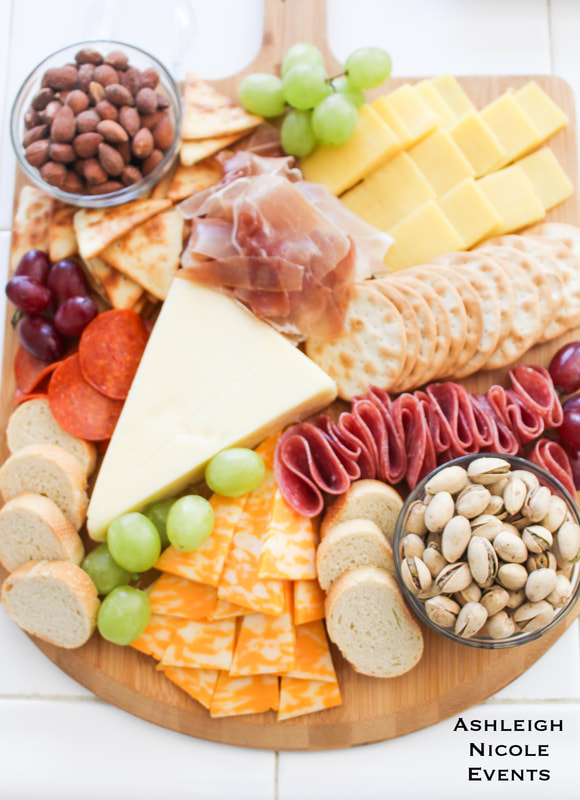
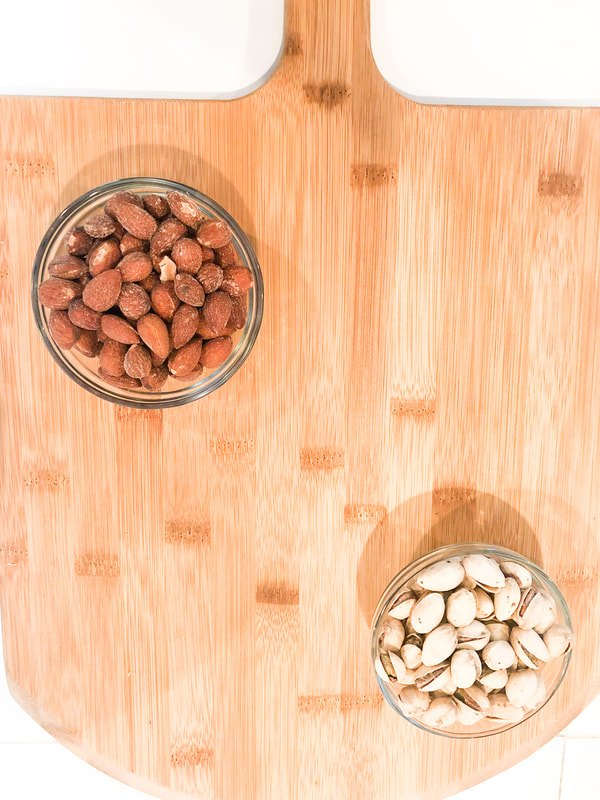
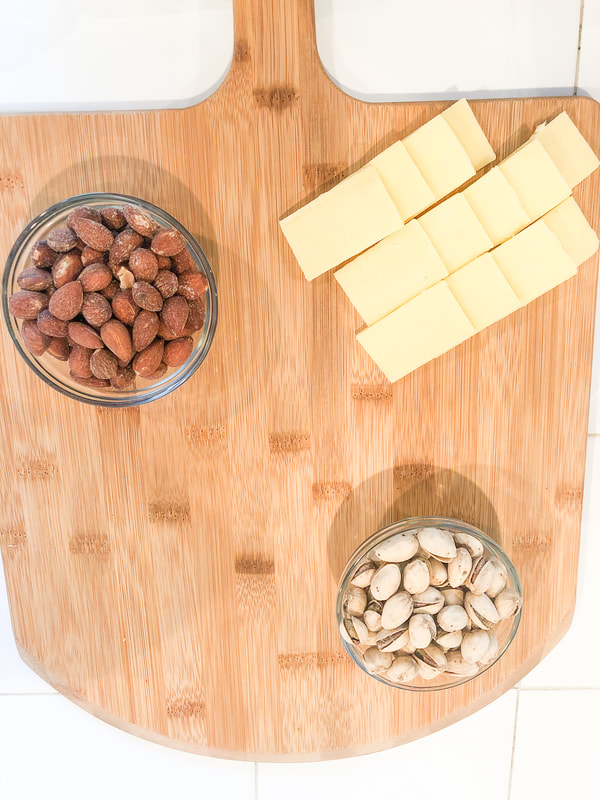
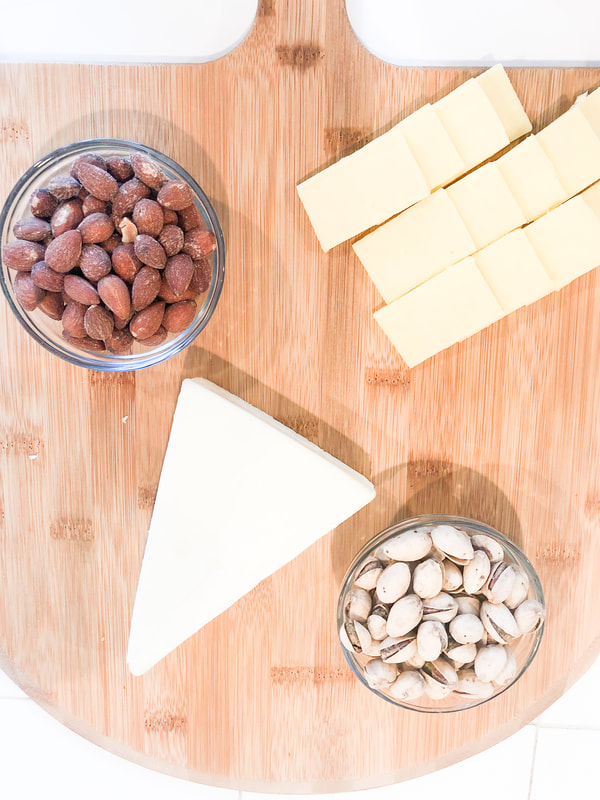
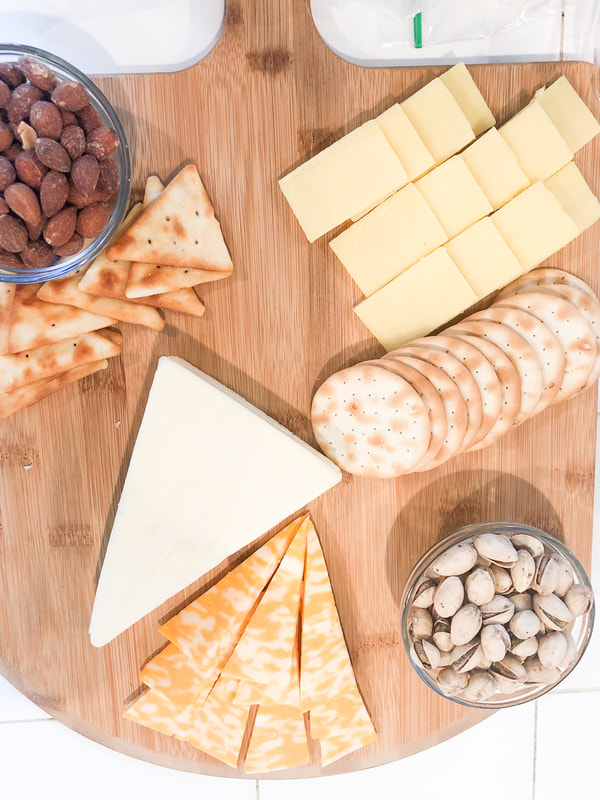
 I’ve been dying to make a charcuterie board. I first saw one on Pinterest a couple months ago. It’s just a fancy cheese board but I had to make one myself. I waited until the perfect opportunity and I thought my boys birthday party was the perfect time! I like having adult food and kids food separate at parties. This charcuterie board was perfect for the adults. 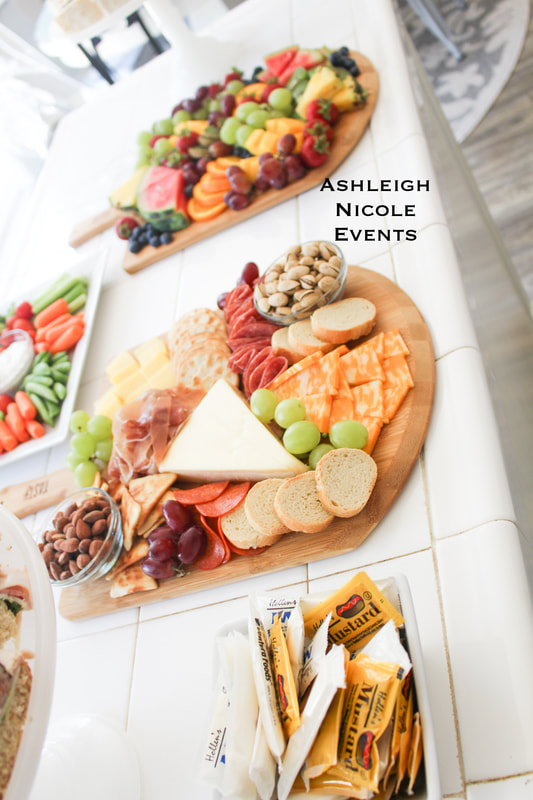 Materials Wood board Cheese Meats Crackers/bread Grapes Nuts  I found the wood board at Ross for $4.99! It’s actually a pizza flip but I thought it would work for the base of my charcuterie board. Next I went to my local grocery store and found everything I needed. 3 types of cheeses Gouda Colby jack Fontina 3 types of meat prosciutto Hard salami Pepperoni 3 types of crackers/breads Water crackers Pita chips Mini bread slices 2 types of nuts Salted almonds Pistachios Green and red grapes to garnish! Here are the steps!!!
  I also made a fruit charcuterie board! It included... Watermellon Mango Kiwi Green and red grapes Organges Strawberries Blueberries 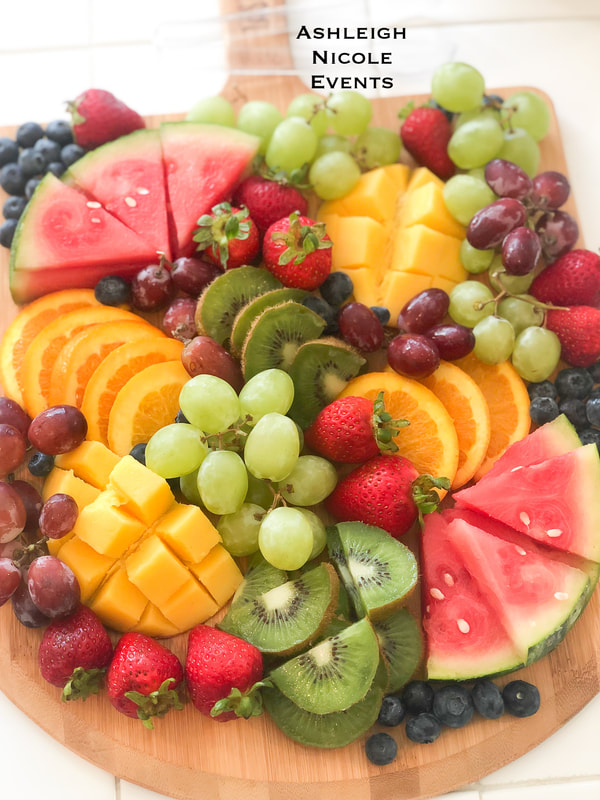  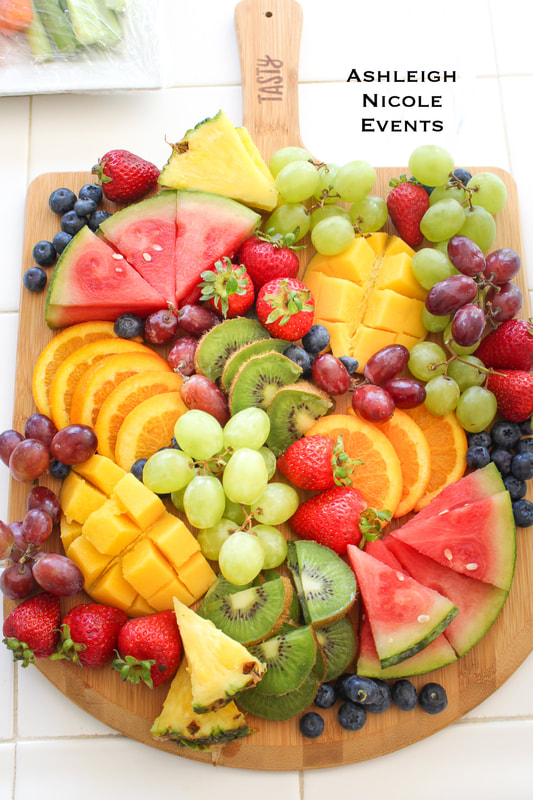 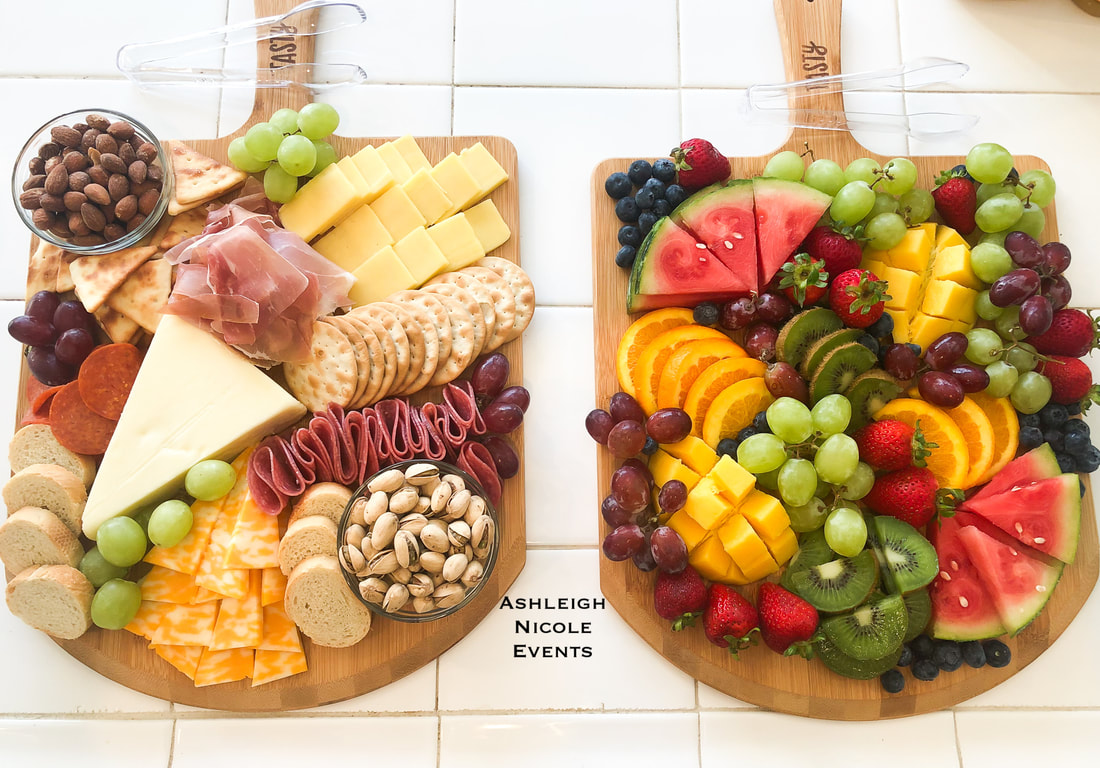
0 Comments
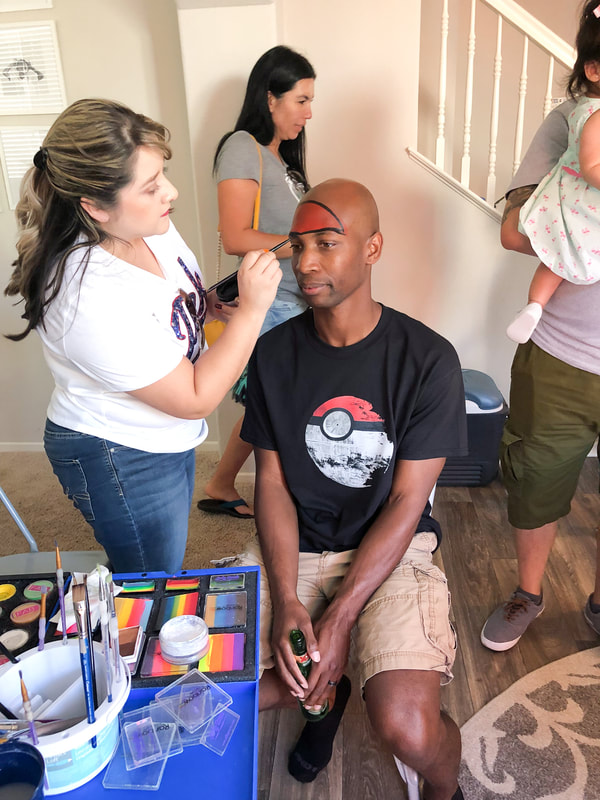
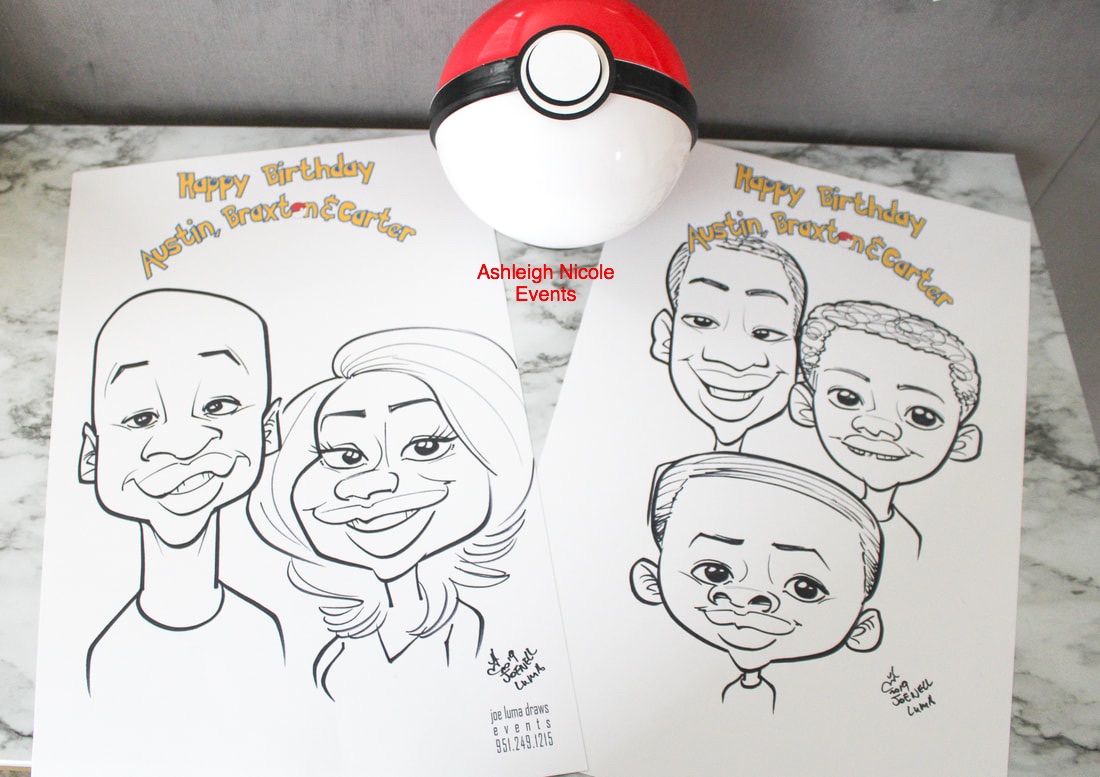
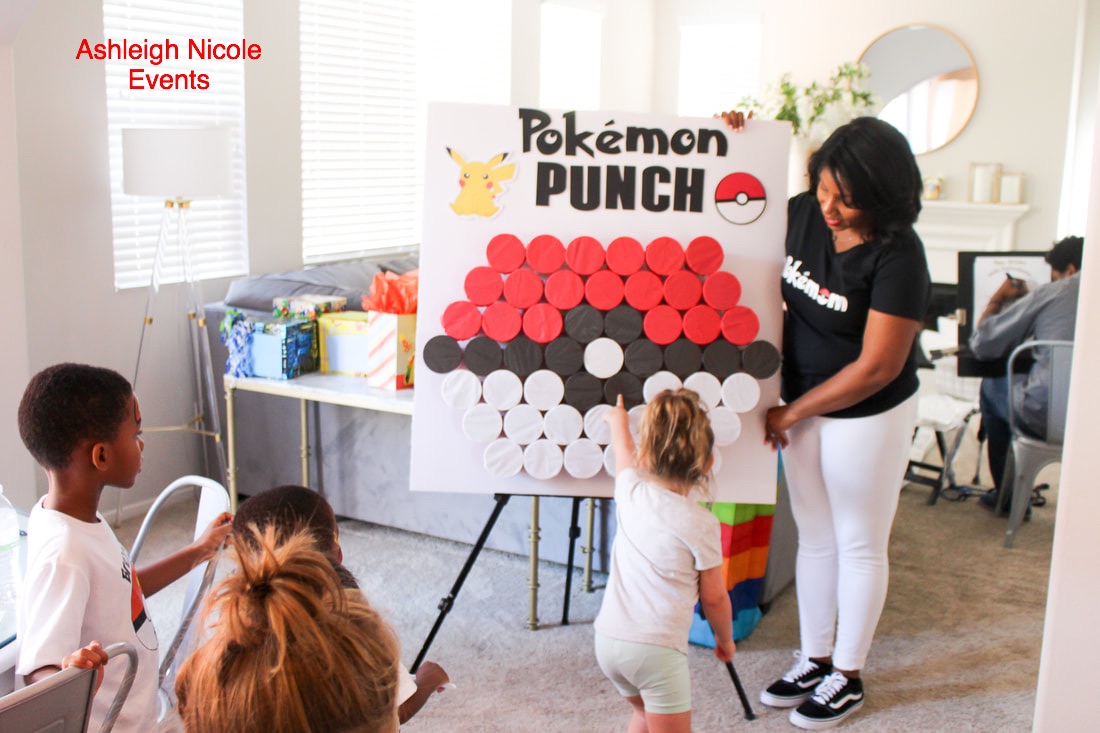
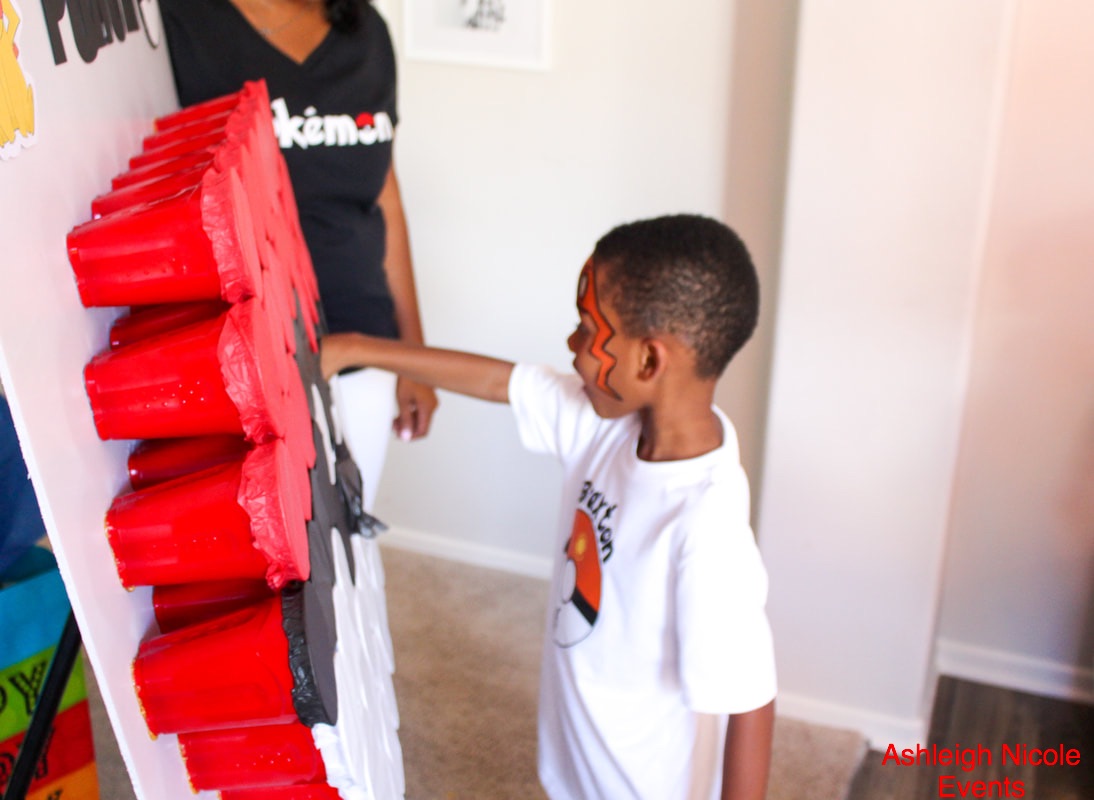
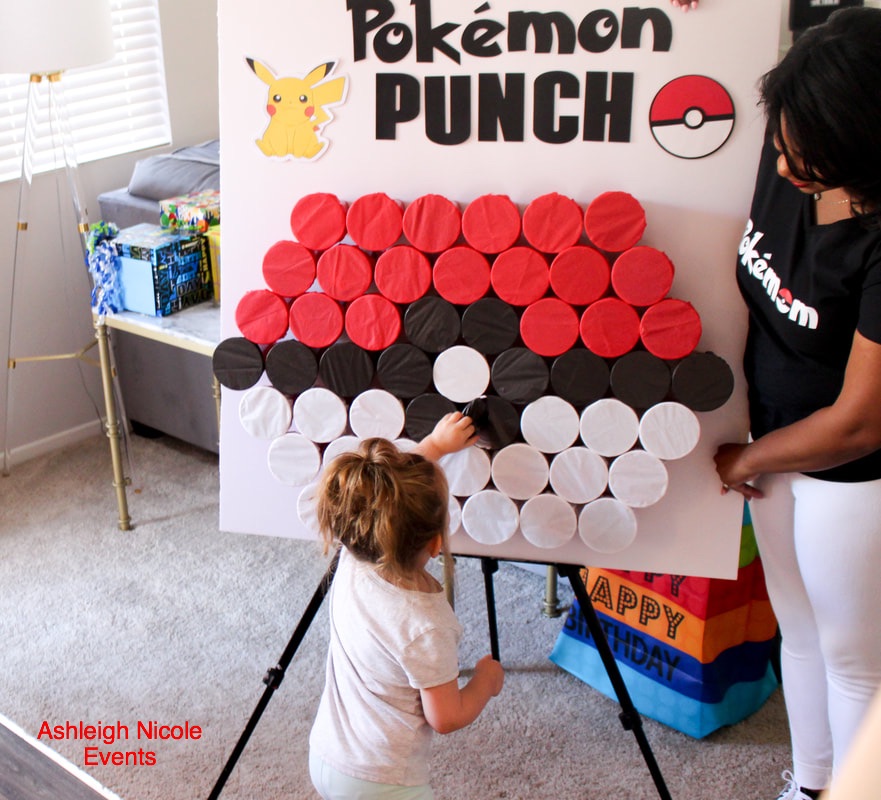
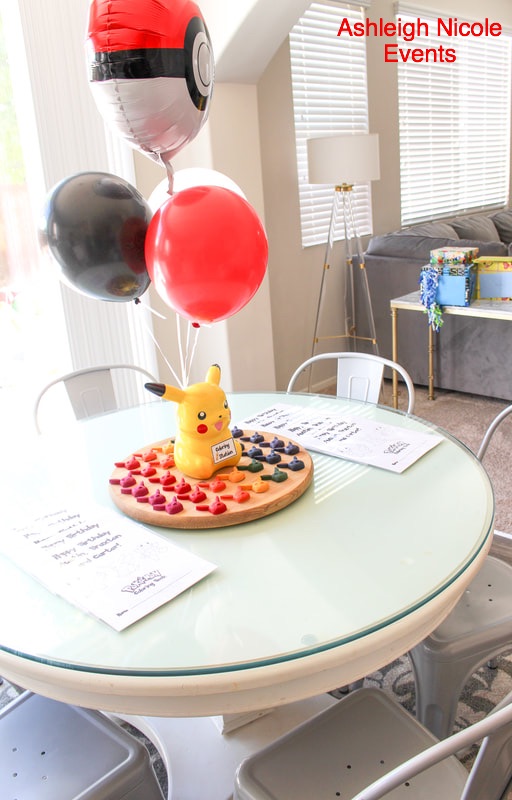
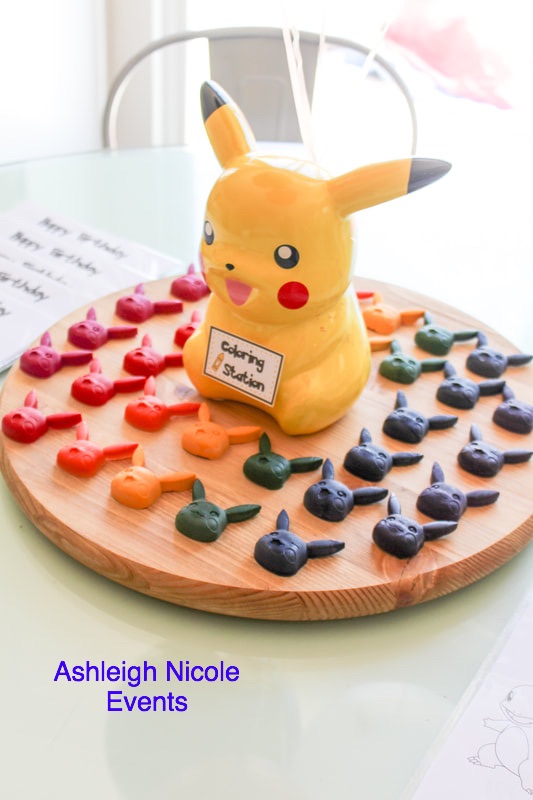
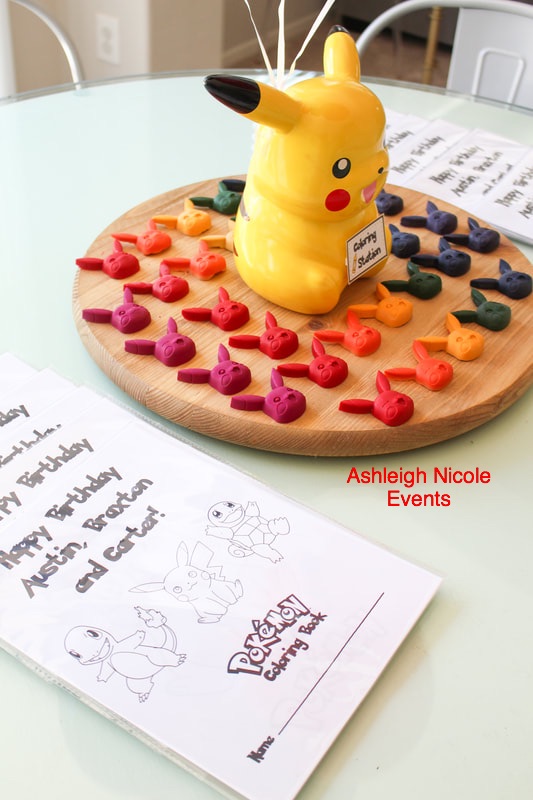
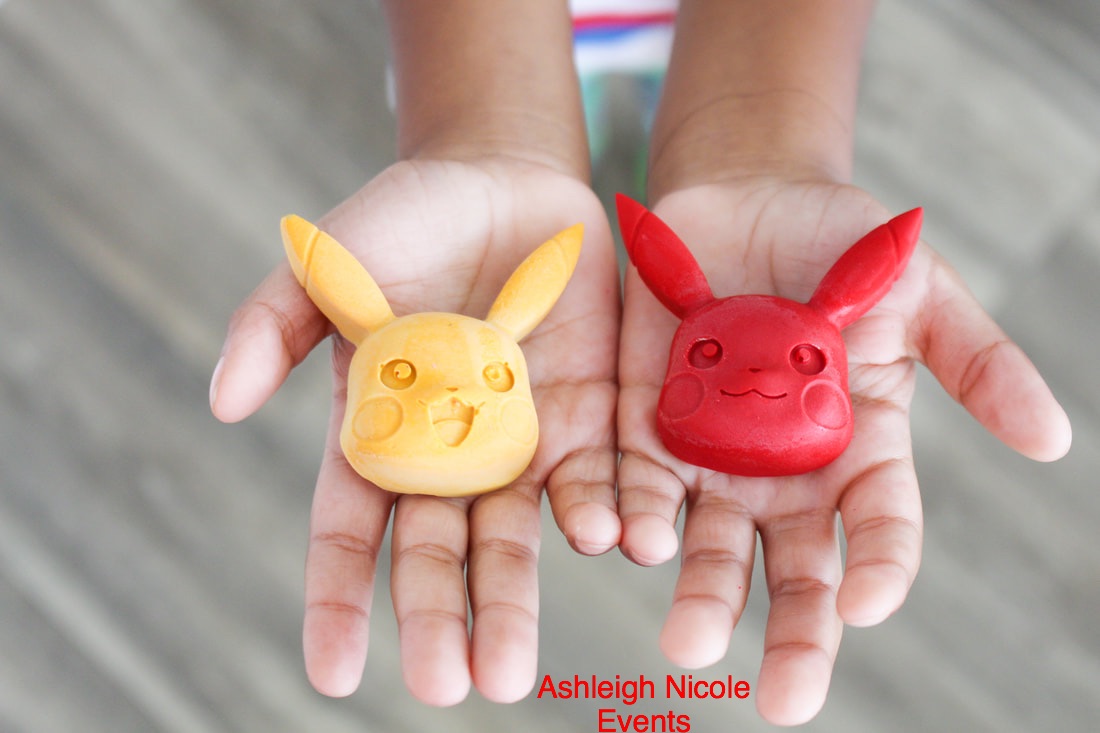
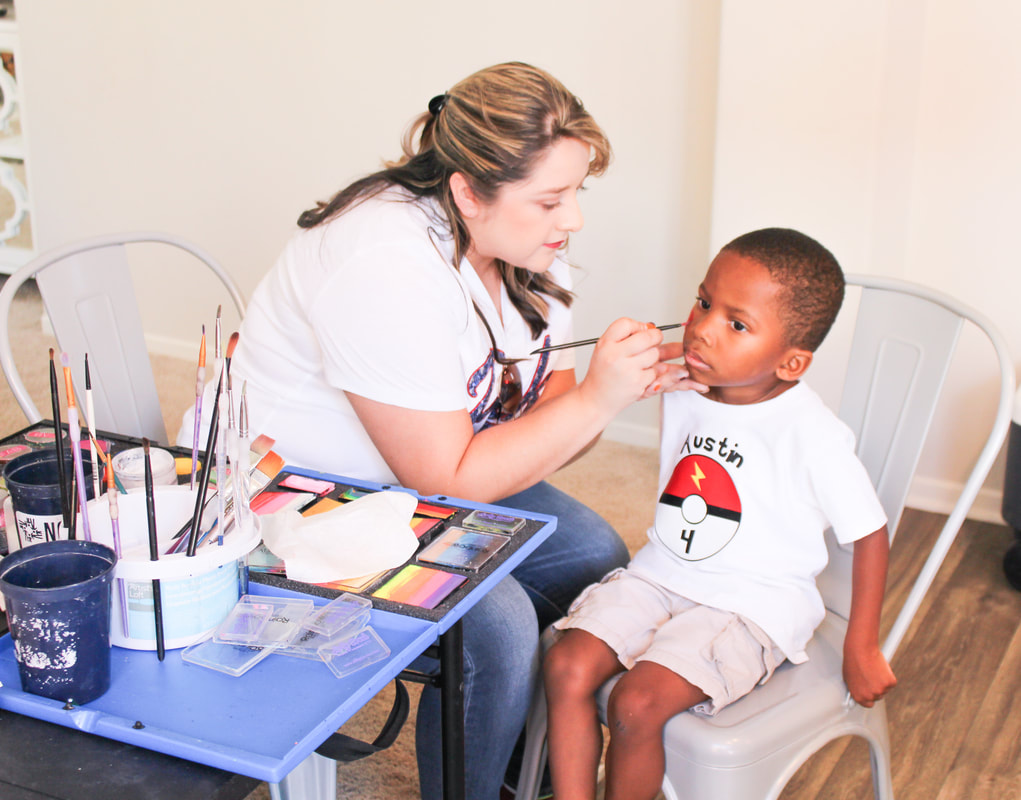
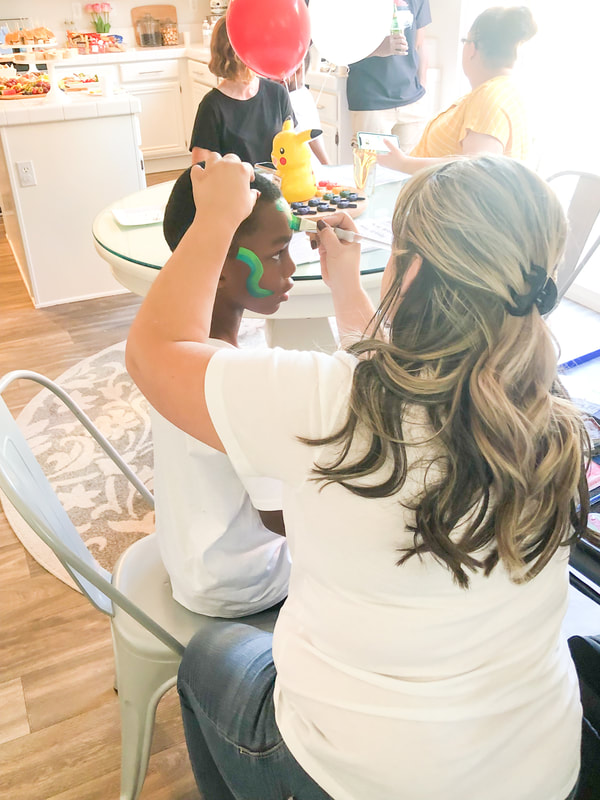
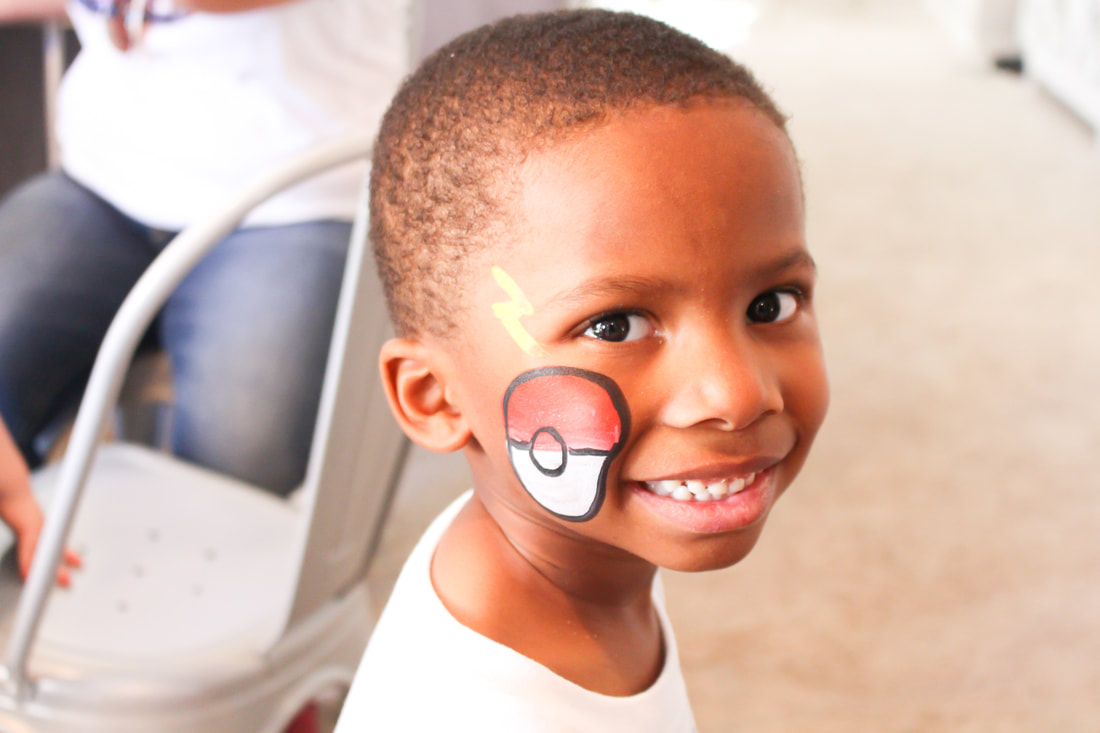
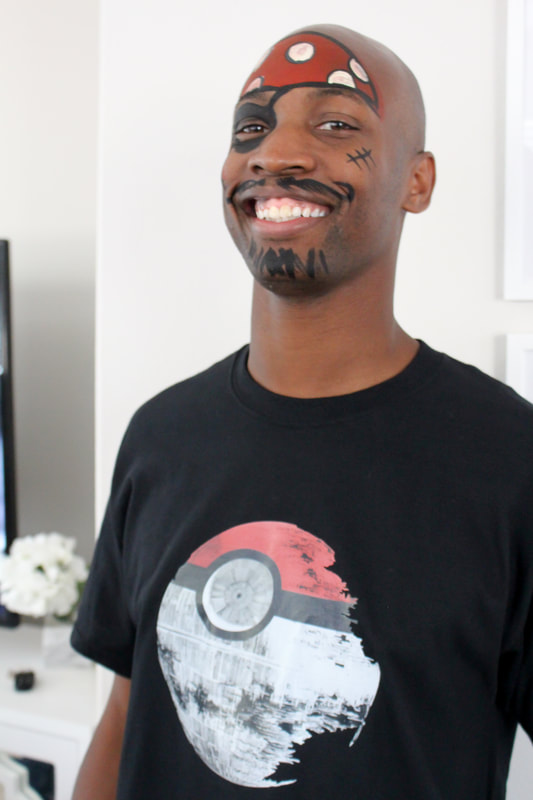
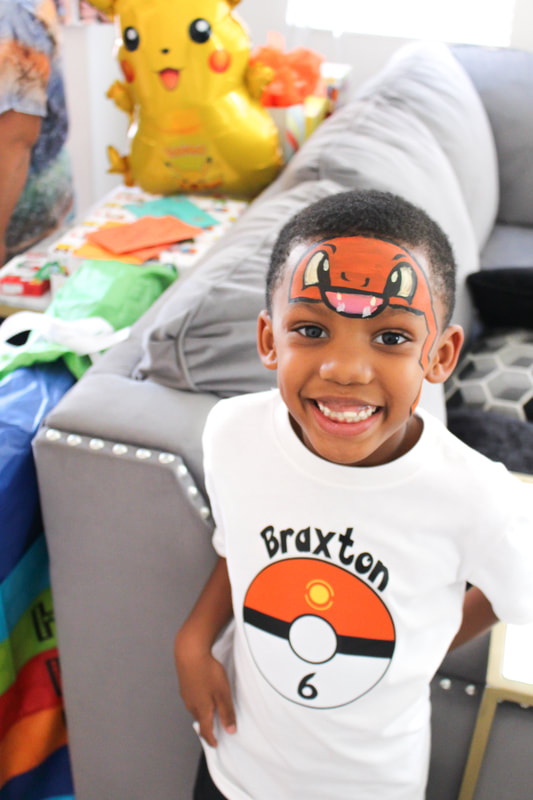
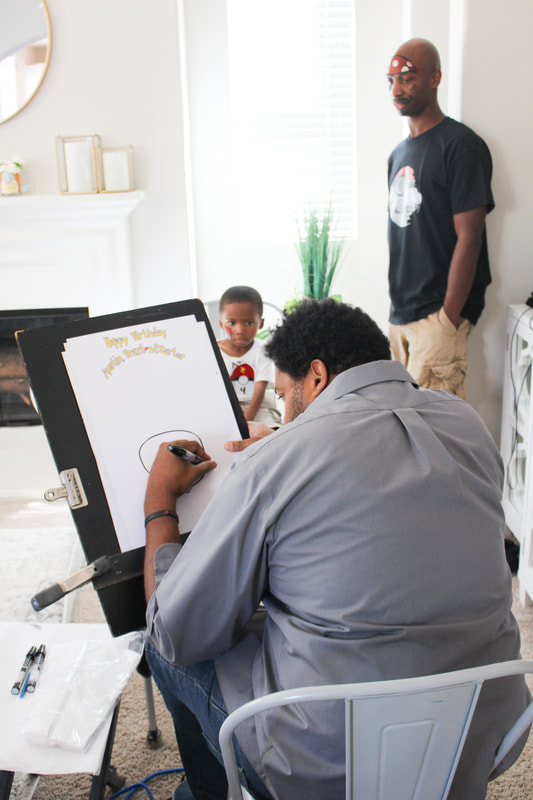
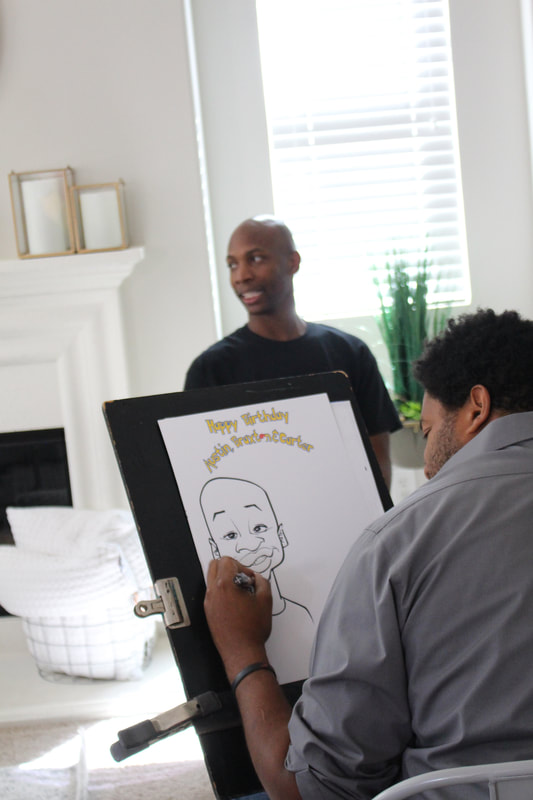
🎶 Gotta catch ‘em all! POKÉMON! My three little boys LOVE Pokémon so I knew it was only a matter of time that they’d ask for a Pokémon themed birthday party. I originally didn’t think I’d like doing this theme but I surprisingly had fun putting it all together. Lots of colors and animations.  If you’ve been around for a while you know I always celebrate my boys birthday together. They all have birthdays within a month so it’s just convenient to do one big shindig. Typically the boys class rule is to invite the ENTIRE class. Luckily none of their teachers were forcing that rule this year. It all worked perfectly because I wanted a more intimate party this time around. I told the boys to pick 2 of their closest friends from their class. They all are old enough to pass out the invites inconspicuously to their buddies without making anyone feel left out. (I helped my youngest out by giving the invites directly to the parents) 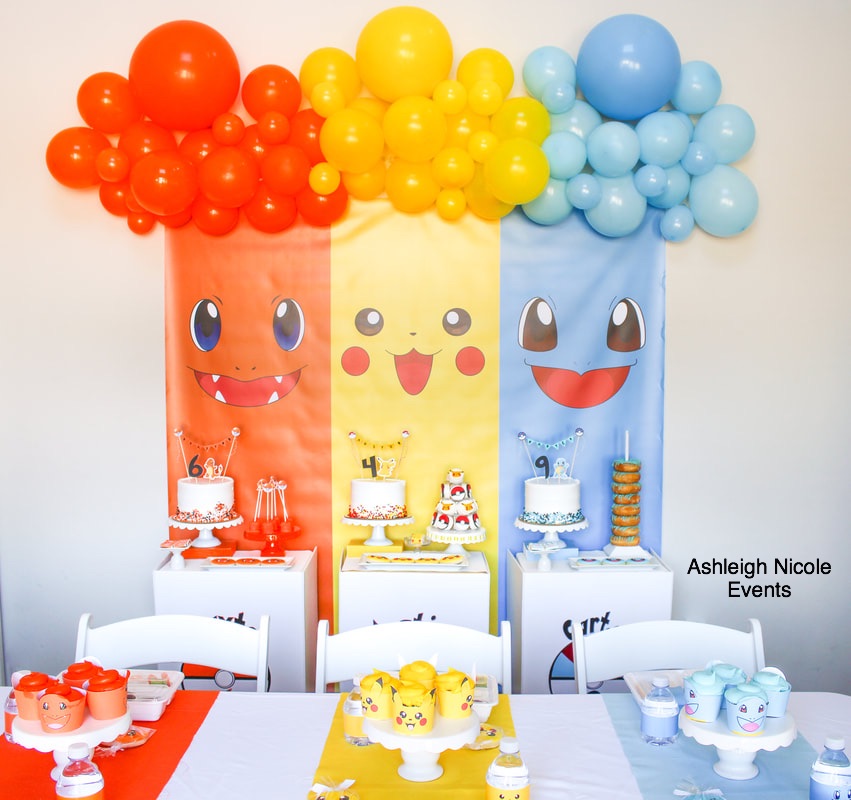 Speaking of invites, let’s start with how I made the cute little Pokeball invitations. I fell in love with this style invite when I saw them and I HAD to make them! They are available in my Etsy shop HERE! 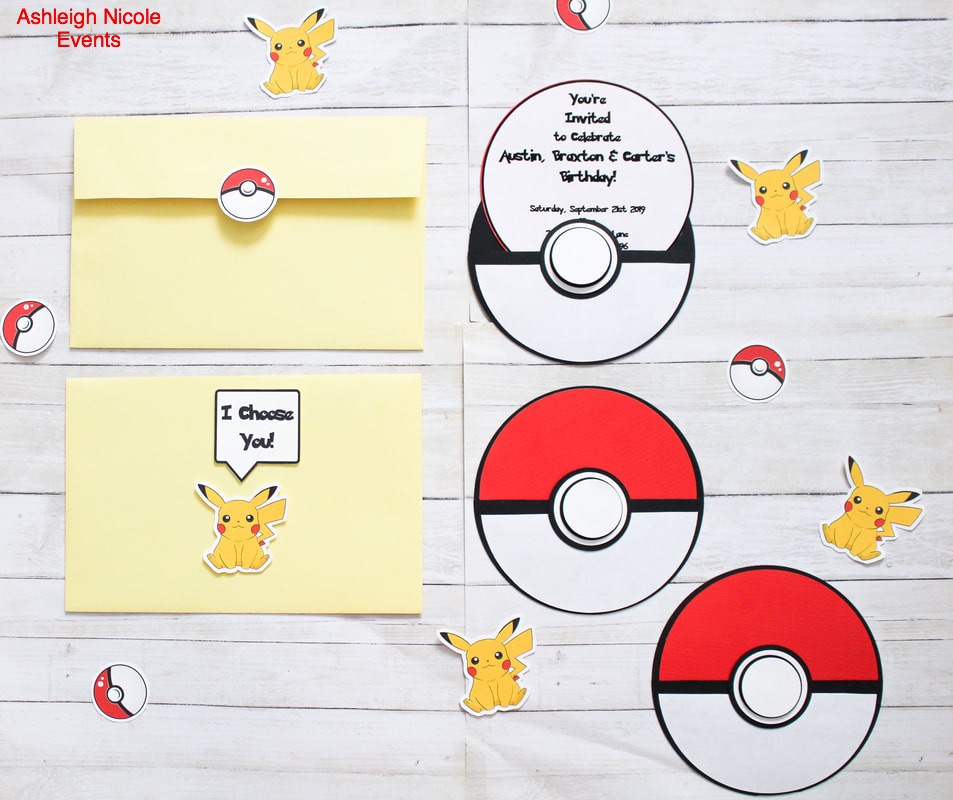  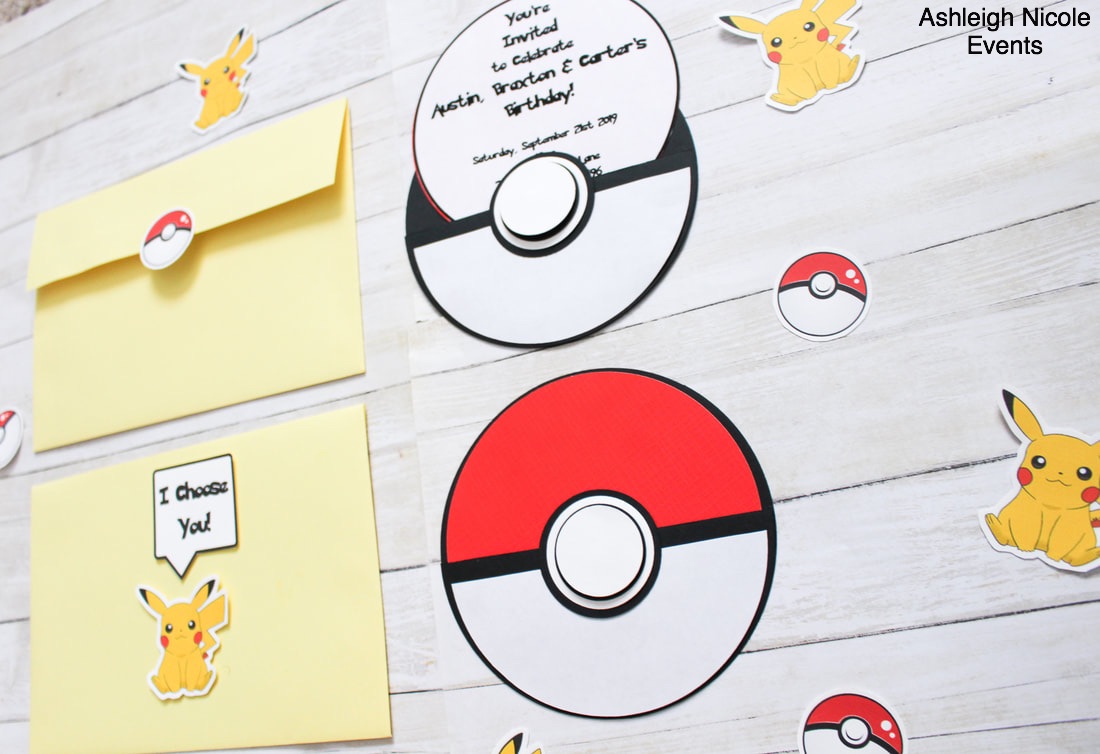 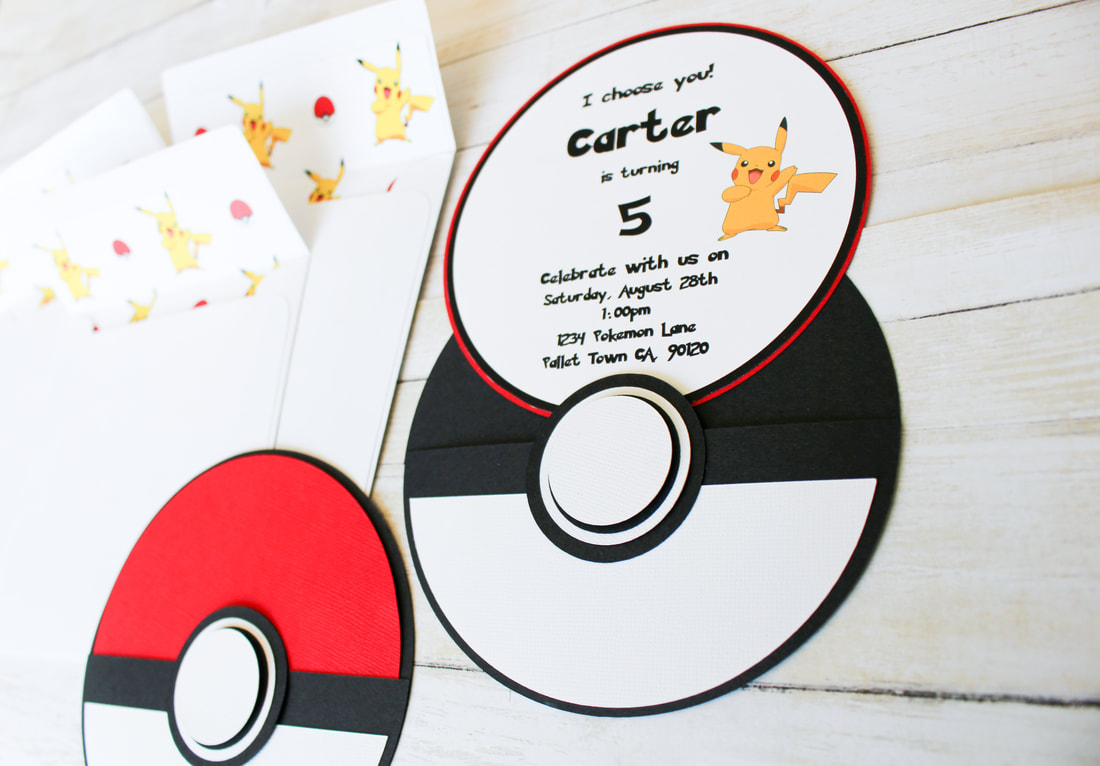 As always, I started my inspiration search on Pinterest. I created a private board and immediately started pinning everything I liked. I found a bunch of free Pokémon printables online that I utilized in multiple places throughout the party. Here’s the link to my Pokémon Pinterest board to see all my inspiration and links to the free printables. Pinterest Board Dessert table Let’s start at the top and work our way down. I love balloon garlands! Inexpensive decor that makes a big impact. I purchased the balloons from Dollar Tree, Walmart and Bargainballoons.com. I used a balloon decorating strip and a low temp hot glue to attach the smaller balloons. Heather Nelson Design created the backdrop design. Since we celebrate all three of my boys together, I wanted three separate colors to signify each kid. I printed the backdrop on 6x6 vinyl. 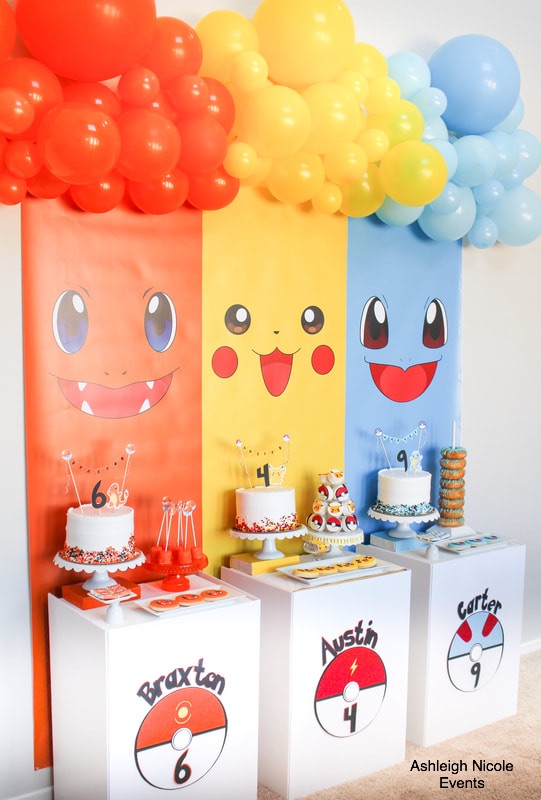 I wanted each kid to have their own little dessert table. I was originally going to rent pedestals for $100+ but decided to make them for $15 instead. Here’s how... I used three TV tray stands (purchased used from FB marketplace for $5 for all 3) I then purchased 40x60 white foam board from Hobby Lobby. They were 50% off which totaled $4.99 each. (I used two) I measured the height and distance around the front and sides of the tray tables. I then measured the full circumference of the table into the foam board in pencil and cut it out using an exacto knife. Then I measured the distance of just the front for the tray stand and scored a vertical lines so the board will bend without breaking. I covered the top of each table with a plastic tablecloth. I used my Cricut to make the name, number and pokeball designs on the front of each table. 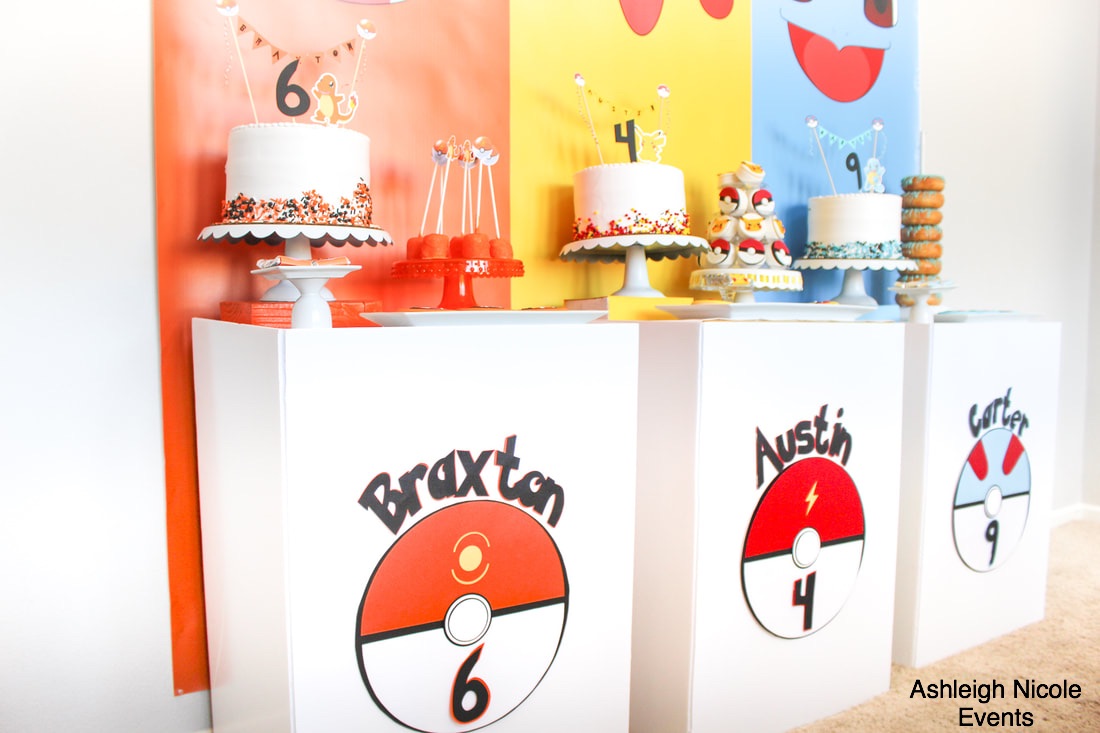 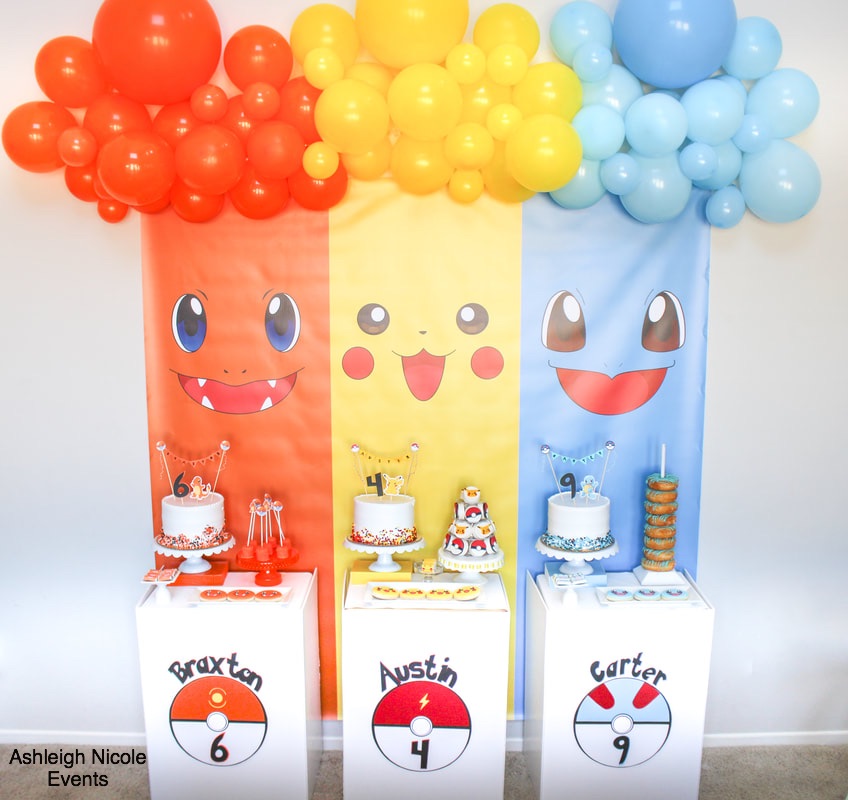 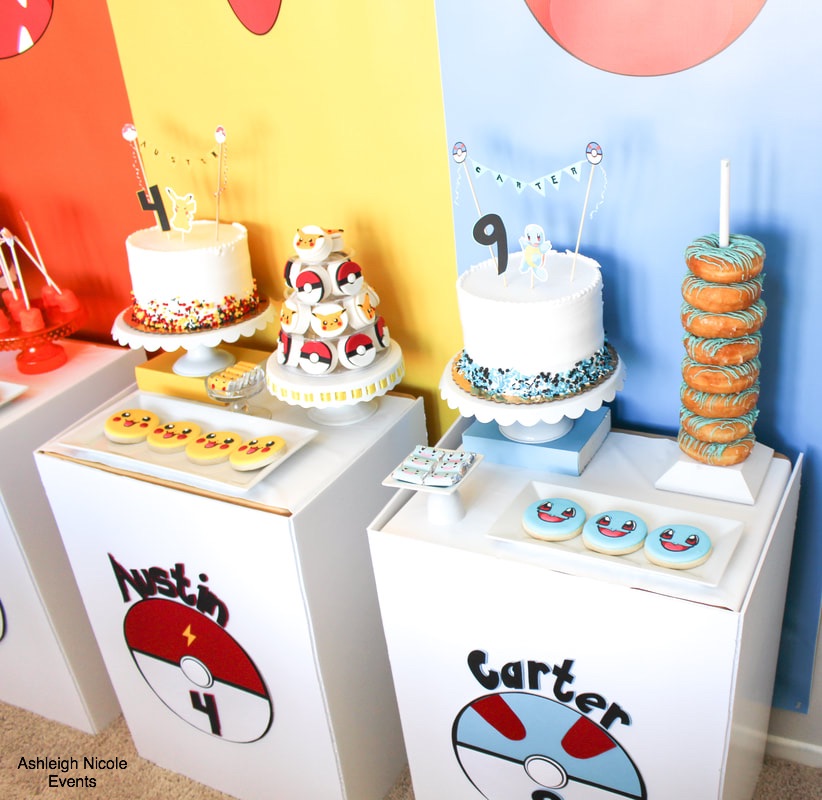 Desserts On the dessert stands, I served 3 cakes (chocolate, vanilla and marble), custom cookies, chocolate covered Oreos, donuts, marshmallow pops and Hershey chocolates. I actually purchased the cakes from our local grocery store. I ordered plain white whipped icing with a simple border design at the top. When I got the cakes home I added the sprinkles to the bottom of each cake to coordinate with each table. I also made toppers for each cake with the name, age and characters for each kid. *Tip- whipped icing makes it easier for sprinkles to stick. The cute little Pokémon cookies were purchased from Dearly Beloved Bake Shop. Love how they came out! I made the chocolate covered Oreos (Tutorial HERE) I purchased the pokeball and pikachu toppers on Etsy from Mary of Kouture Kupcakes. I attached the topper to each chocolate covered Oreo with a dab of white chocolate. I displayed them using my macaroon stand. The marshmallow pops are probably the easiest kids party dessert item to make. Simply stick at lollipop stick into a marshmallow and dip it into melted candy melts. Immediately after, cover with sugar crystal sprinkles! Add cute topper to the end of the stick to complete the look! The little Hershey chocolates are made with another free printable found online. 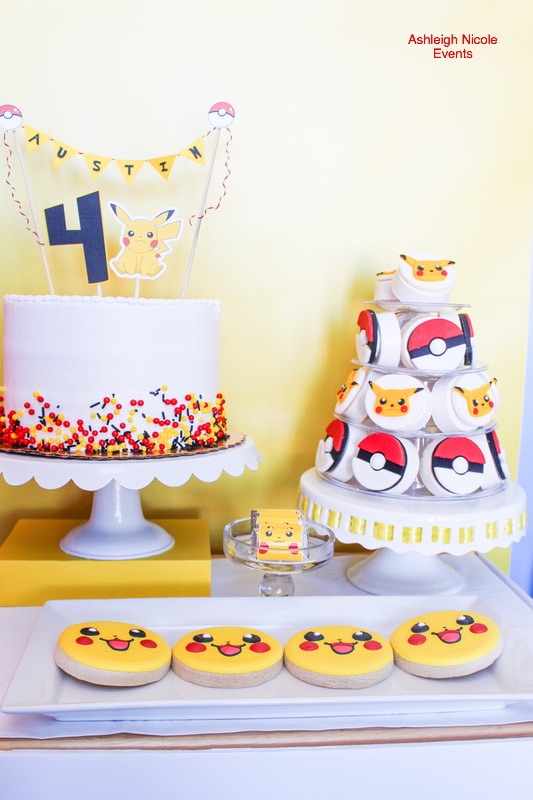 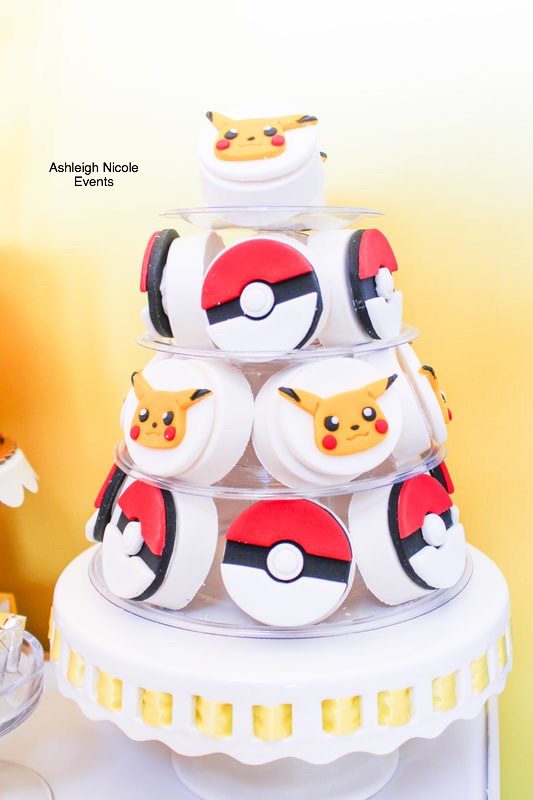 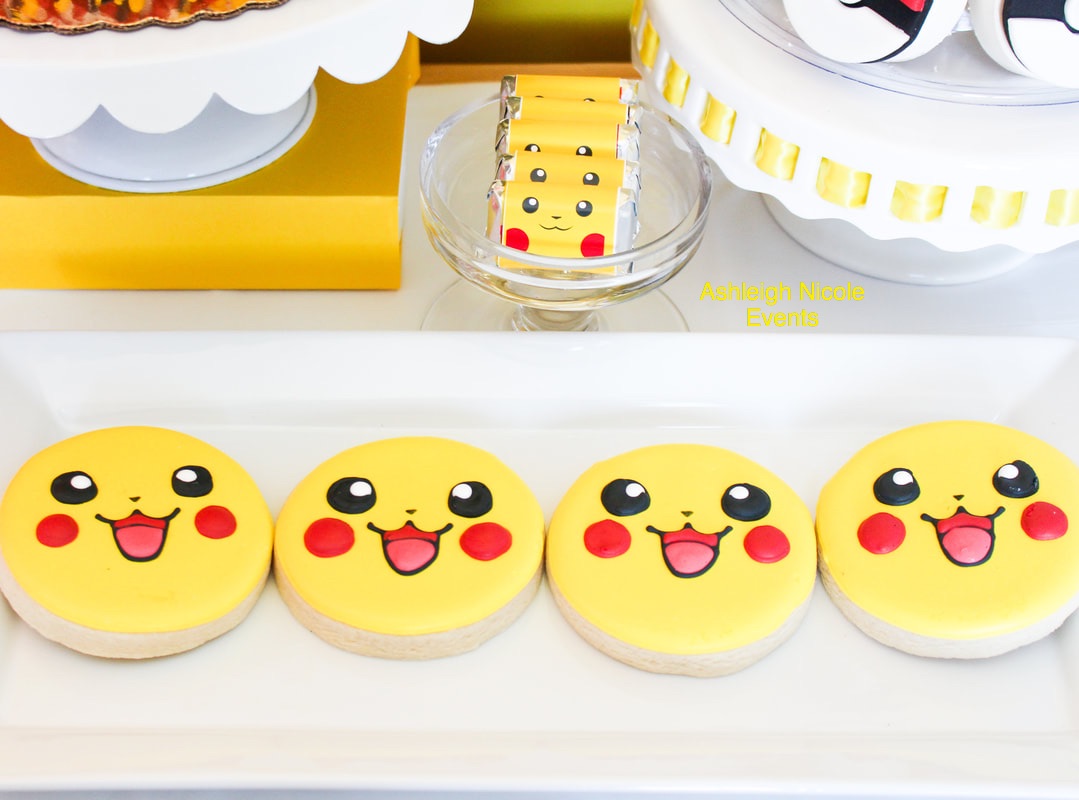 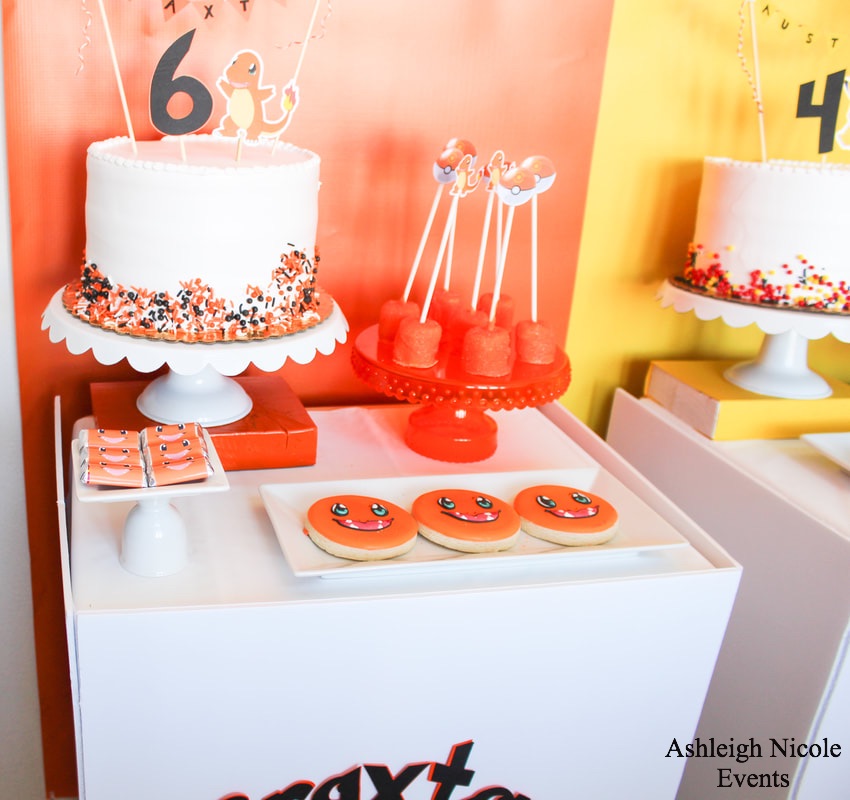 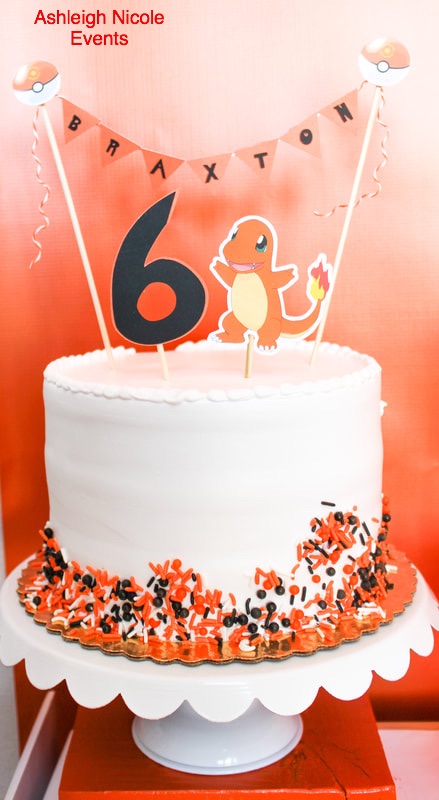 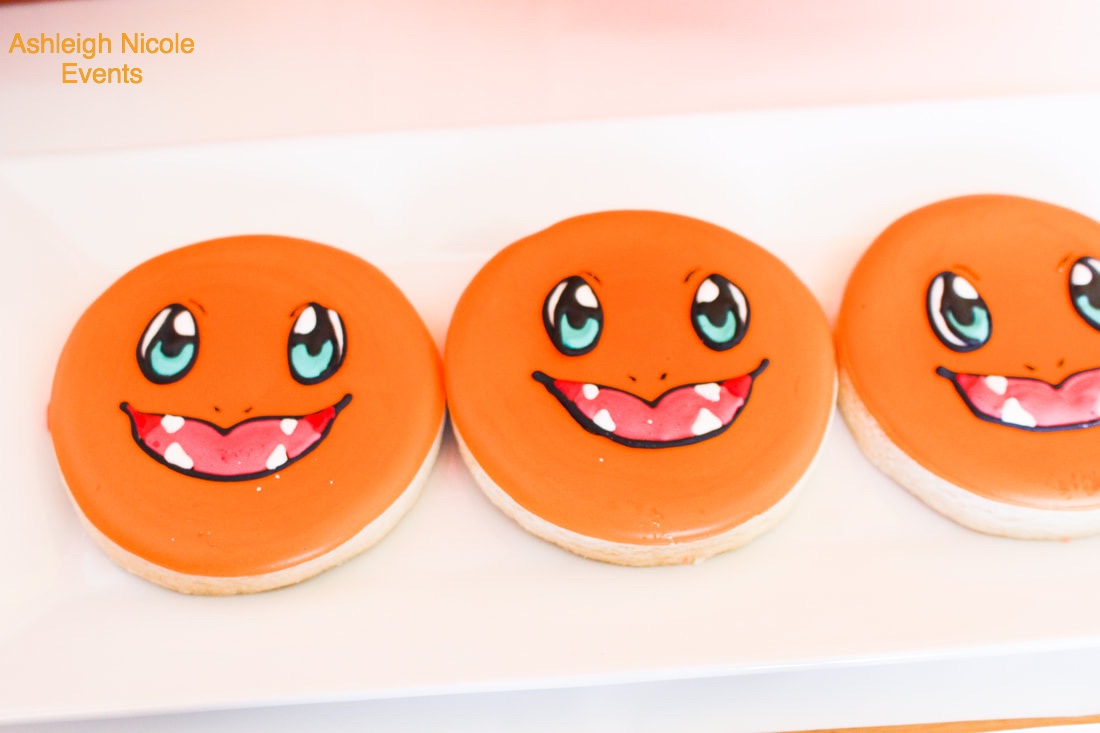 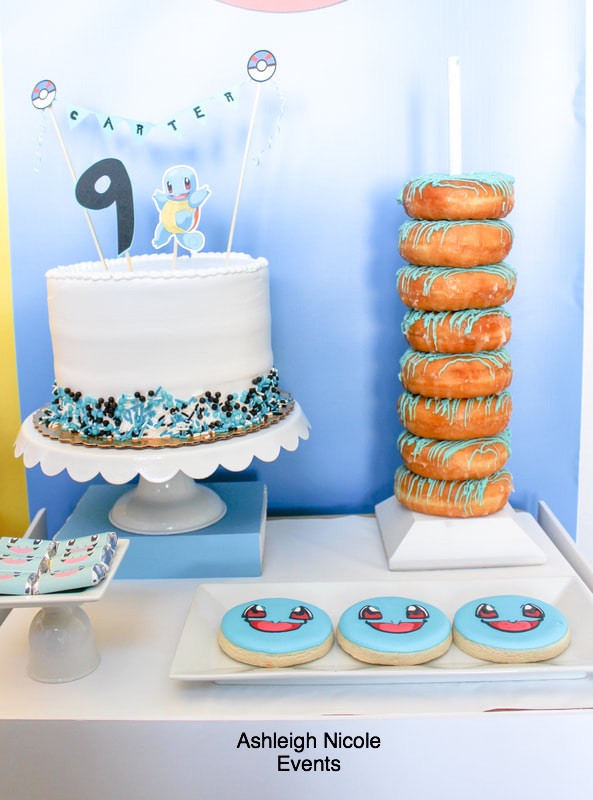 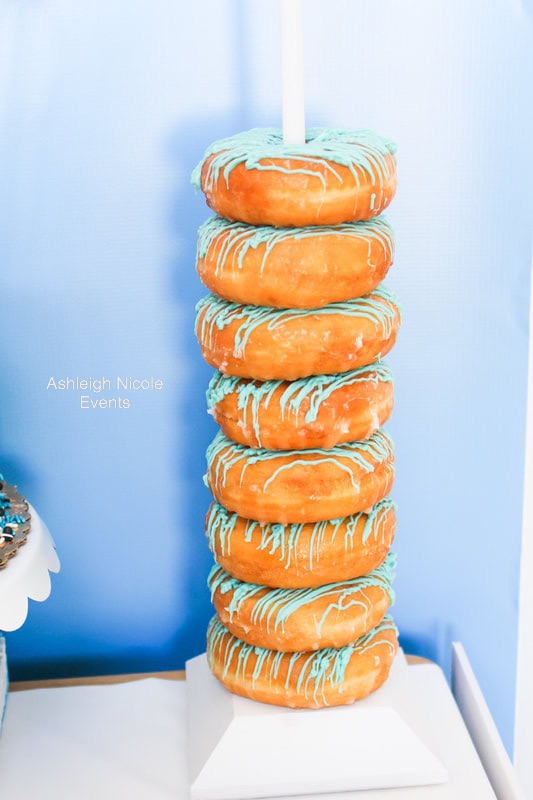 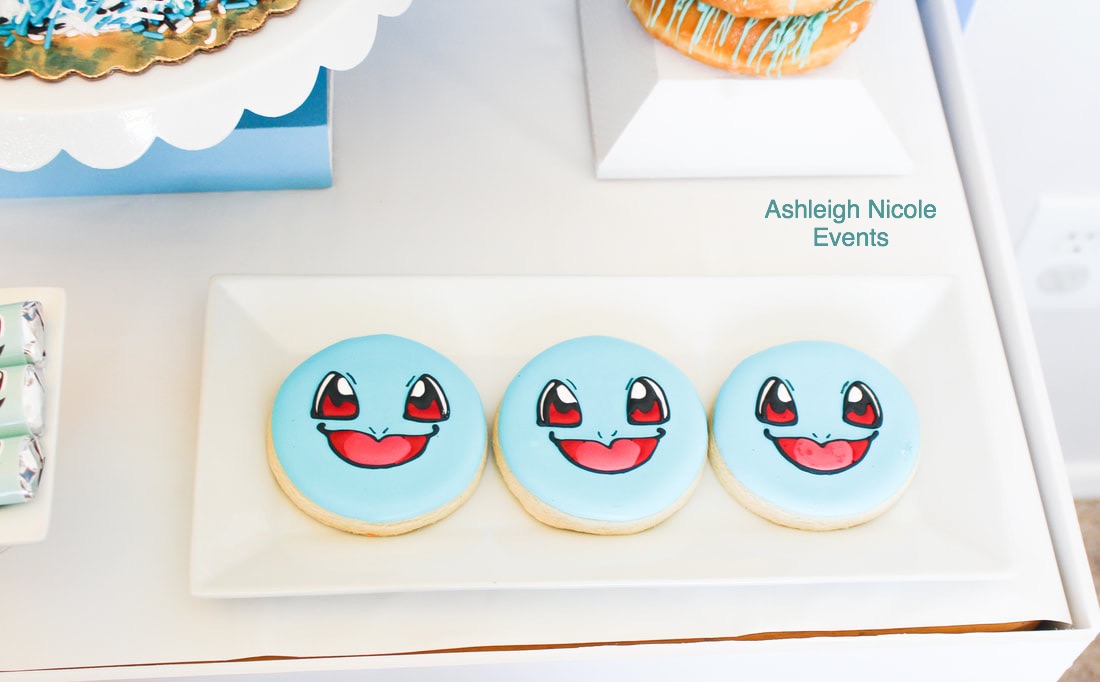 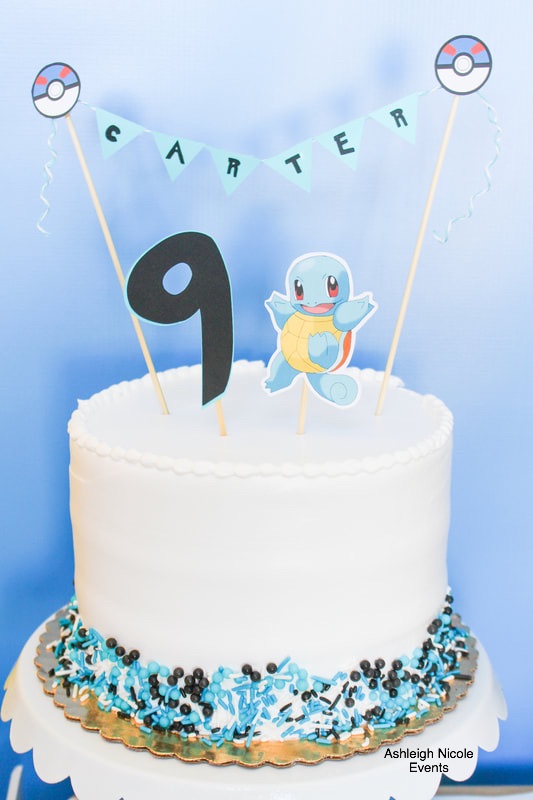 Moving on to the kids table setting... I covered a 6ft long table with white linen. I then used orange, yellow and blue runners draped horizontally to coordinate with the dessert table backdrop. I made the runners by cutting fabric remnants down to 12x40. Now comes the fun part! I put together little bento style lunch boxes for each child! It included green and red grapes, pretzels, carrots/celery w/ranch and a deli sandwich! The kids loved getting their own little lunch box. I purchased the boxes HERE from Target. Each setting also included a mini water bottle with custom label and coordinated custom sugar cookie. I used three mini cake stands as centerpieces. I placed 4 cupcakes on each stand with custom wrappers that coordinated with the table runner and backdrop. I purchased the cupcake wrappers from Alaina of Fancy and Fun Family (Etsy) 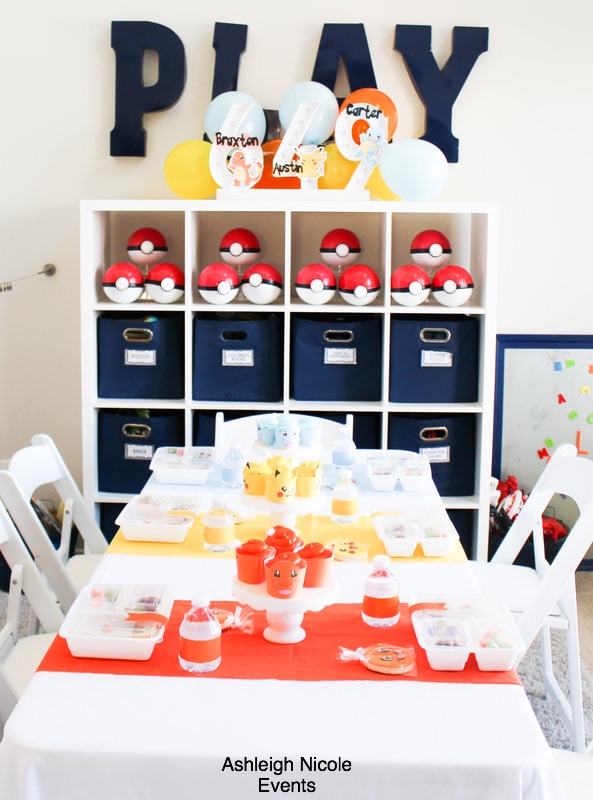 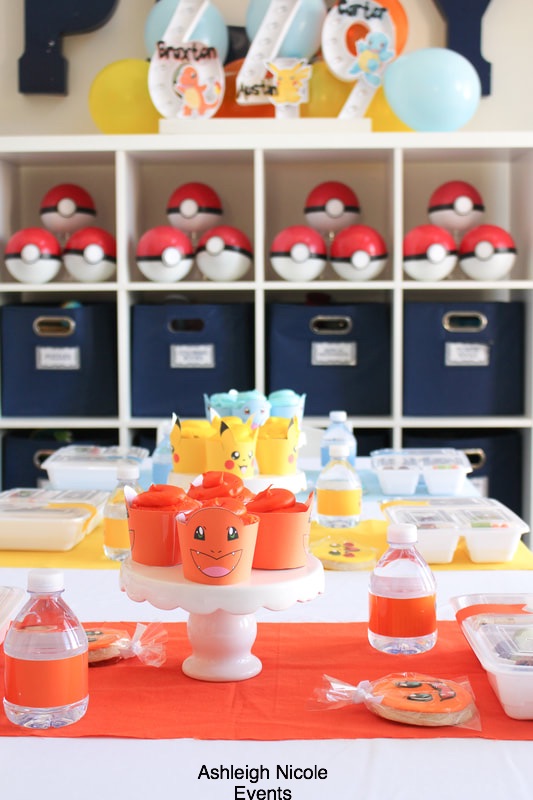 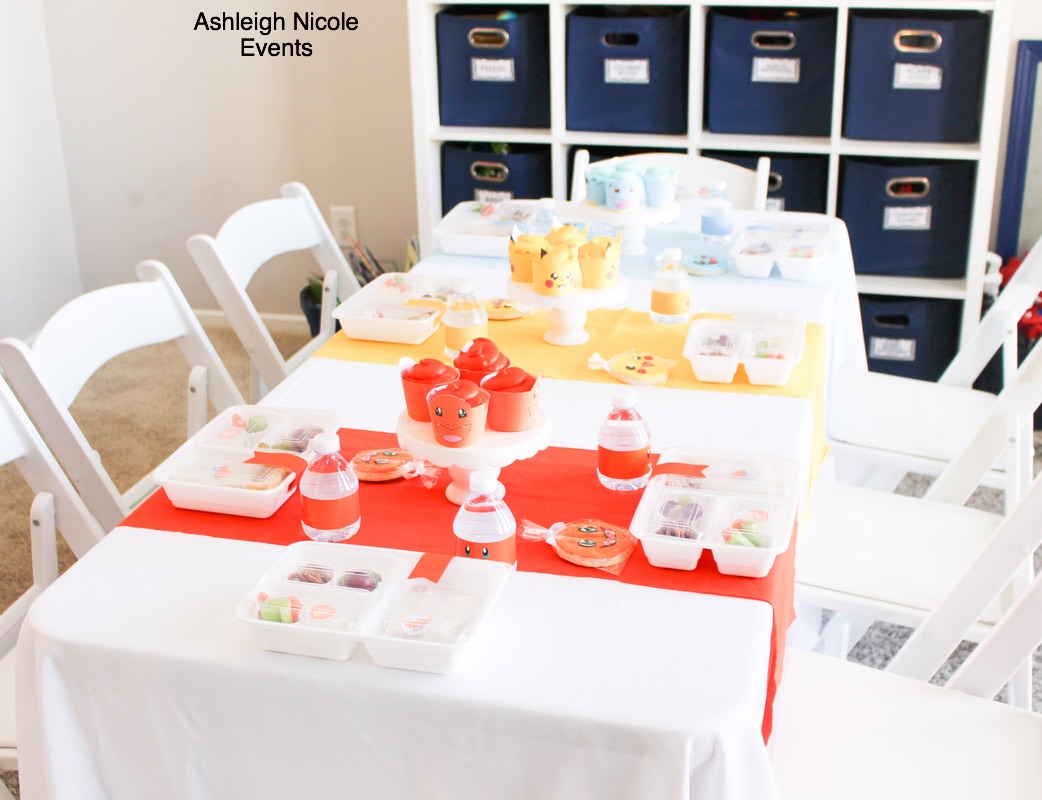  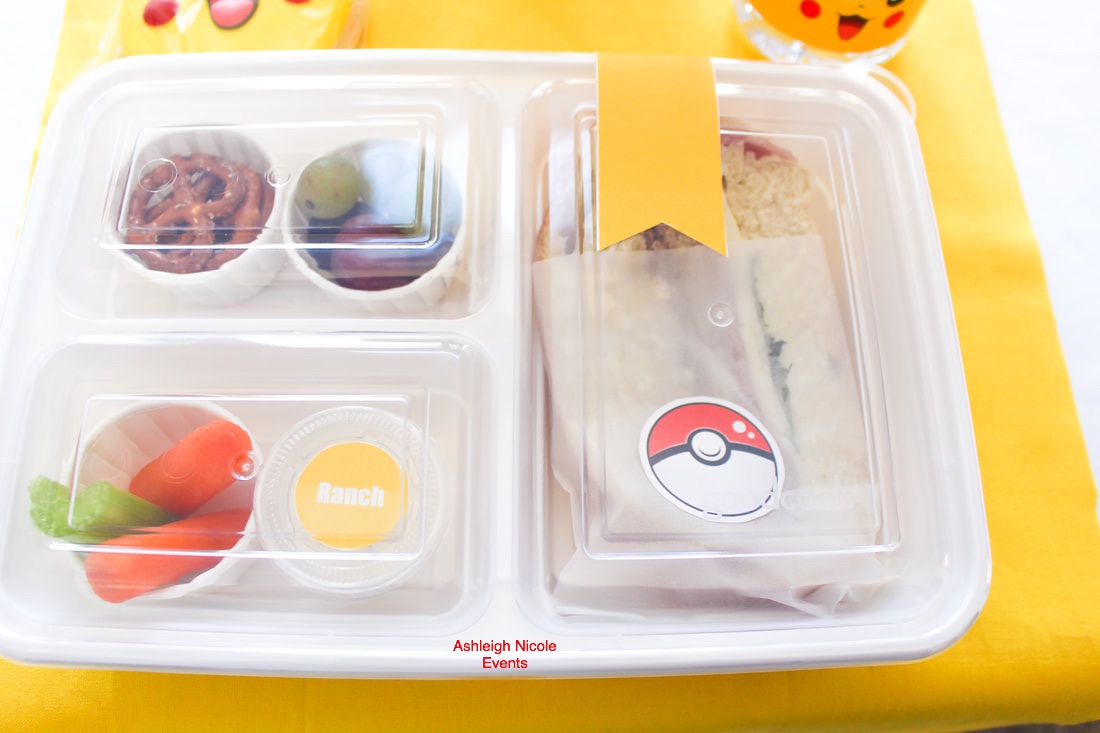 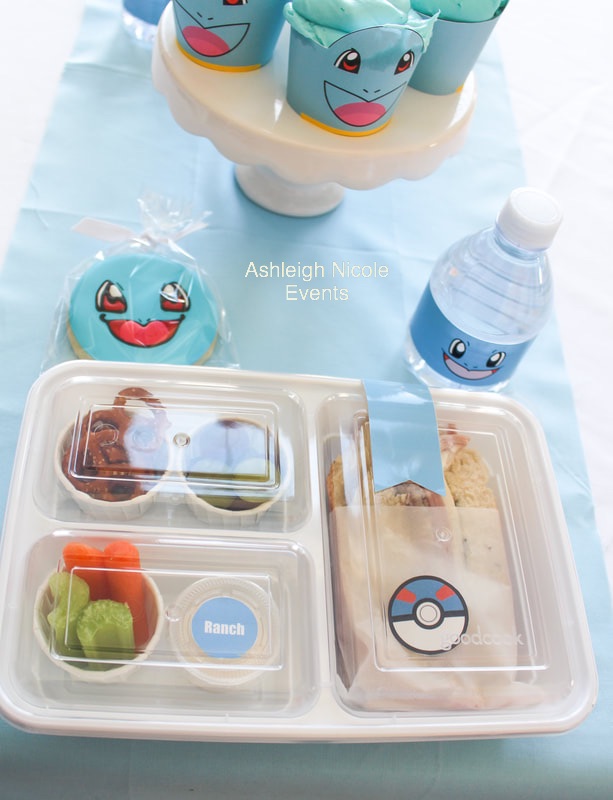 Next is the “ice cream room”. (That’s what the boys called it.) This may be my favorite space in the party. Lots of DIY stuff going on in this area. Let’s start with the ice cream balloon mosaics. I fell in LOVE with the Creative Heart Studio balloon mosaics the very first time I saw them! I couldn’t wait for the opportunity to use them. I purchased the template HERE and ran to hobby lobby for 40x60 foam board. I followed all of the instructions and a couple hrs later I had three 4 1/2 ft tall ice cream cones! I used 5” balloons to fill the mosaics. The only thing I would change is the actual cone color (I ordered wrong color) Another foam board project in the “ice cream room” is the stripped awning. I wanted the space to feel like a real ice cream shop, so having a awning was a must-have. I used acrylic paint to create the stripe design and I attached each board with clear tape to my window blind cover. I made the circular Pokémon Ice Cream Shoppe sign with a white 14” cake board and my Cricut. The most important part of the ice cream room was the ice cream bar! I served chocolate and vanilla ice cream. I kept the ice cream chilled by placing the containers in a clear ice filled ice bucket. I offered a bunch of different toppings for the gusset to choose from. Gummy bears, mini Oreos, rainbow sprinkles, chocolate chips, mini Reece’s, nuts, cherries and m&ms. The guest had an option to grab a bowl, white container or sugar cone. Guest could also top their ice cream creations with chocolate sauce, caramel syrup or whipped cream. I found the fun Pikachu and Charmander cone wrappers for free on Pinterest. I purchased the Squirtle ice cream cone wrapper from Heather Nelson Design. 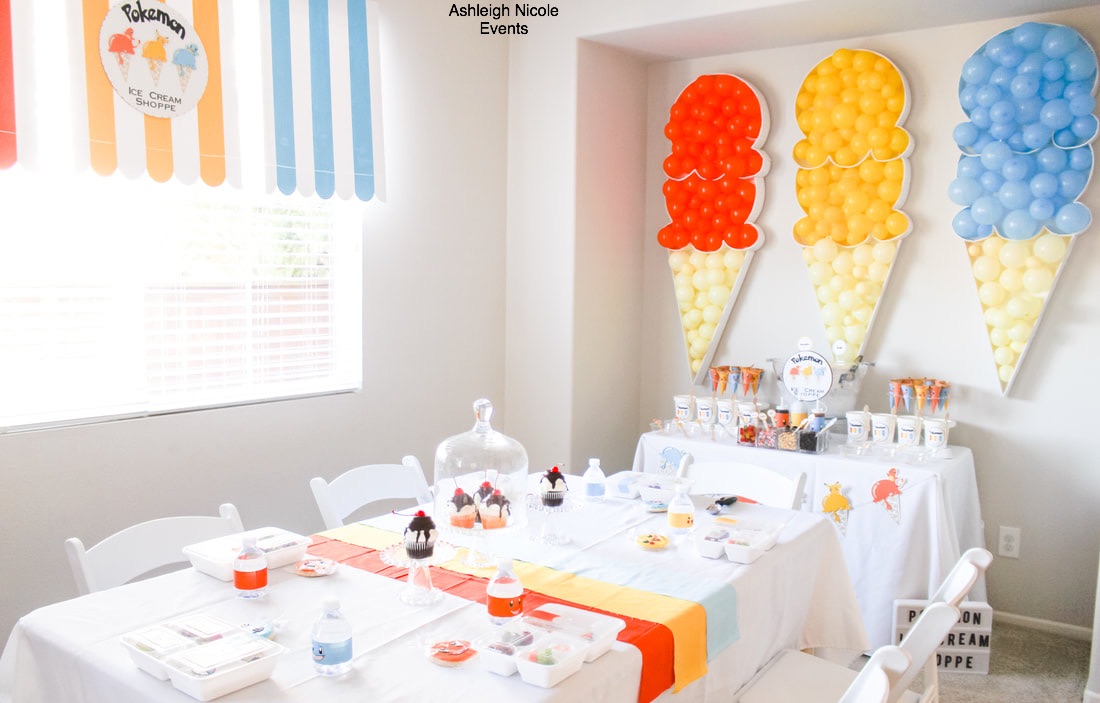 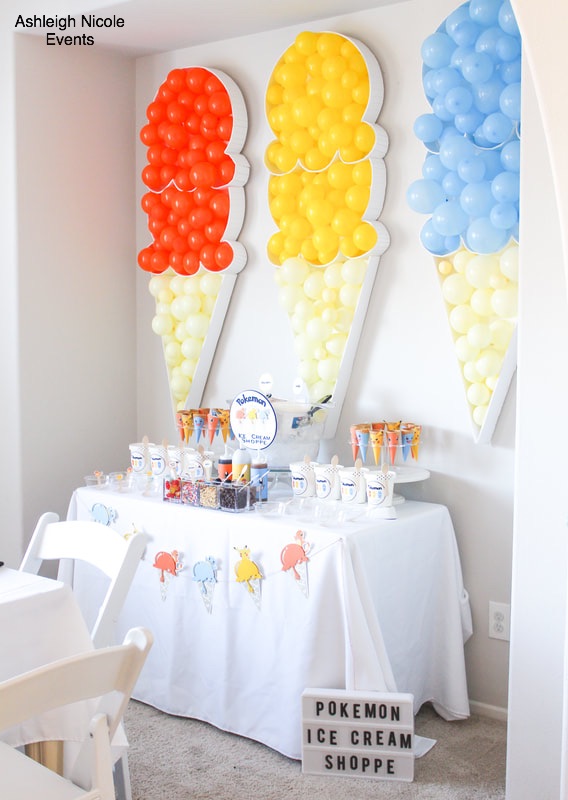 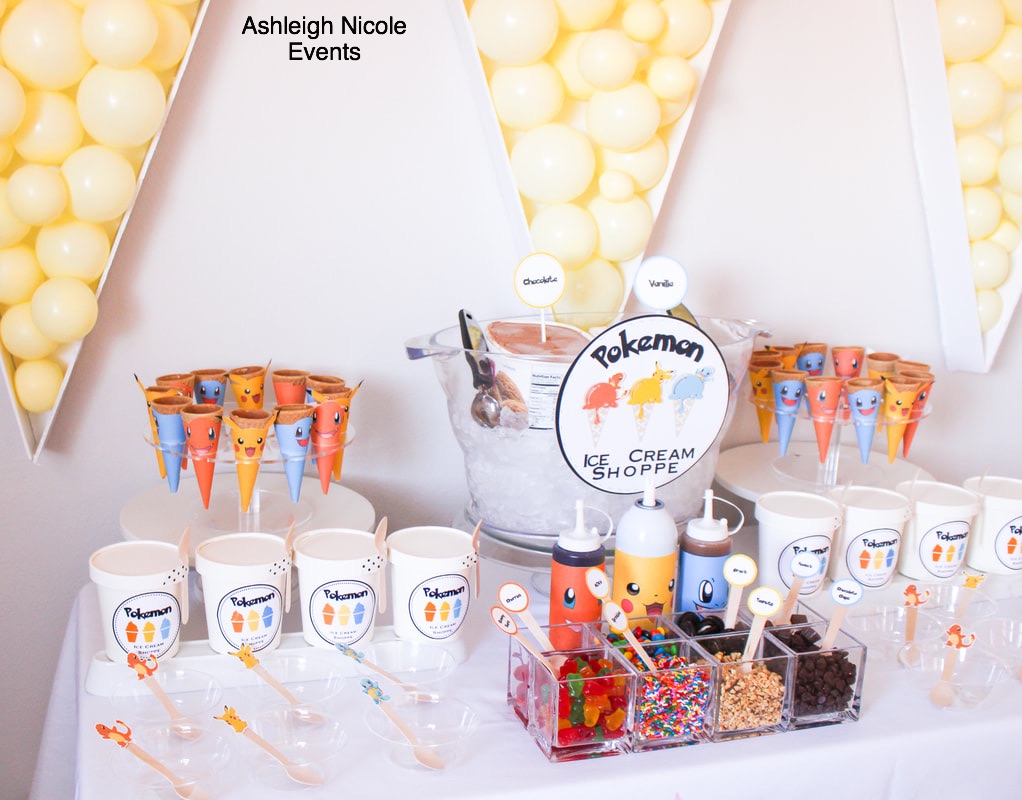 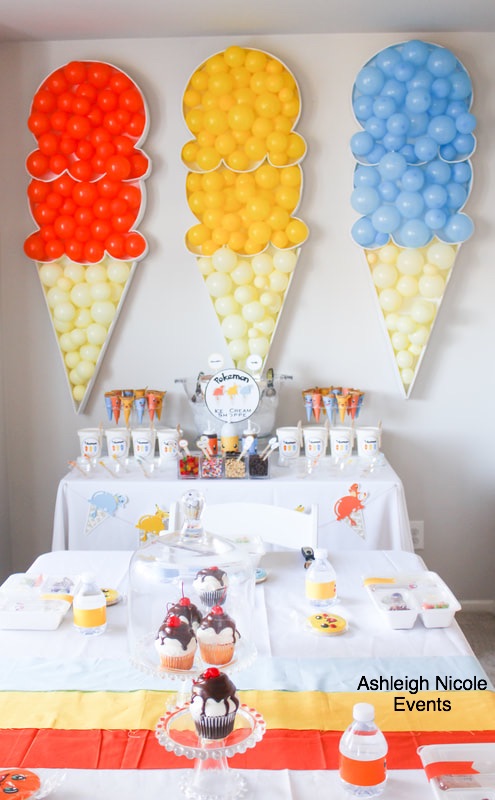 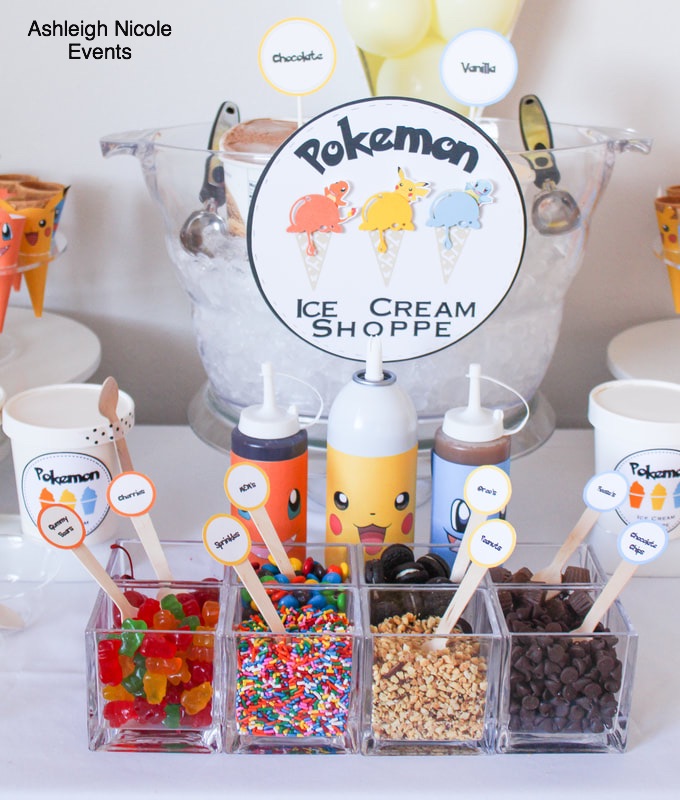 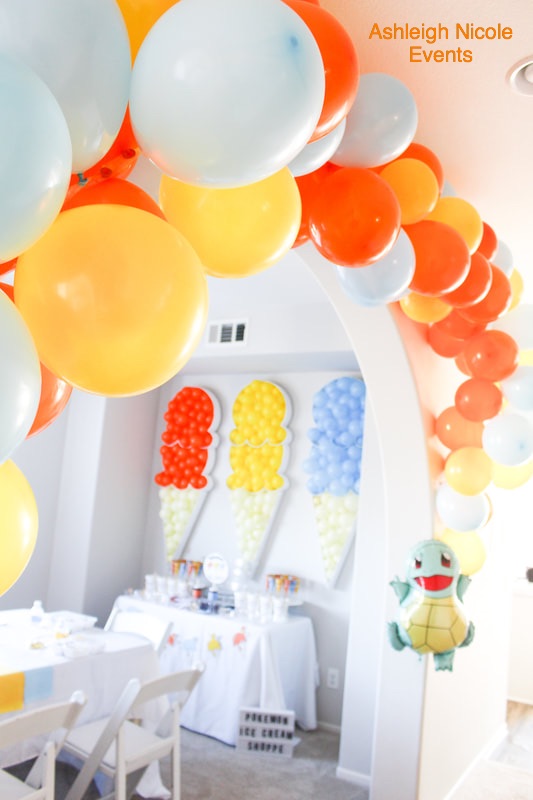 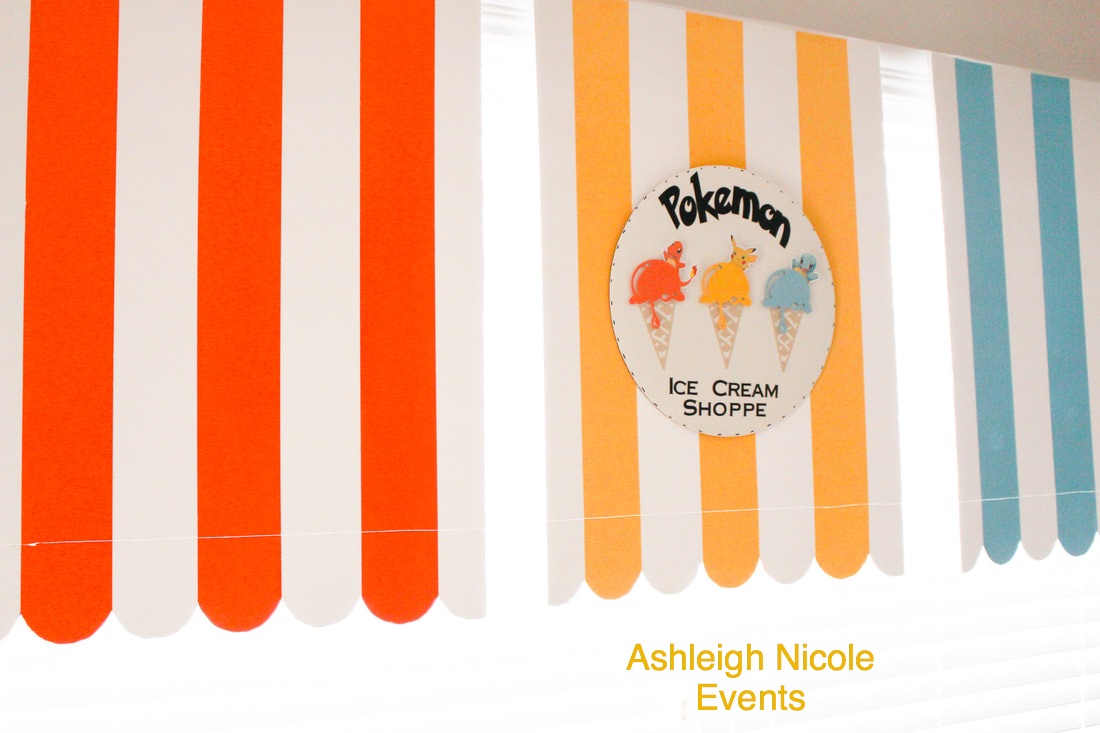 The table setting in the ice cream room was similar to the main kids table. I covered the table with white linen and used the leftover fabric to create a runner. I used three cake stands as centerpieces and placed ice cream sundae themed cupcakes on each stand. (Cupcakes purchased from local grocery store) I placed the remaining bento style lunch boxes at each seat with a mini water bottle and custom cookie. 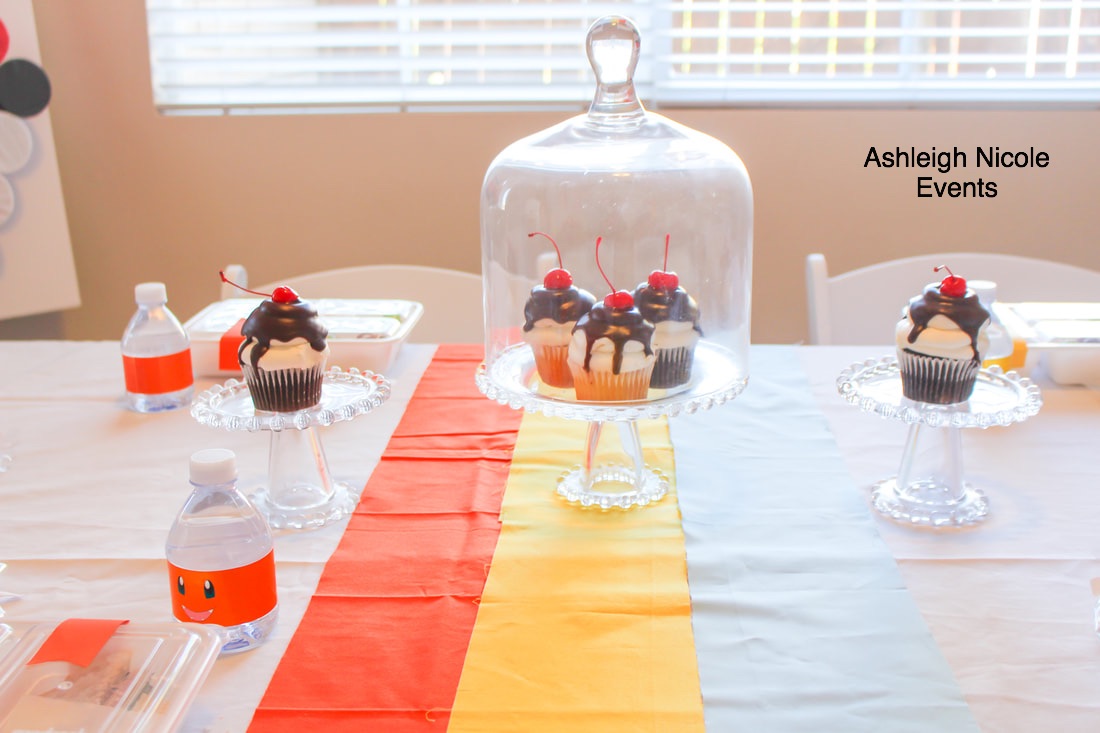 Adult food Section Now that the kids food is squared away, let’s talk about the adult food! I decided to keep the menu pretty simple. Deli sandwich’s, deli pinwheels, a variety of chips, fruit board, veggie platter and a meat and cheese charcuterie board. Ok so Ive been seeing these fancy chesse board all over Pinterest and IG that I HAD to try to make one myself. I found the wooden board from Ross of $4.99! Its actually a pizza flip but I thought it would work perfectly for the charcuterie board. One stop at the deli section and I found everything I needed. Full tutorial on how to make a charcuterie board HERE. I also served a delicious pineapple, orange and apple juice cocktail with fresh pineapple and orange slices! (Additional water, soda and juice boxes were also available)    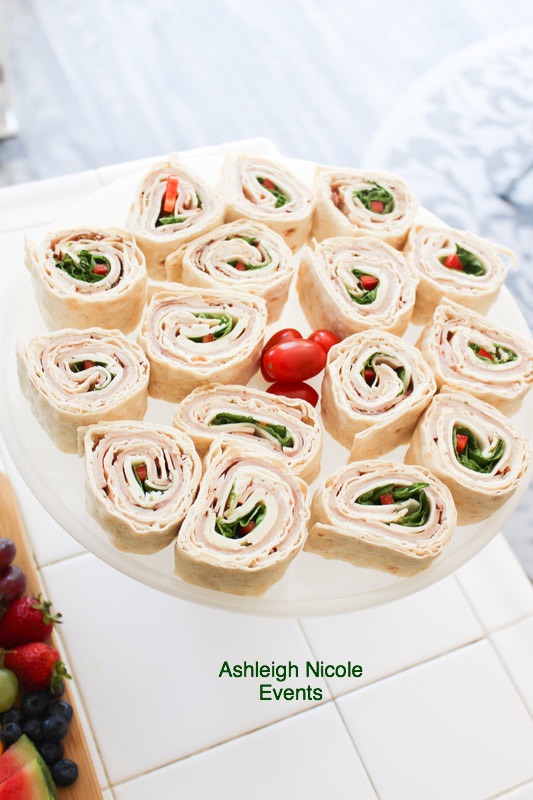 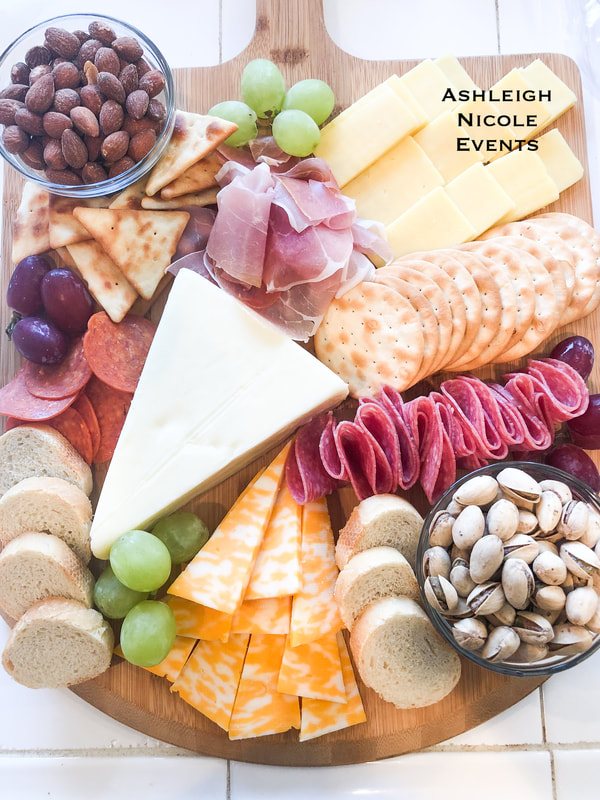  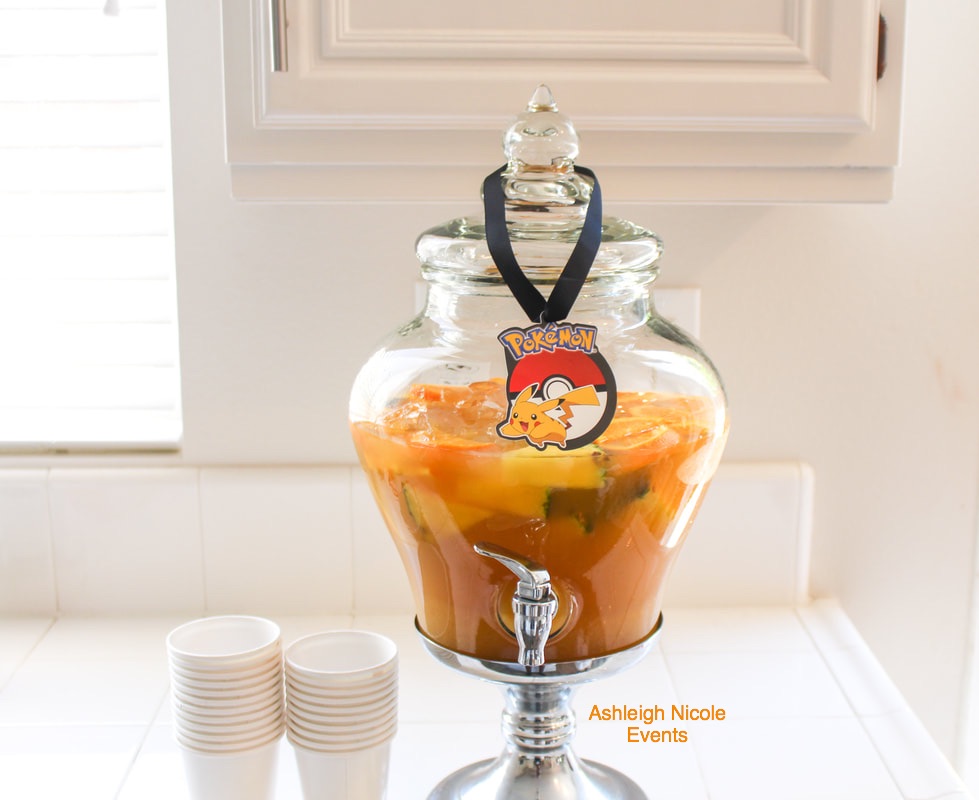 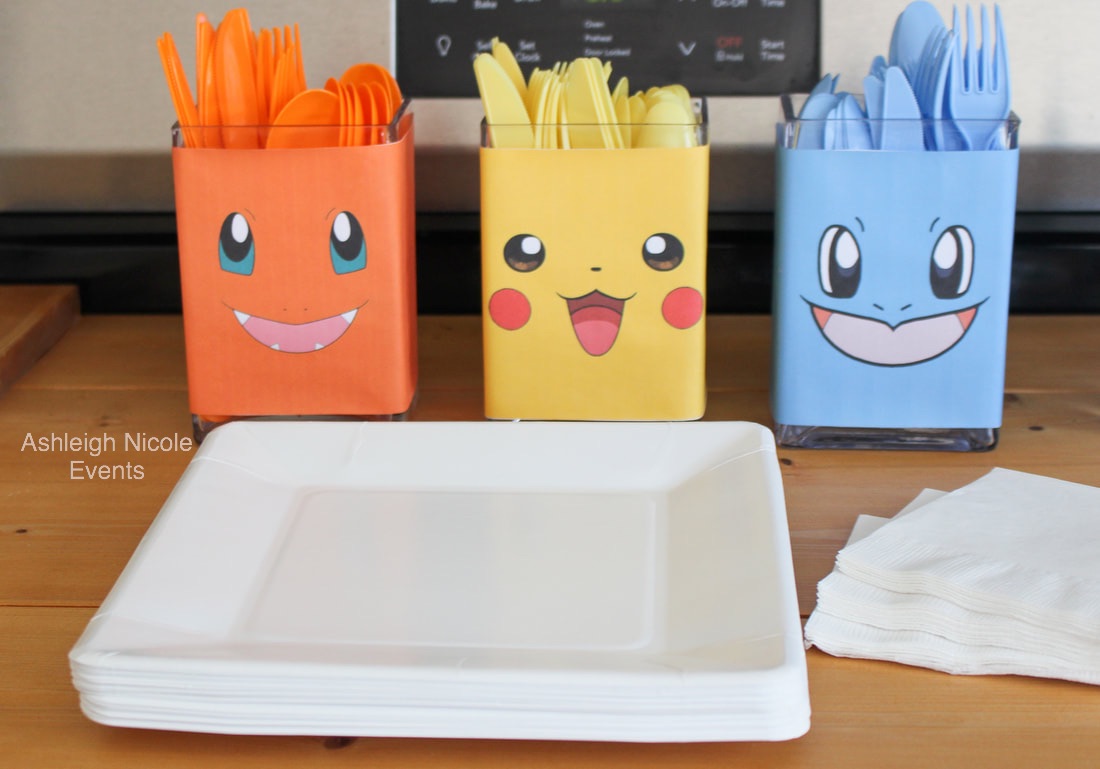  Activities Now to the fun part! With a party that has 3 year olds AND 9 year olds, I had to be smart with planning activities. I decided to have a game truck for the older kids in the front yard and a bounce house in the back for the younger kiddos. It worked perfectly! We reserved Elite Game Box to entertain the 8 and 9 year old boys who LOVE gaming. #fortnight The younger kids (3-6 year olds) bounced to their hearts content. I placed chairs and large bubble containers outside for when the kids needed a break. 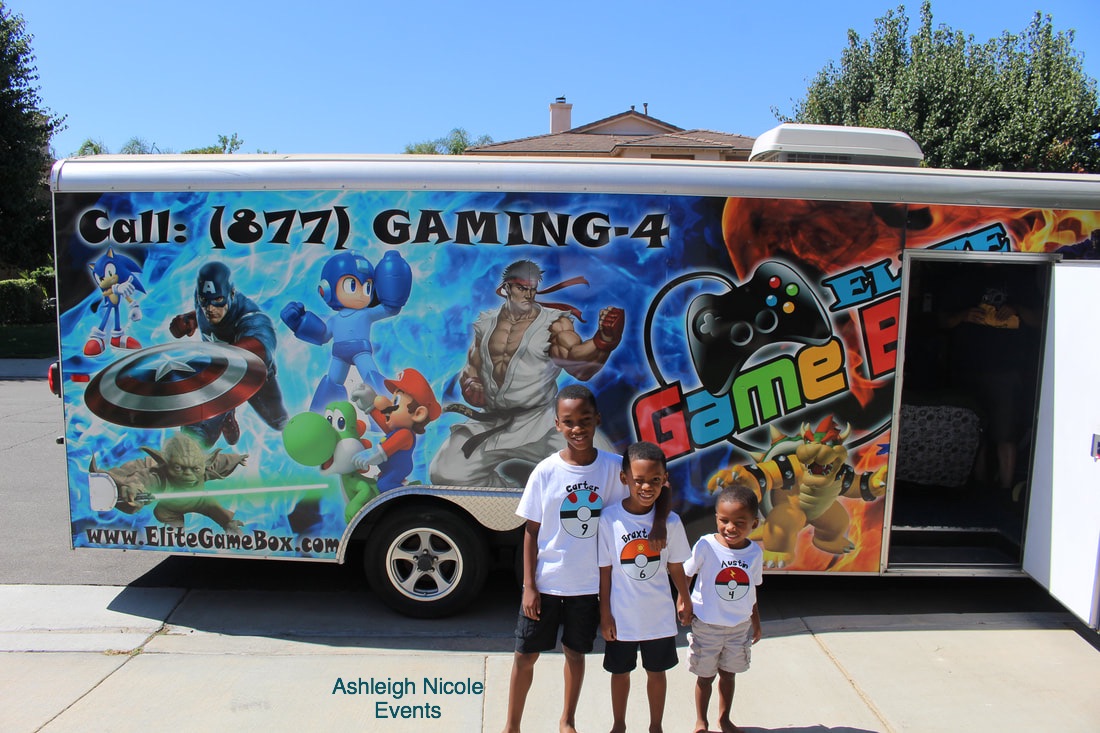 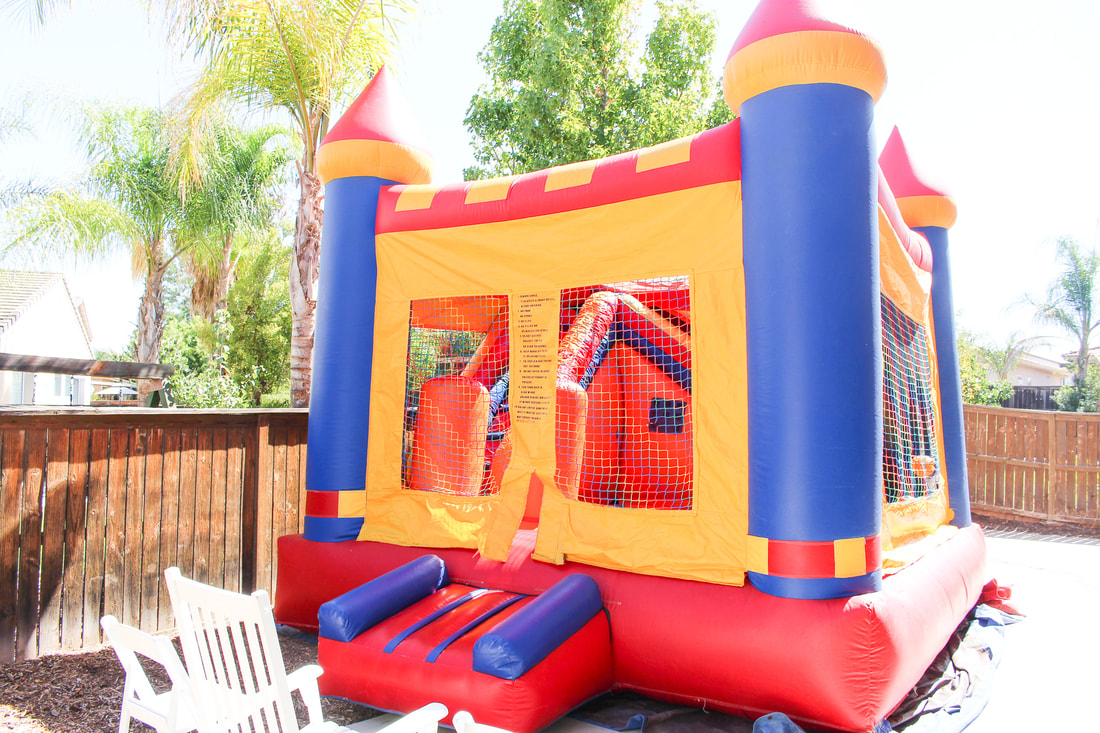 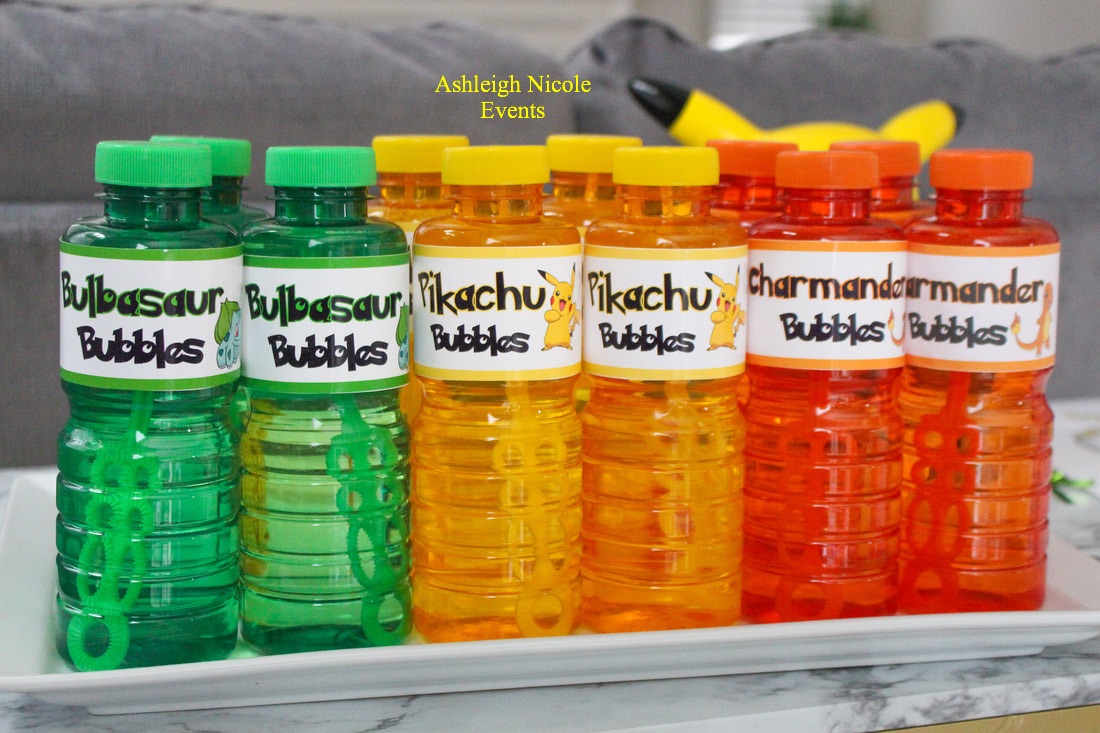 Inside, there was an awesome face painter, Stephanie of Happy Face Painting. She made sure all the kiddos were comfortable and got exactly what they wanted painted. My husband even joined the fun and had a pirate painted on his face. We also had a fantastic caricature artist! Joe of Joe Luma Draws Event came and wowed all the guest with his artistry. He even provided custom paper with the birthday boys names. Each guest got to take home a little gift of art that will last forever. We had a coloring station with colorful handmade Pikachu crayons purchased HERE and custom Pokémon coloring books. I found a ton of free Pokemon coloring page online and I just printed a few and created a cover page. I then placed each coloring book in clear sealed bags. The last, but super fun activity was a last minute add on. I made a Pokémon Punch game for all the kids to play. I used leftover foam board, solo cups, and treats. We let the younger kiddies go first. Each cup was filled with a little treat. There were Pokémon cards, toy slinkies, Party blowers, a variety of candy and Pokémon themed key chains.
        Party Favors Along with the caricature art and treats won in the Pokémon Punch game, I made cute little pokeball Favors! Inside Each pokeball Favor were Pokémon trading cards, pikachu/pokeball keychains, Pokémon fruit snacks and a Pokémon bracelet. The kids absolutely loved it! 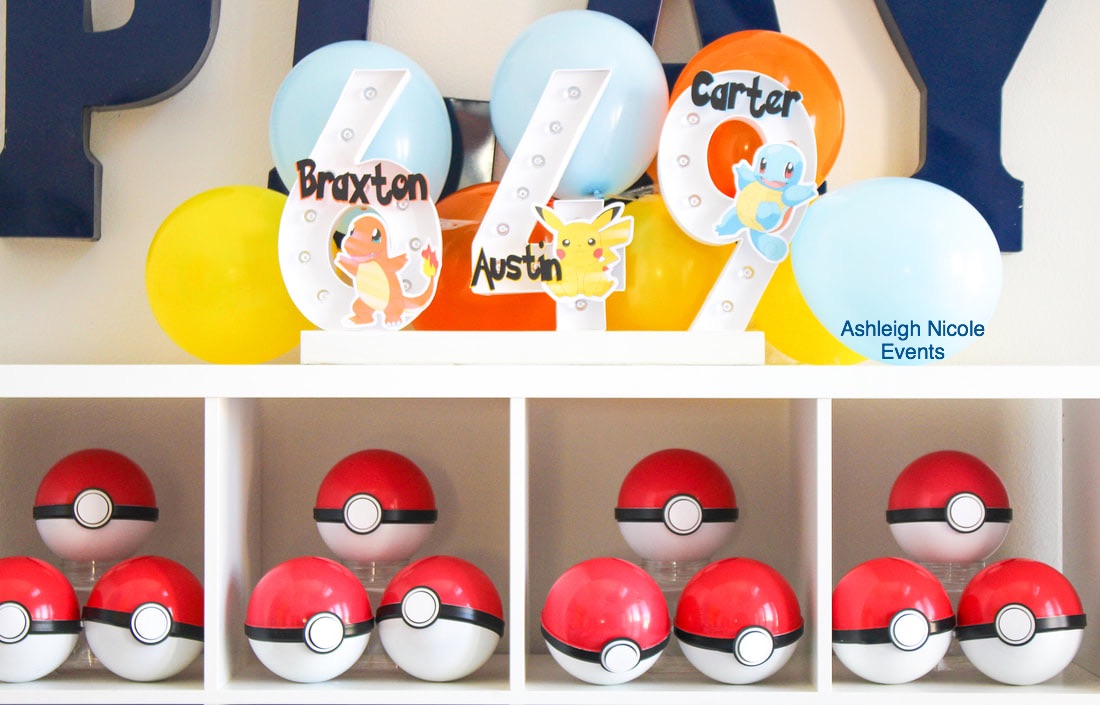 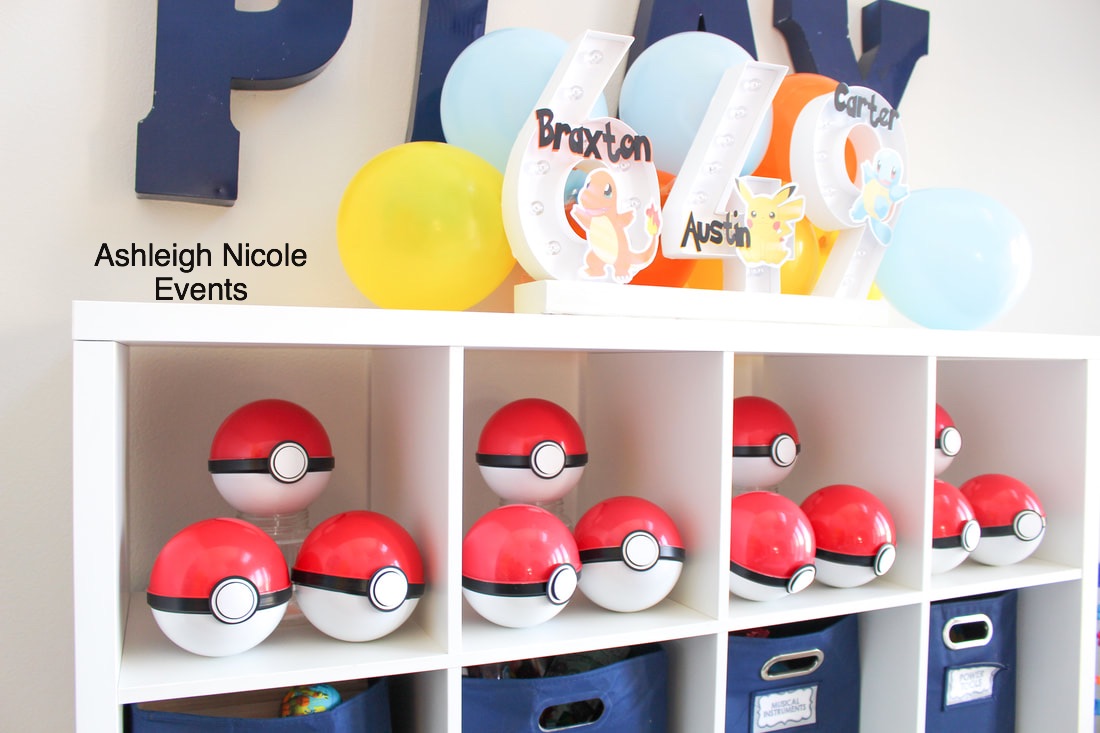 Outfits Each of the boys wore custom pokeball shirts. I wanted their shirts to match with the three dessert table designs. I made the shirts with my Cricut. I purchase the shirts when they were on sale for $1.99 each at Joann’s. I purchased iron-on vinyl and used my regular iron to adhere the vinyl to the shirts. (A heat press is on my Christmas list lol) Each shirt had their names, ages and their designated pokeball. I wore a shirt that read “Pokémom”. I made it using the same method I used for the boys shirts. My husband wore a Deathstar Pokeball shirt. (He loves Star Wars) I ordered his shirt HERE from Amazon. 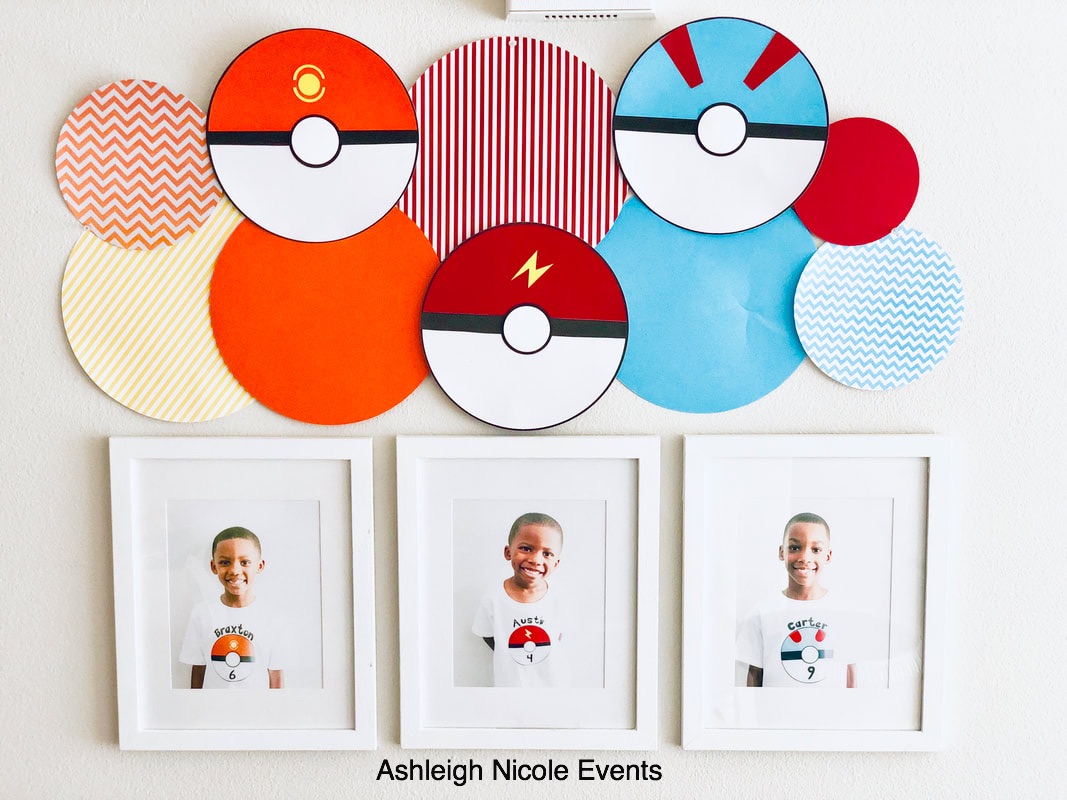 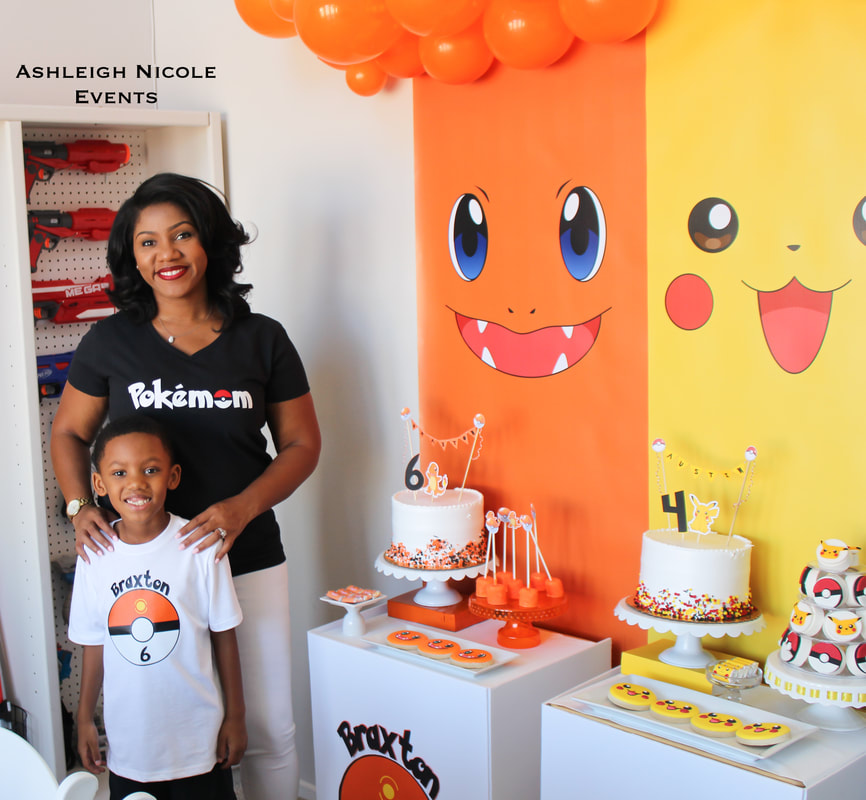 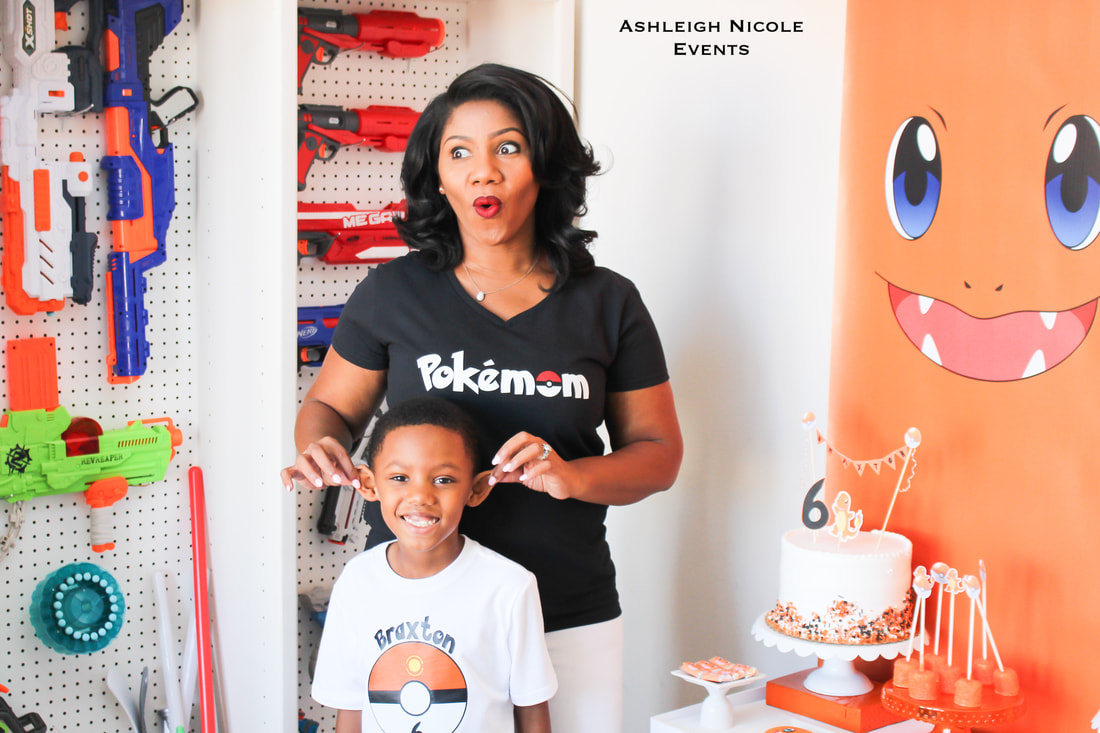 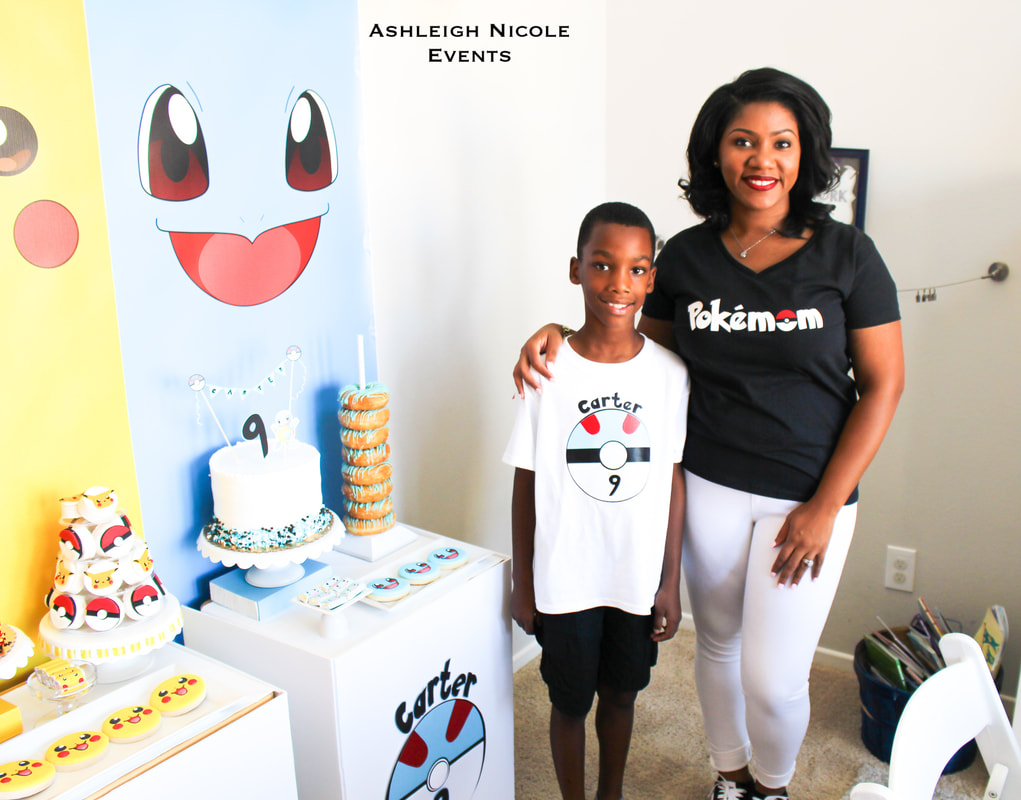 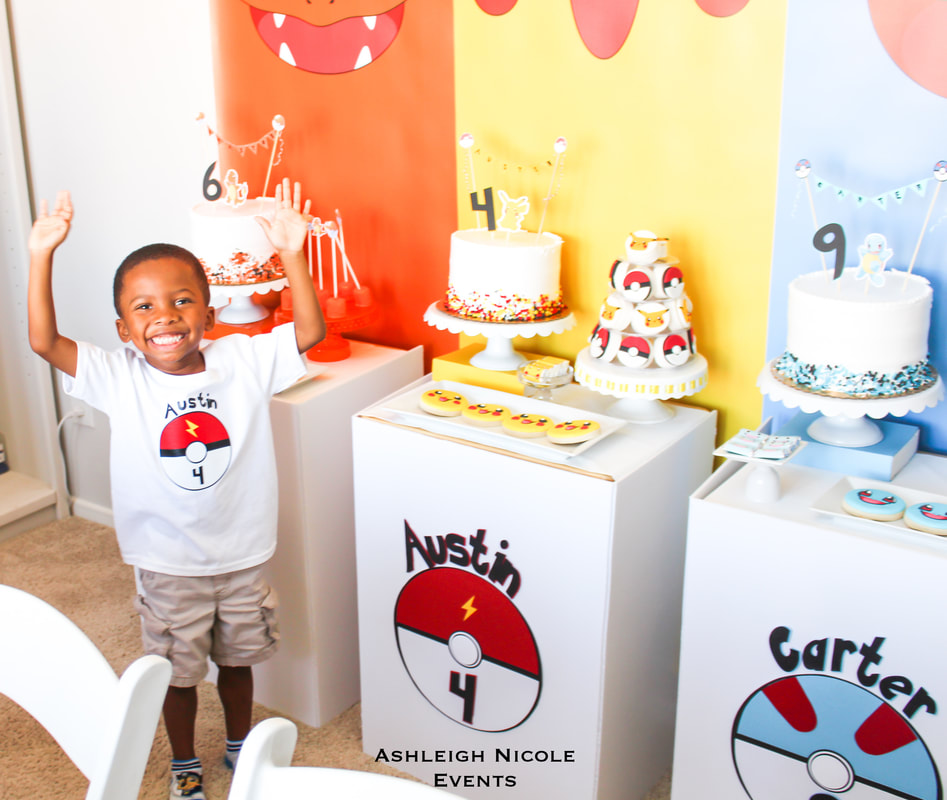 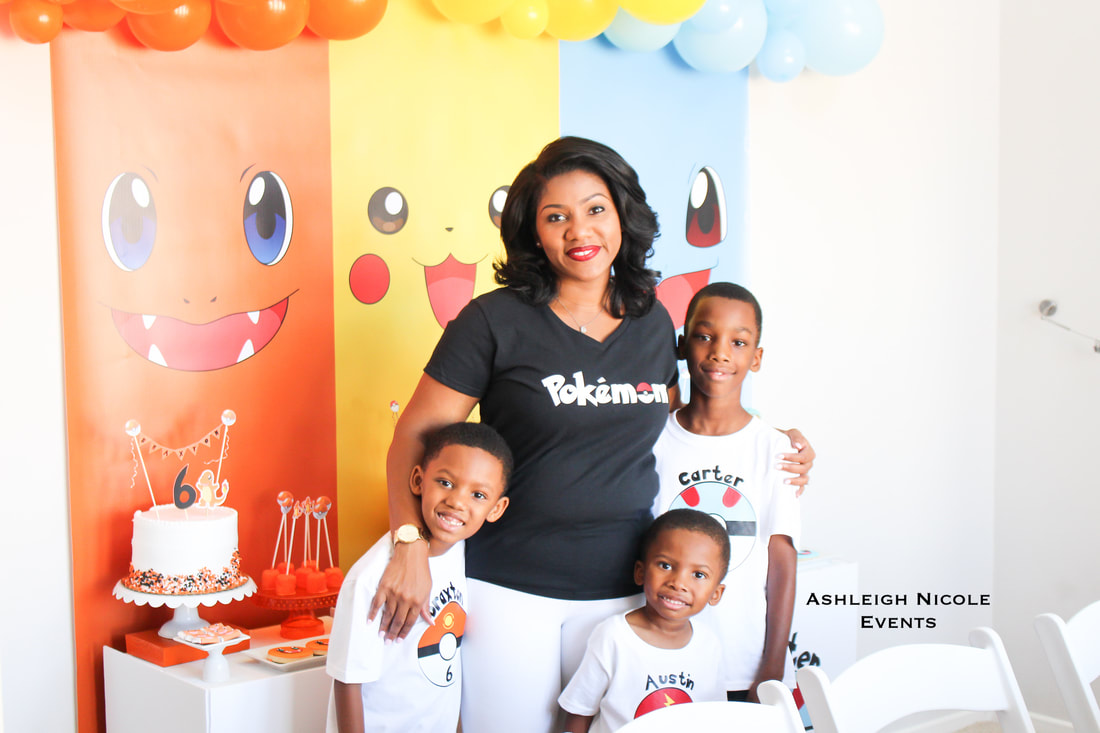  Other Decor I added little Pokemon elements throughout the house. I changed our letter board to read "Happy Birthday Austin, Braxton and Carter". Beside the letter board I placed white carnations in Pokemon themed vases. (Another free printable) I also placed extra Hershey chocolates wrapped in Pokemon themed wrappers in a candy dish on our coffee table. The last thing I added at our entry way was the welcome sign and a plush Pikachu and Pokeball. 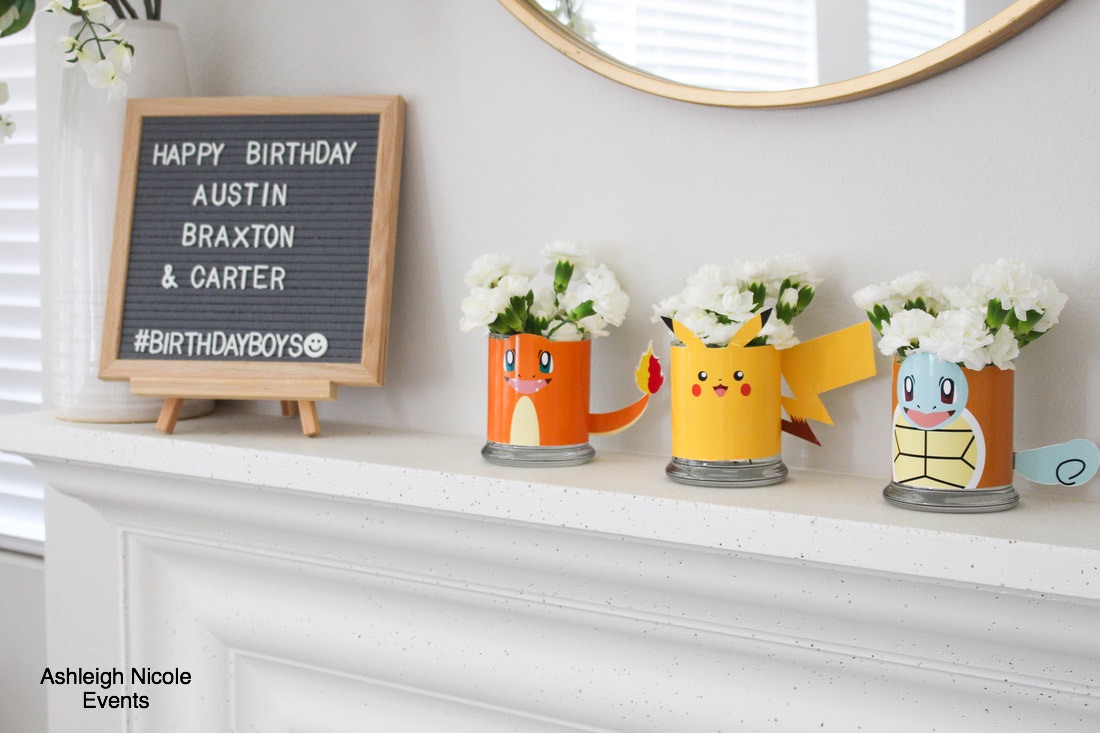 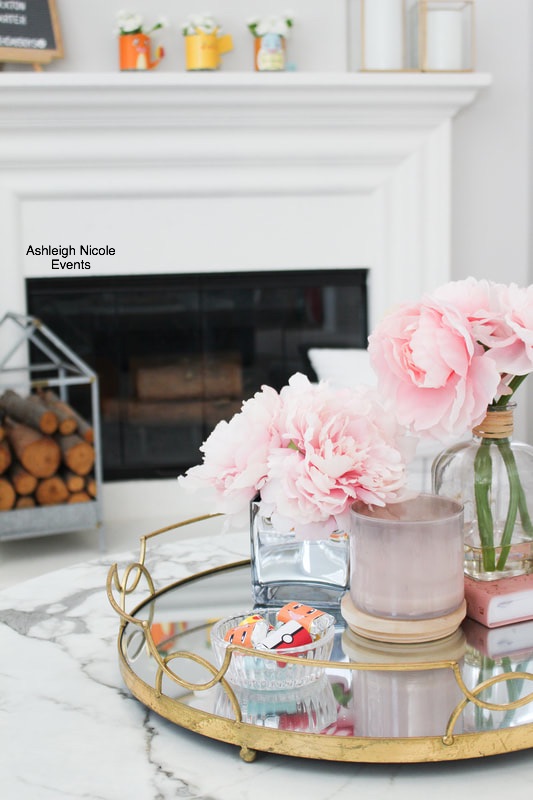  I think I covered just about everything! If you have any questions about ANYTHING please don't hesitate to ask in the comment section below! Warmly, Ashleigh Vendors
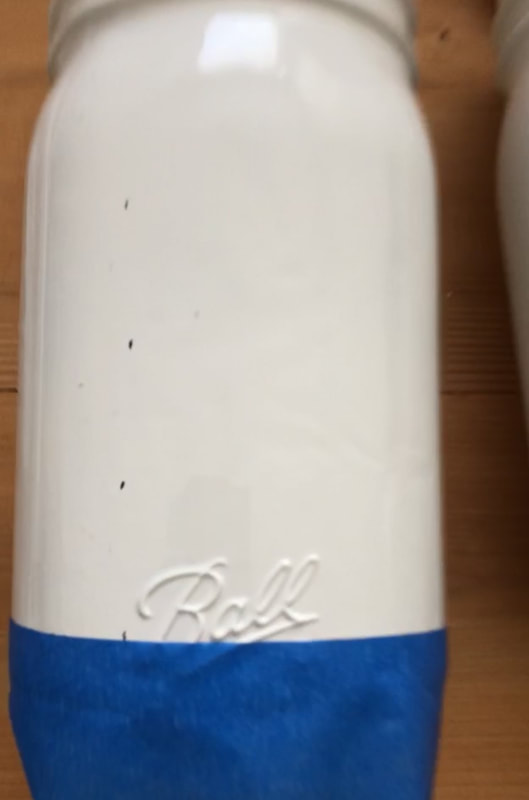
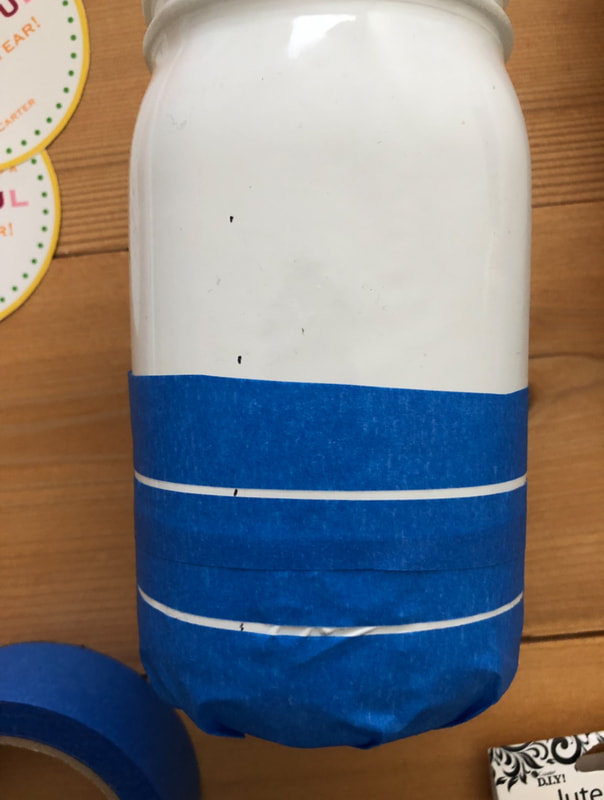
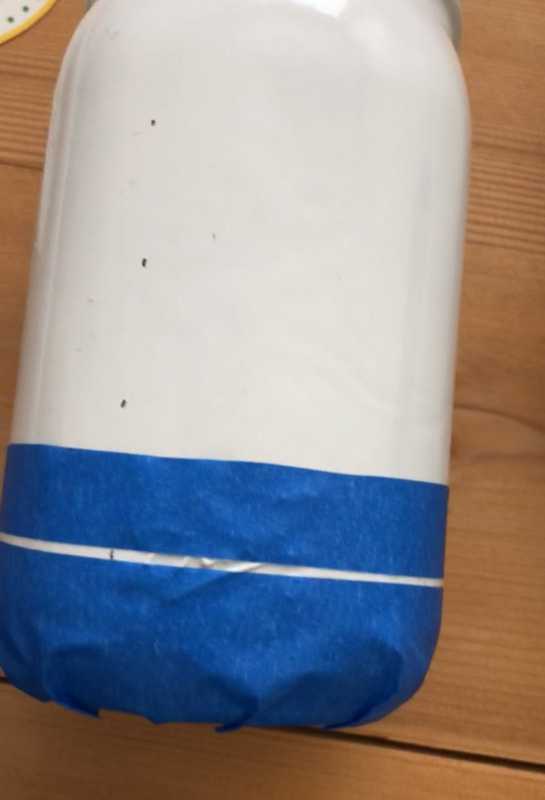
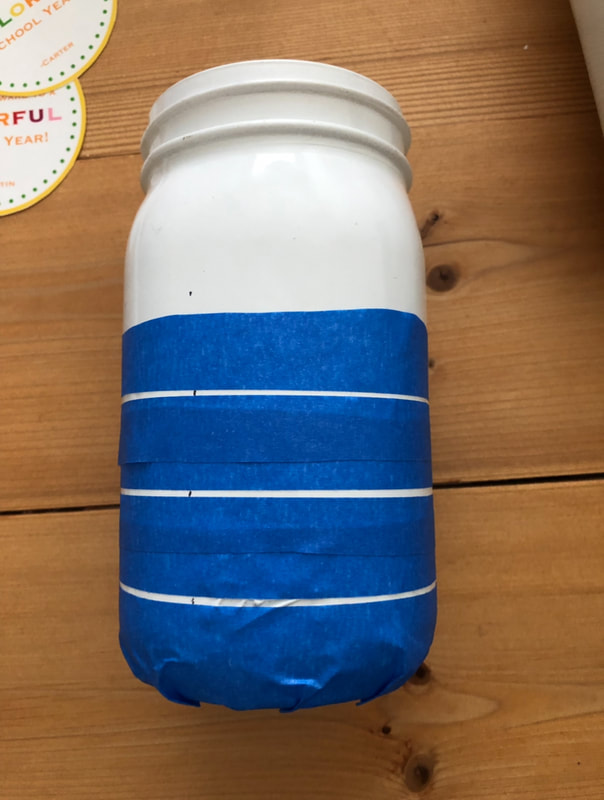
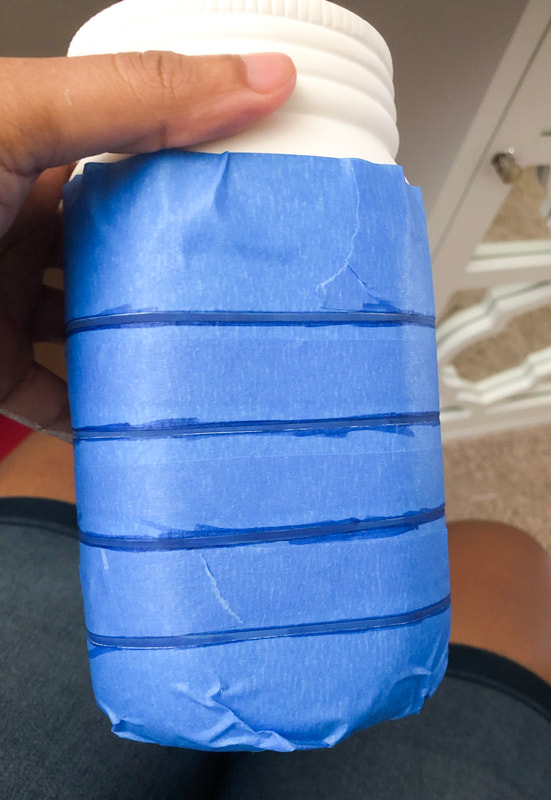
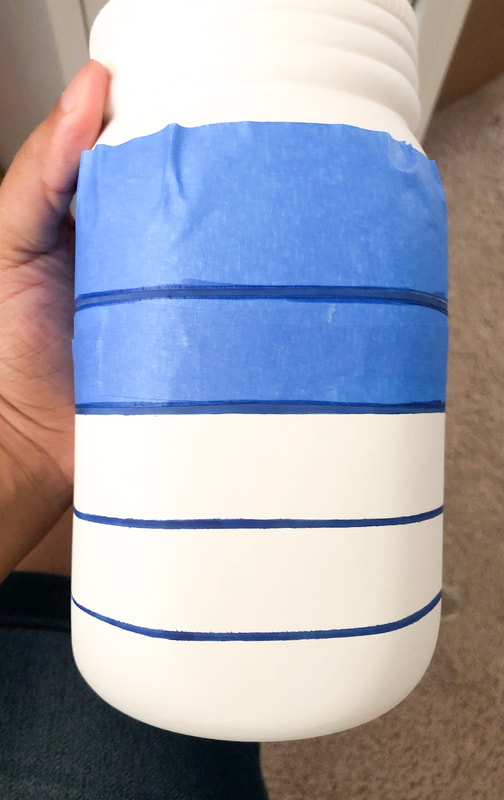
Event styling- Ashleigh Nicole Events Graphic design (backdrop & Squirtle ice cream cone wrapper)-Heather Nelson Design Cookies- Dearly Beloved Bake Shop Caricature artist- Joe Luma Draws Events Face painter- Happy Face Painting Game truck rental-Elite Game Box 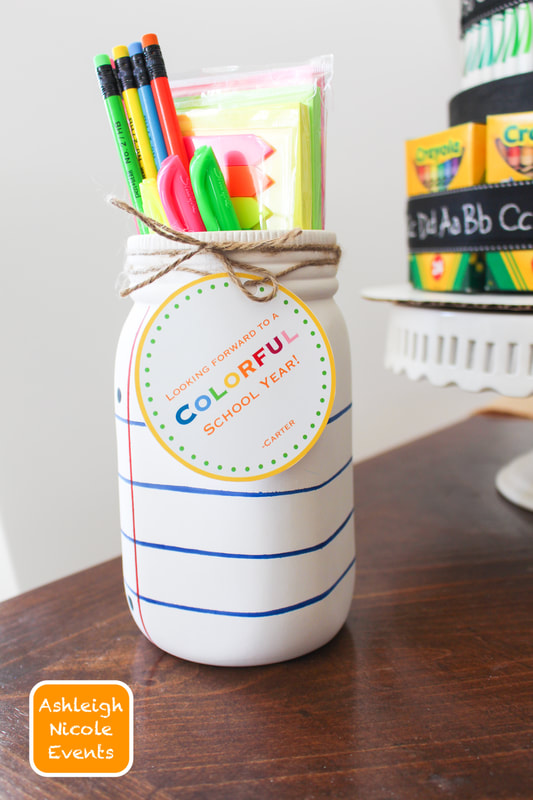 Back to School Mason Jar Isn’t it cute!?! Love how this mason jar gift turned out! 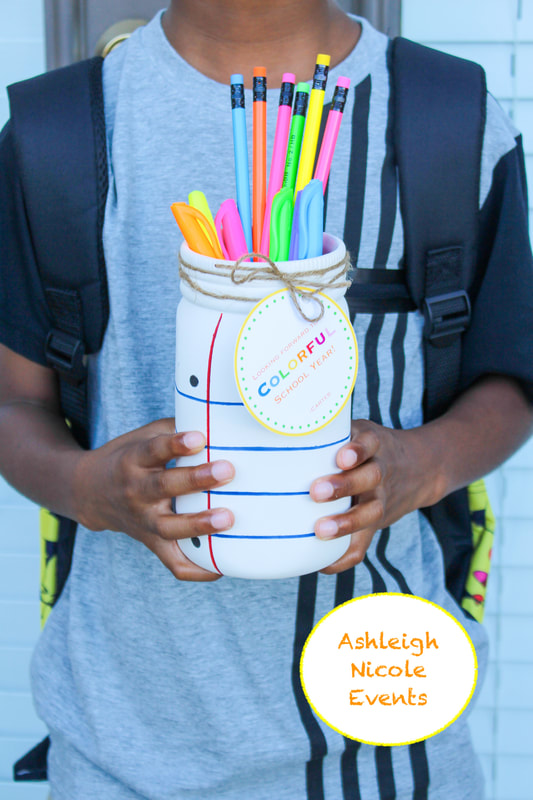 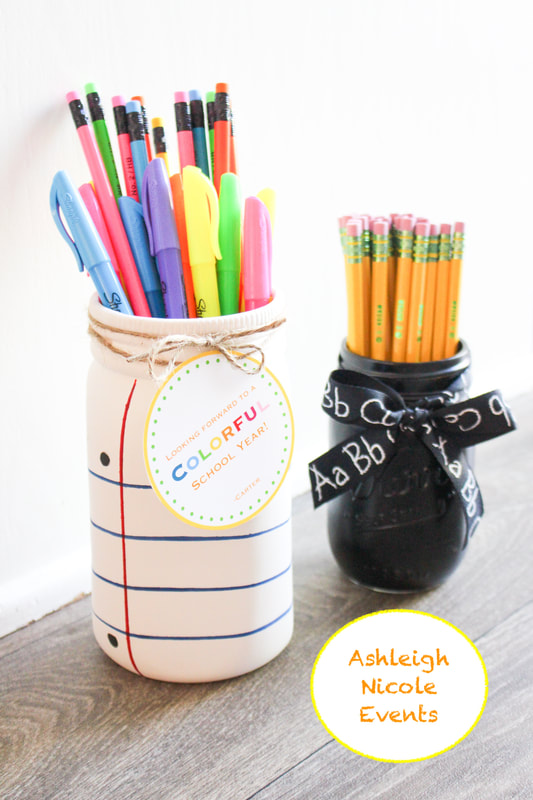 I started with this clay mason jar that I randomly found in the craft section at Walmart. It was already white. You can also achieve this look by painting a regular glass mason jar with white chalk paint. *DO NOT use spray paint! Trust me, I tried. I failed horribly. The paint pealed when I removed the painters paint and the blue paint bled. Horrible. 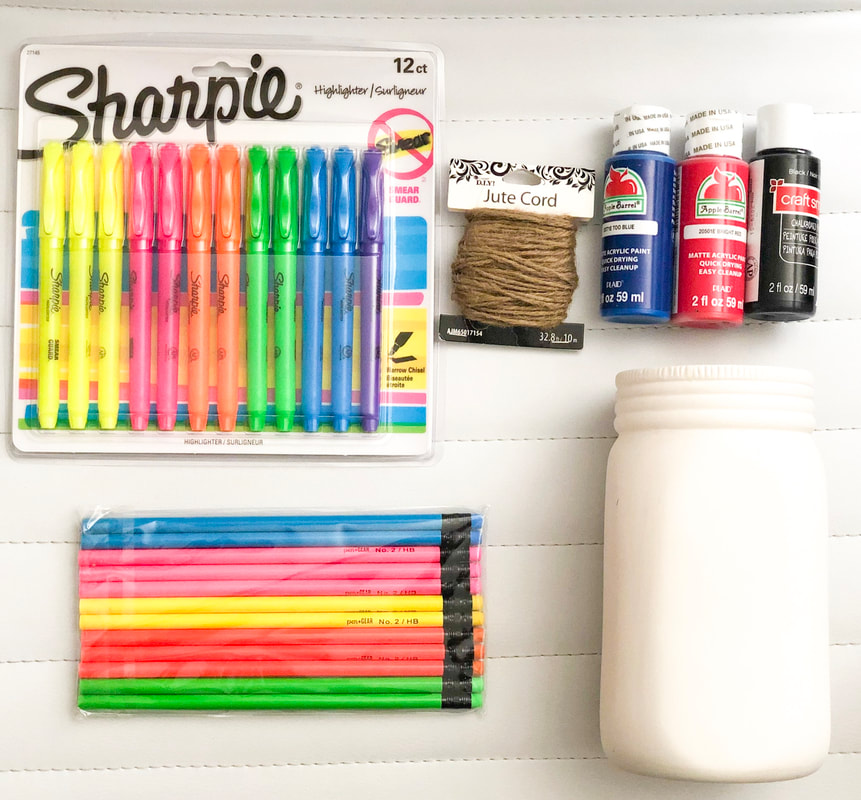 Step 1 Purchase a white clay mason jar OR paint a standard clear mason jar white using chalk paint. Let dry. 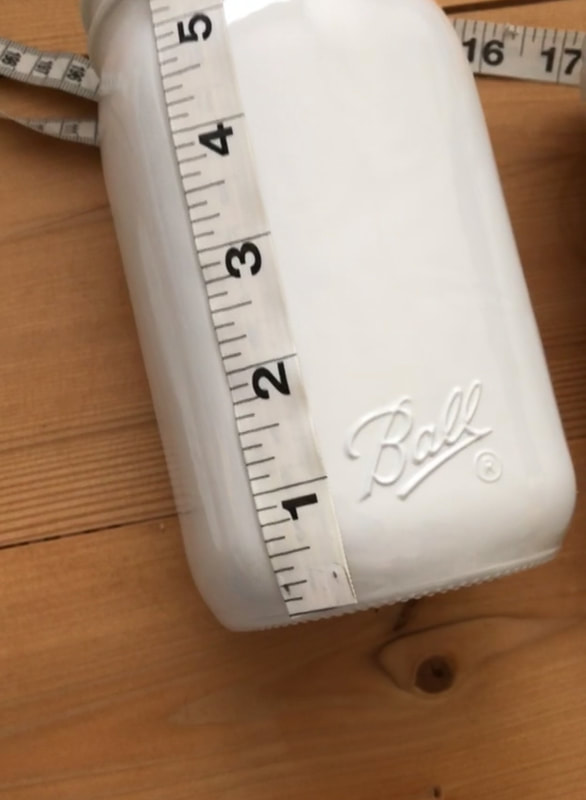 Step 2 Measure and mark with a pencil every inch. Tape horizontally around the mason jar at every inch mark. Leaving around 1cm of space at each mark.
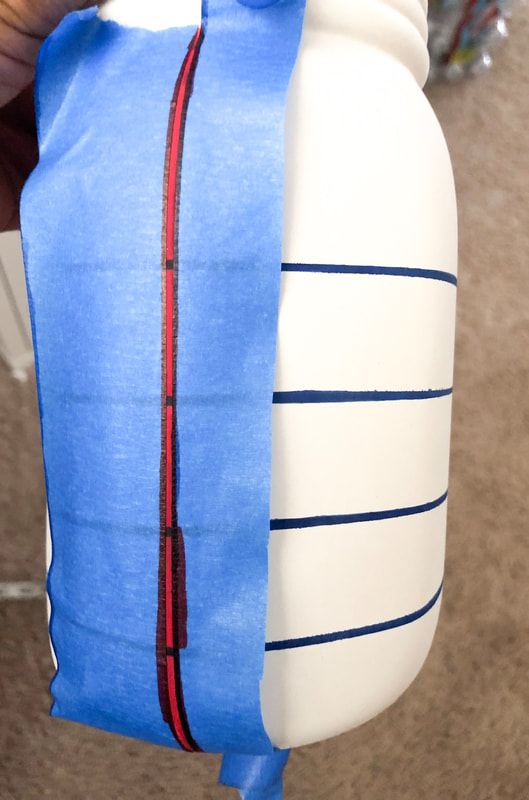
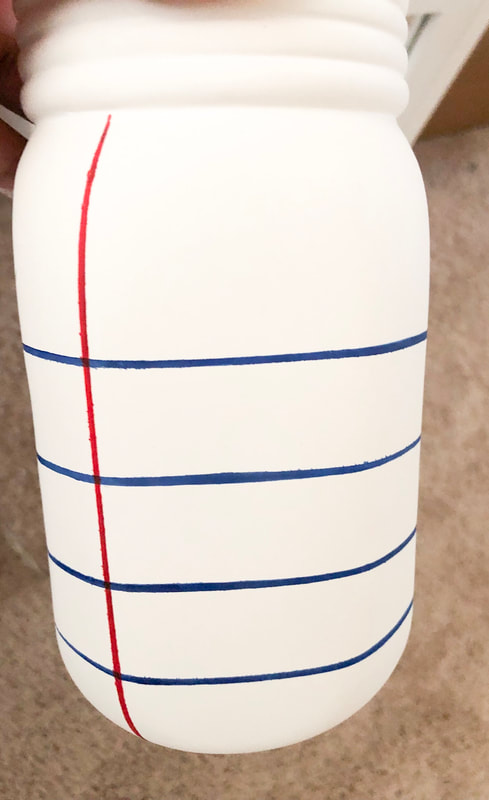
Step 3 Using blue paint, fill in the 1cm lines. This will create the paper line design. Let dry. Next place two strips of painters tape vertically down the left sign of the mason jar. Again, leaving a 1cm space in-between each strip. Fill in space with red paint. Let dry. Last add two black circles to the left side of the mason jar to resemble paper holes. (top and bottom)
Step 4 Fill the mason jar with colorful post-it note pads, sharpies, flag tabs and colorful pencils! Add a cute little tag with twine and you’re done!!! 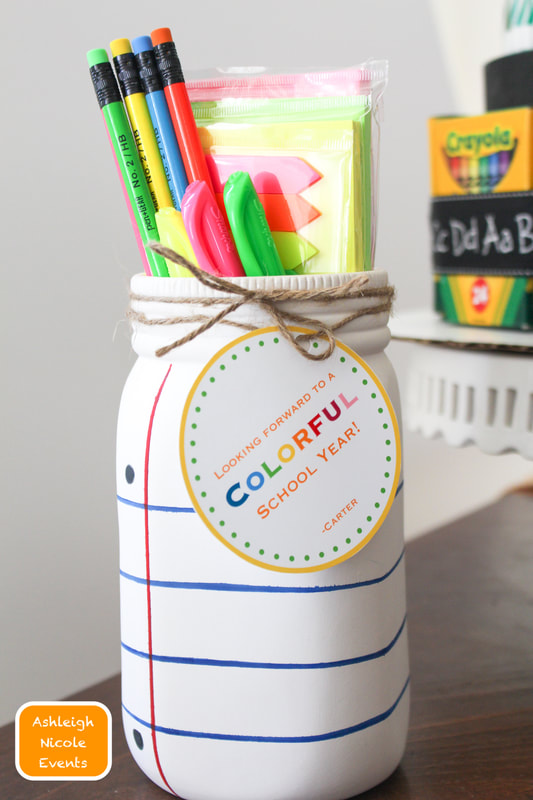 Tag wording ideas... •Looking forward to a BRIGHT school year. •Looking forward to a COLORFUL school year •Thanks for marking me BRIGHTER •MARK my words, it’s going to be a great school year. •You’re one SHARP teacher  Wishing everyone an awesome school year!!!
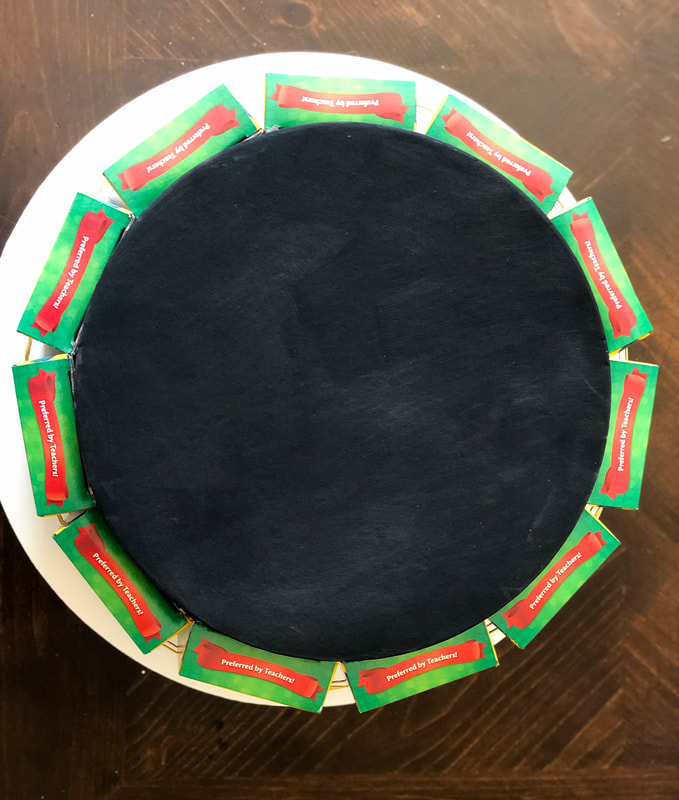
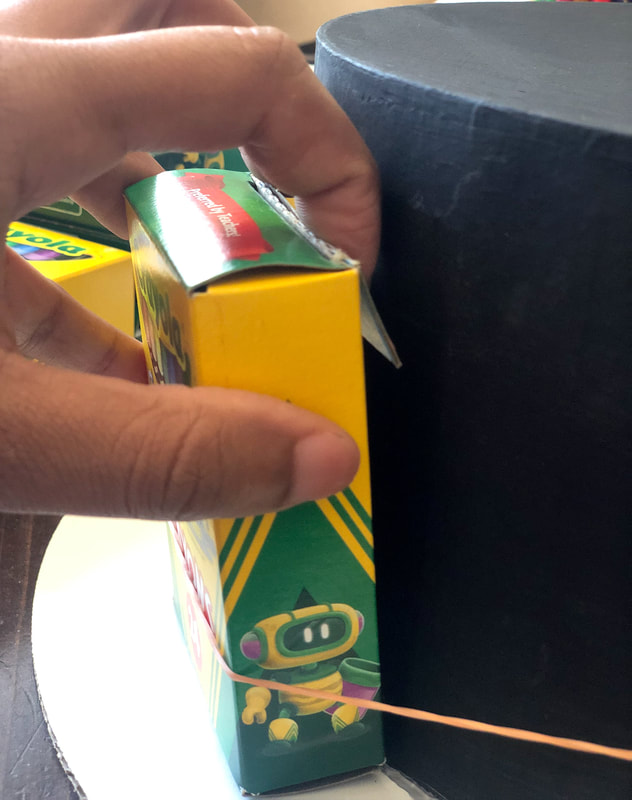
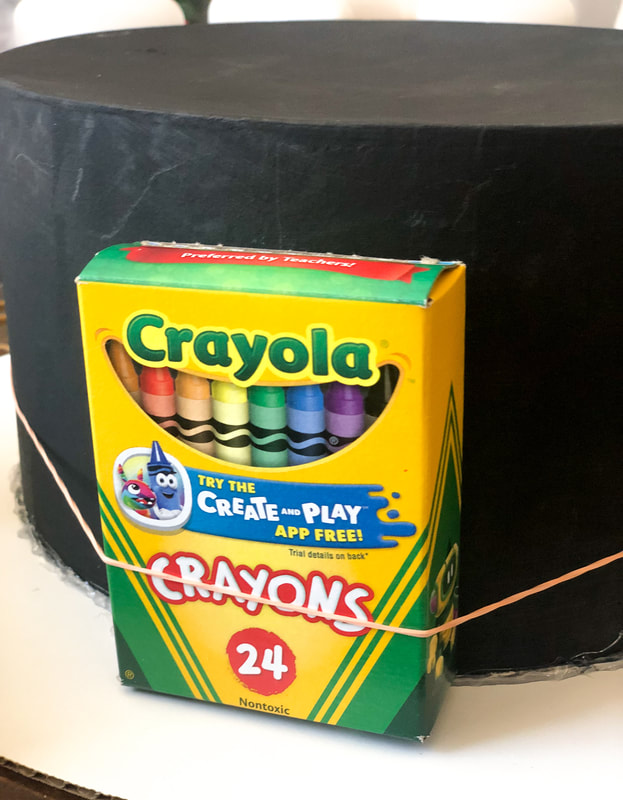
DIY School Supply "CAKE"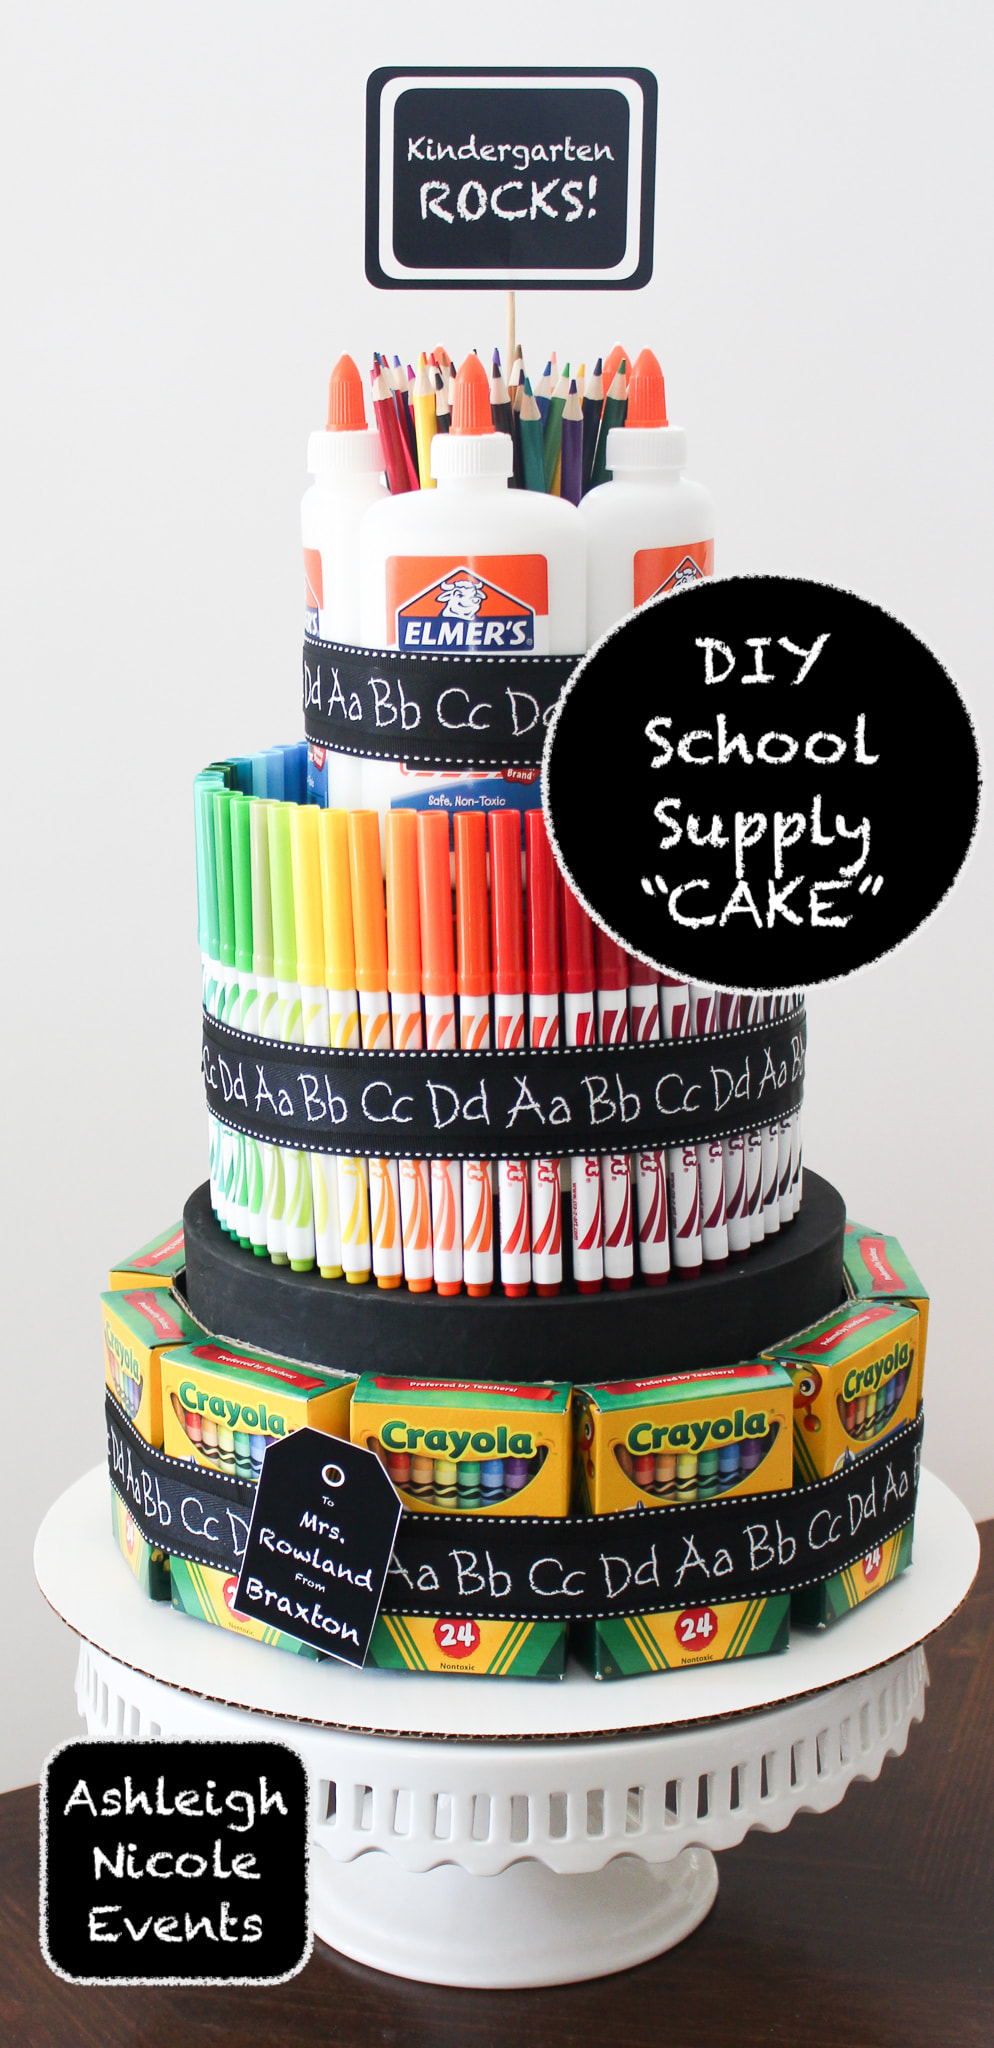 It’s that time of year again!!! BACK TO SCHOOL!!! This year I wanted to make each of my sons teachers something special. I decided to make my sons Kinder teacher a DIY school supply “cake” The classroom can always use extra supplies, right!?  Materials •Craft rounds 10” and 6” (purchased from Michaels HERE. It comes in a pack of 3 but we will only be using 2) •14” cake board •Black paint and brush •Black ABC ribbon (purchased from Michaels HERE) •6 Rubber bands •1 paper cup •Hot glue gun •Double sided foam tape •11 boxes of Crayola crayons •55 fine tip markers •5- 7.6oz Elmer’s school glue •36 colored pencils 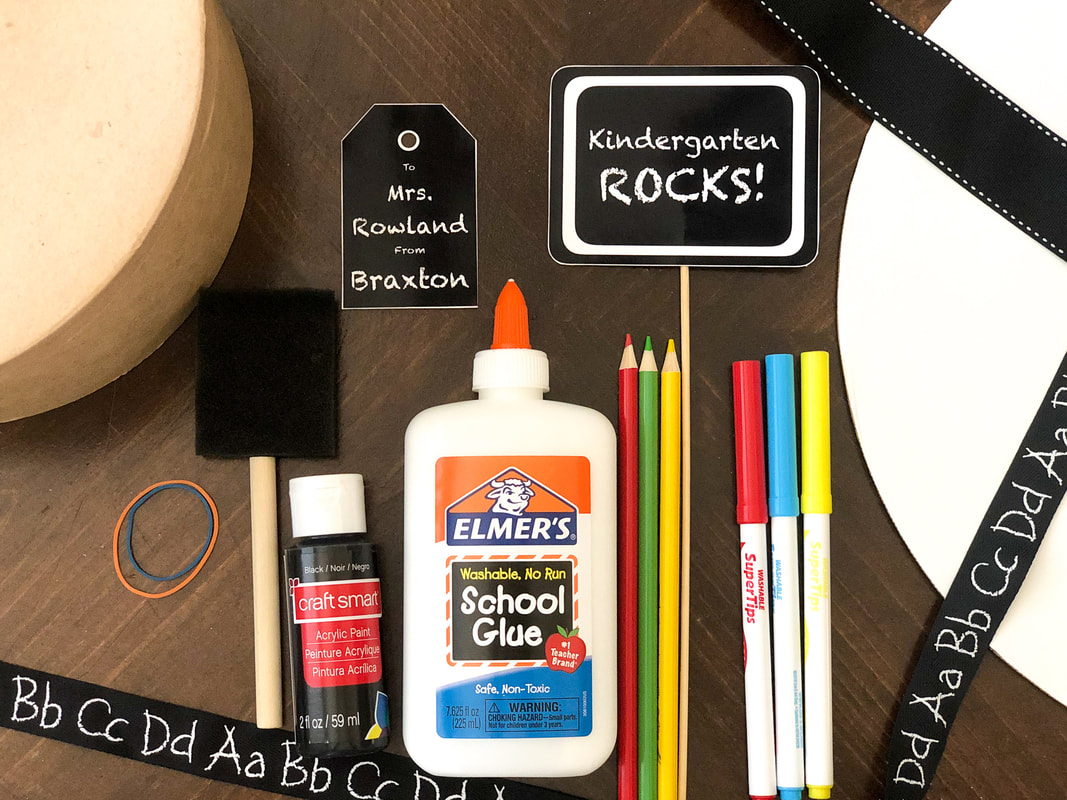 Step 1 Paint your 10" and 6" craft rounds black. Let dry. Attach the largest craft round, button up, to the cake board using hot glue. Place in the center of the cake board. * I did not use the lids.  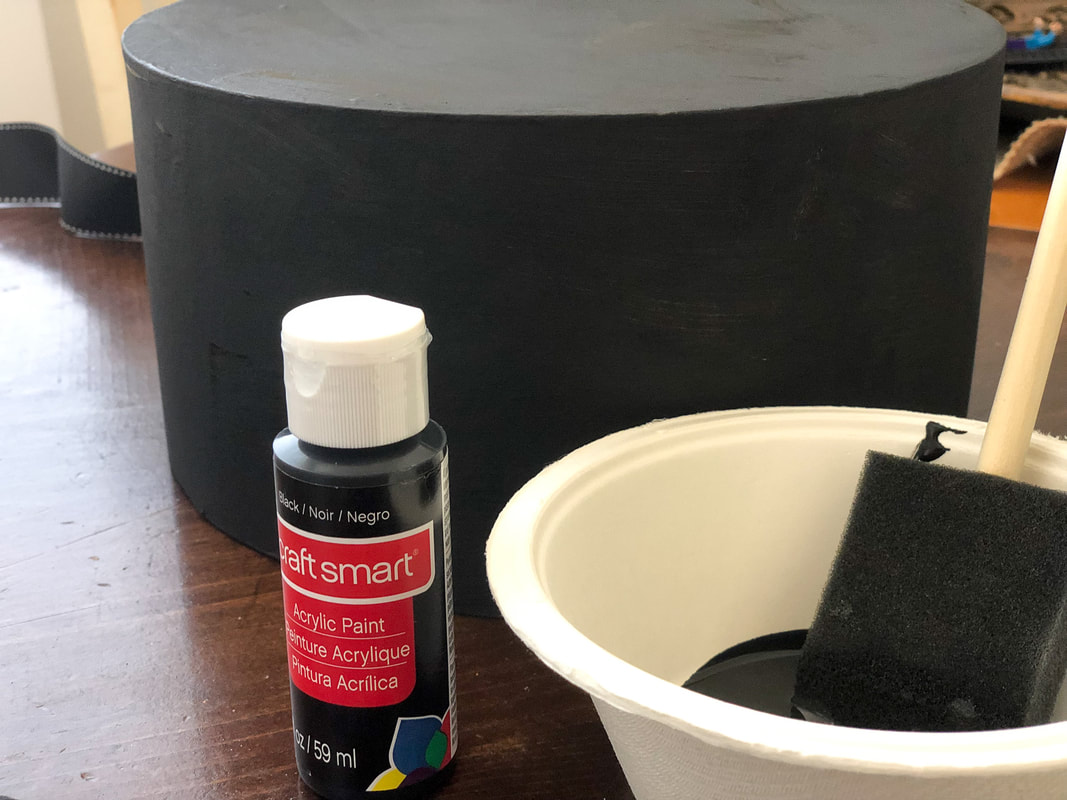 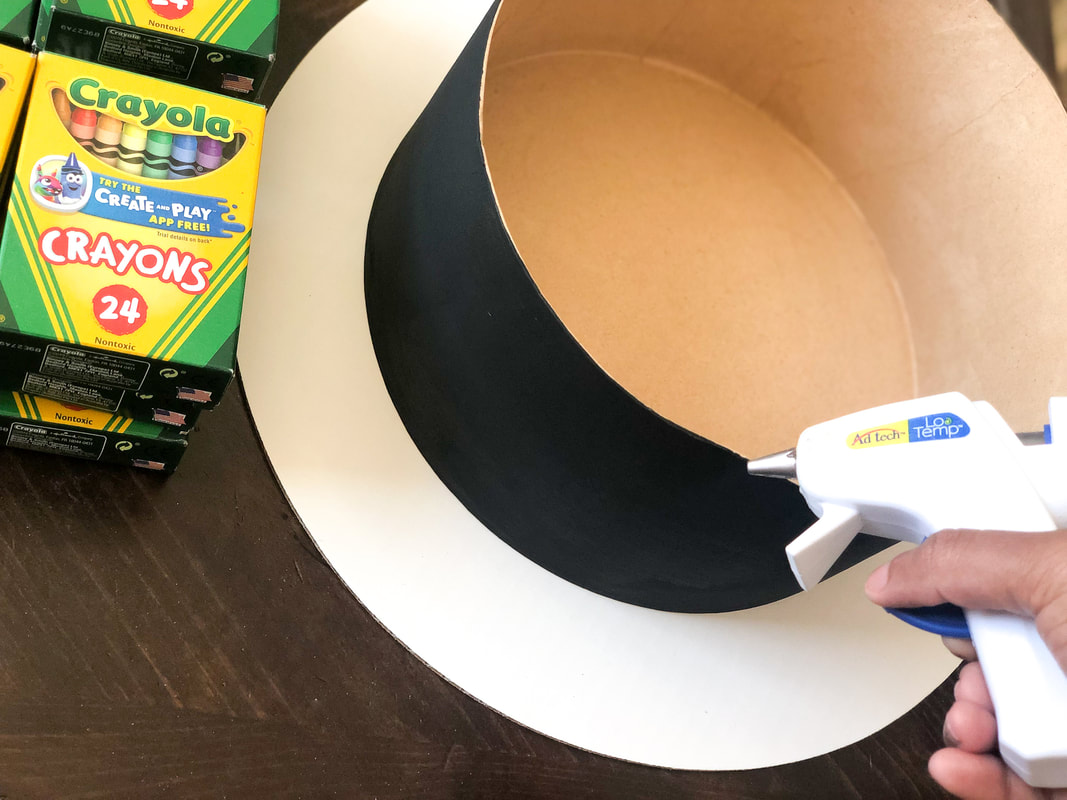 Next place two rubber bands around the craft round. Carefully add the crayon boxes by securing them with the rubber bands. Tuck the upper flap on each crayon box behind itself. Doing so makes it look a little neater. Repeat until all 11 boxes have filled the bottom layer. 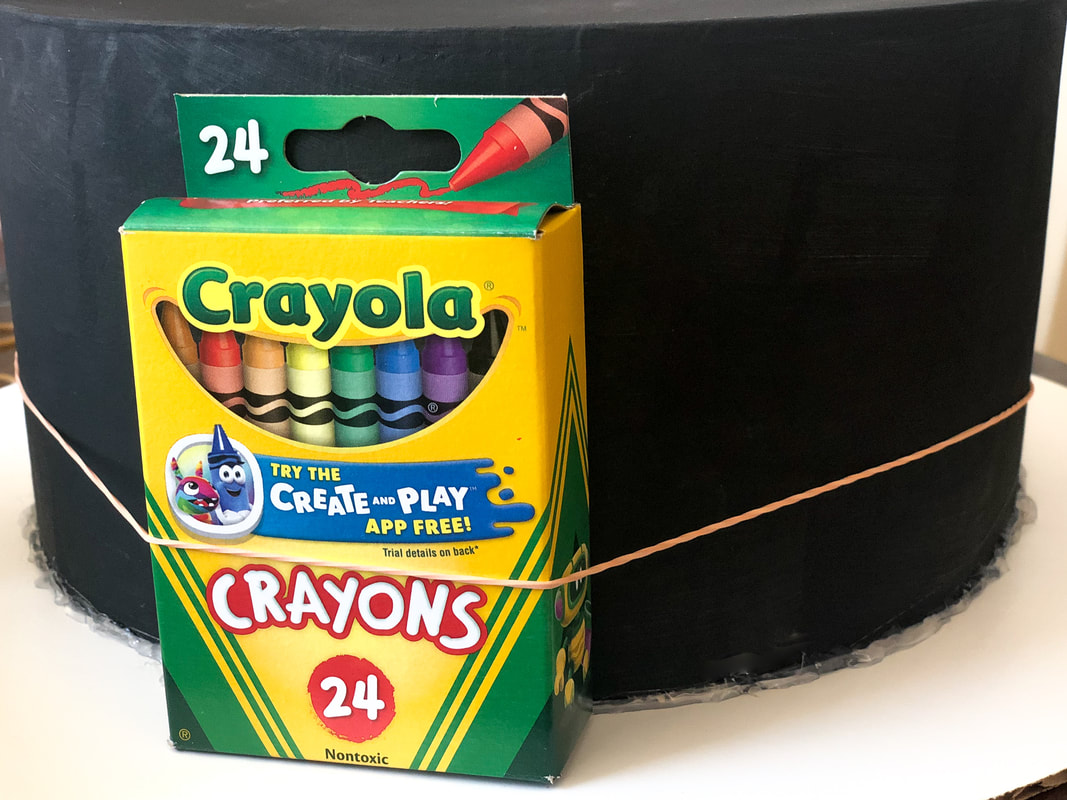
 Step 2 Take your smaller craft round and secure it to the center of the bottom layer. Again, bottom up! Secure with hot glue.  Next place one rubber band around the smaller craft round. Add a strip of double sided foam tape around the center of the craft round. This will help prevent the markers from shifting. Add another rubber band above the foam tape. 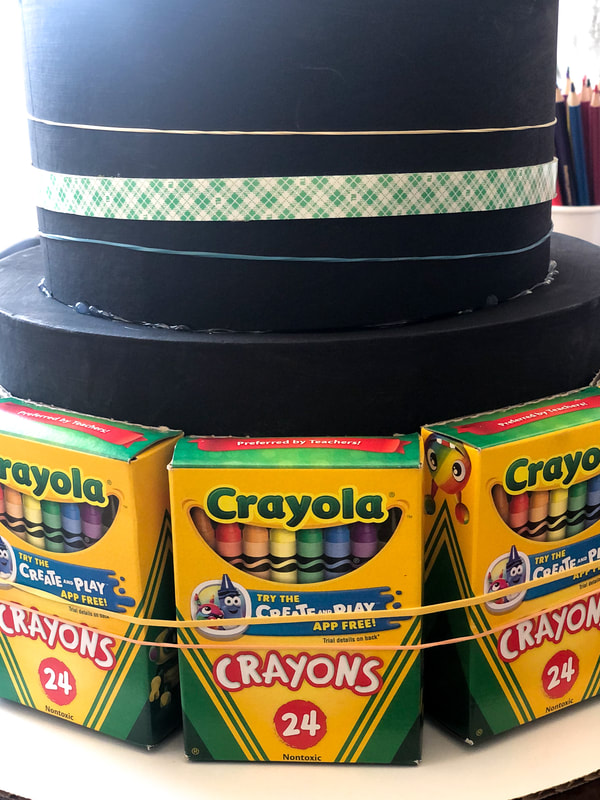 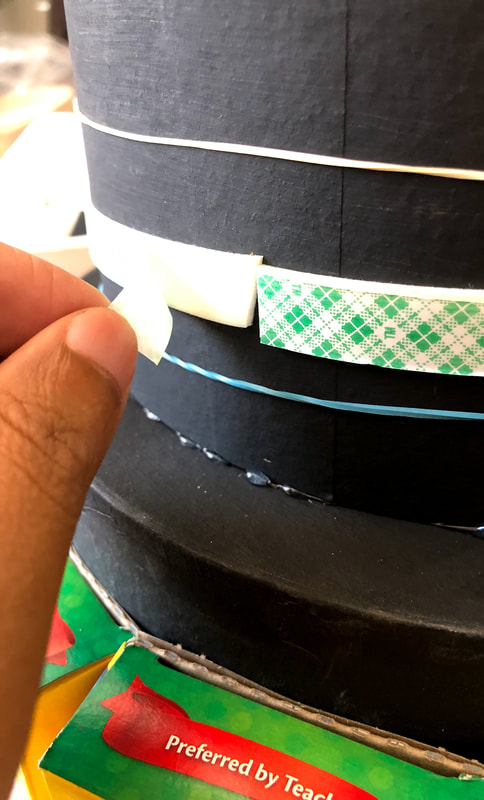 Arrange the markers in rainbow order (or any order you prefer)  Attach each marker to the craft round by sliding it under the rubber band and sticking it to the foam tape. Continue until entire craft round is covered. 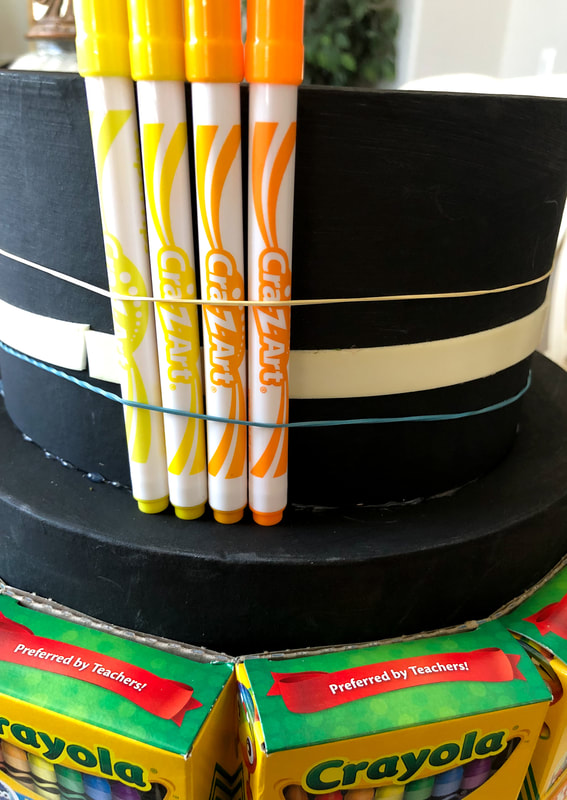 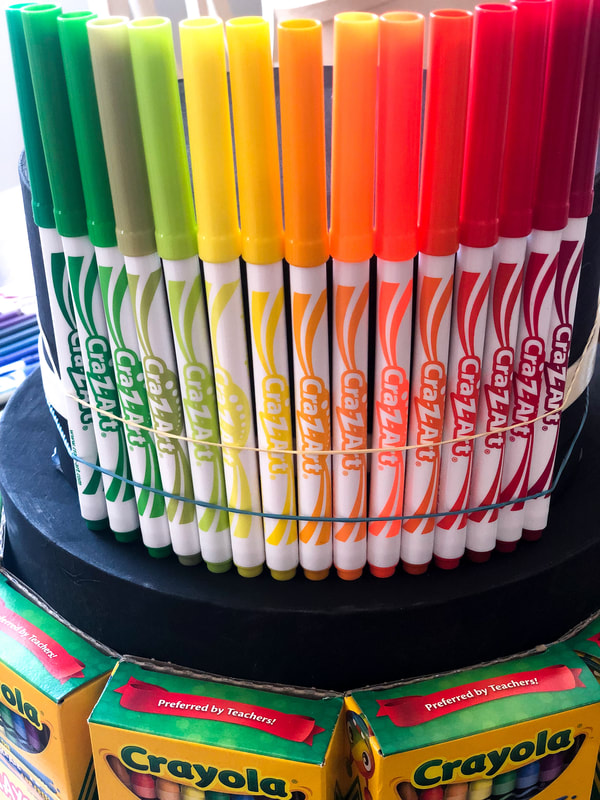 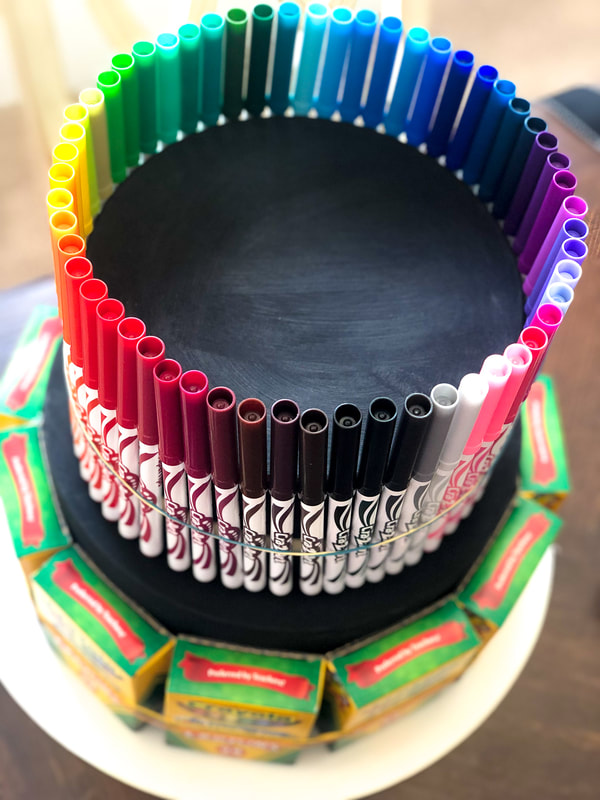 Step 3 Attach the paper cup to the top layer using hot glue. Add colored pencils to the cup. 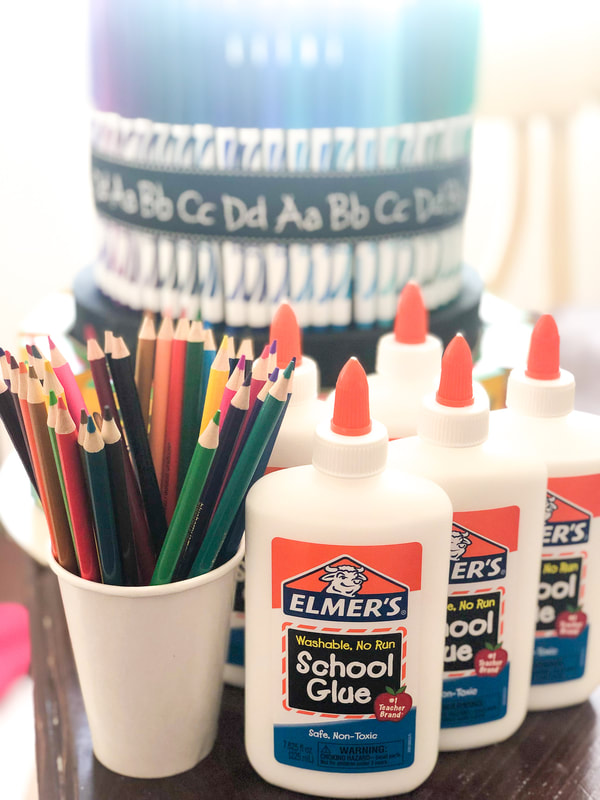 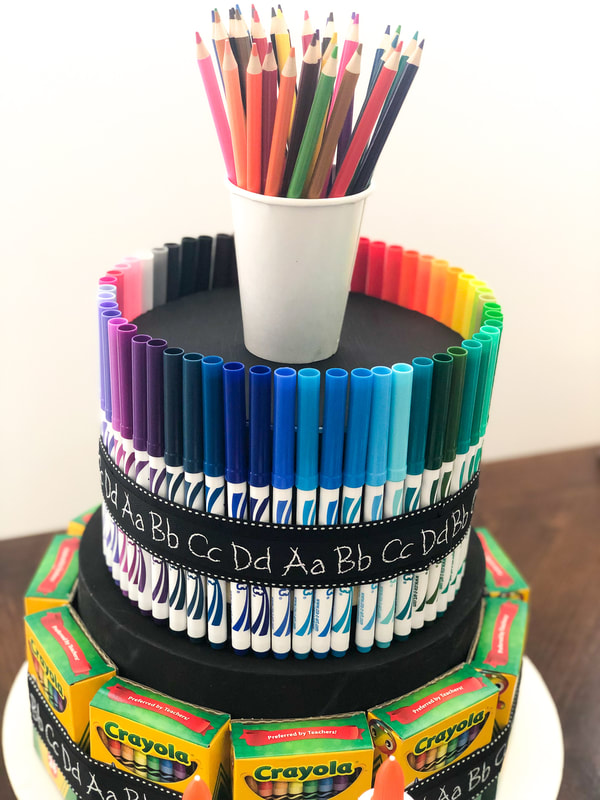 Place the 5 - 7.6oz school glues around the cup. Secure with 2 rubber bands. *you can also secure the bottom of each glue bottle with a dab of hot glue. 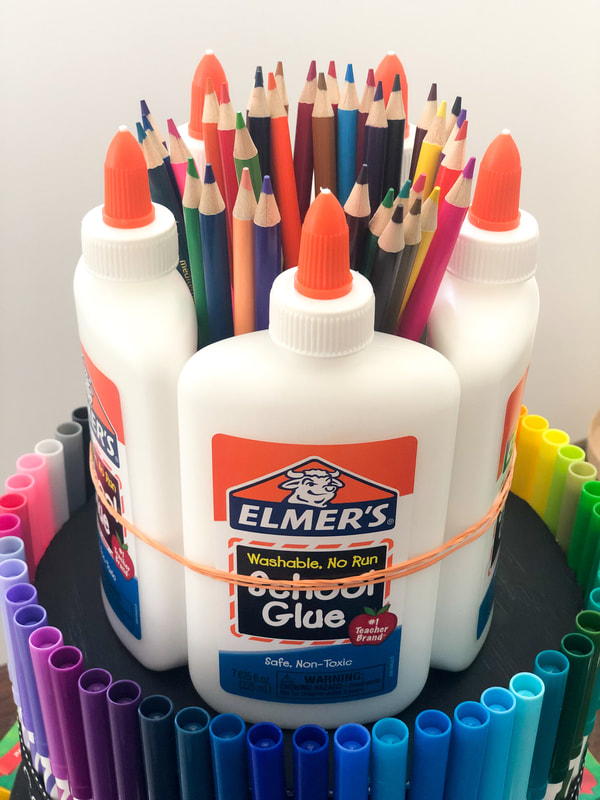 Step 4 Add ribbon round each layer. This hides the rubber bands and foam tape. I used two layers of ribbon. A thicker black ribbon and a thinner ABC ribbon. 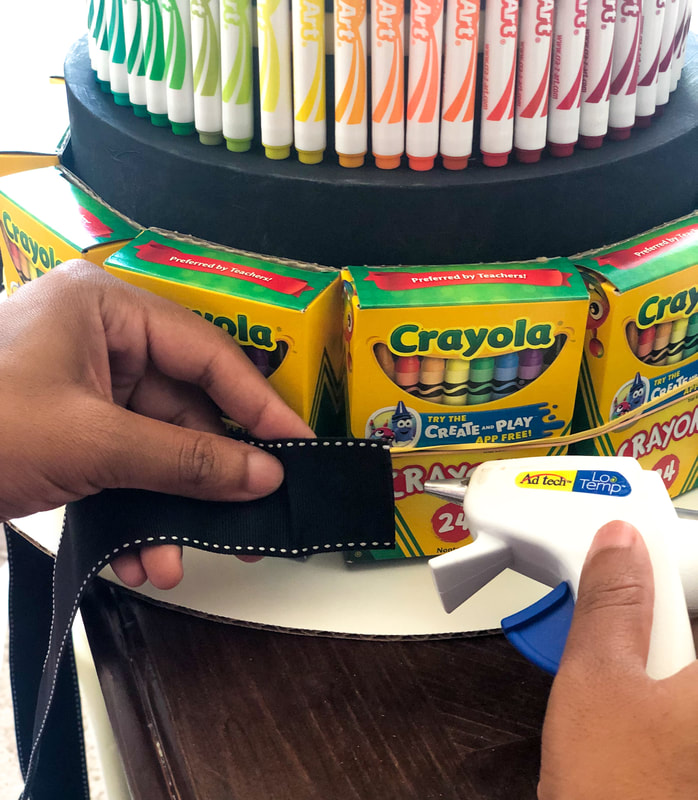 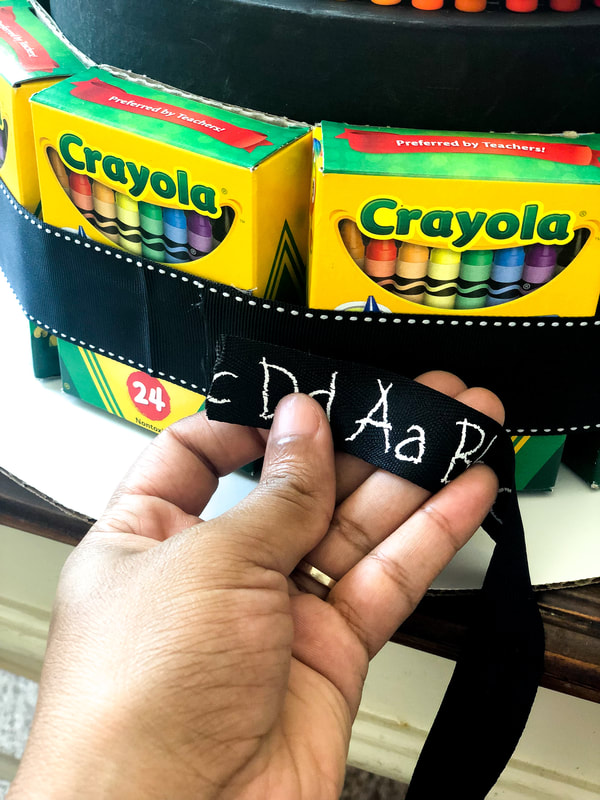 I created the "Kindergarten Rocks" topper and tag using Pages and downloaded the chalkboard font from dafont.com. 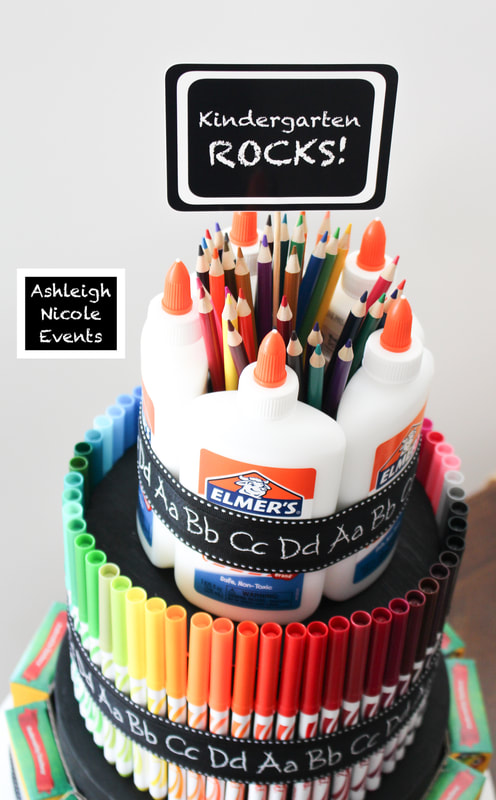 That’s it!!! Any teacher would love to receive this! Wishing all of your kiddos an awesome school year!  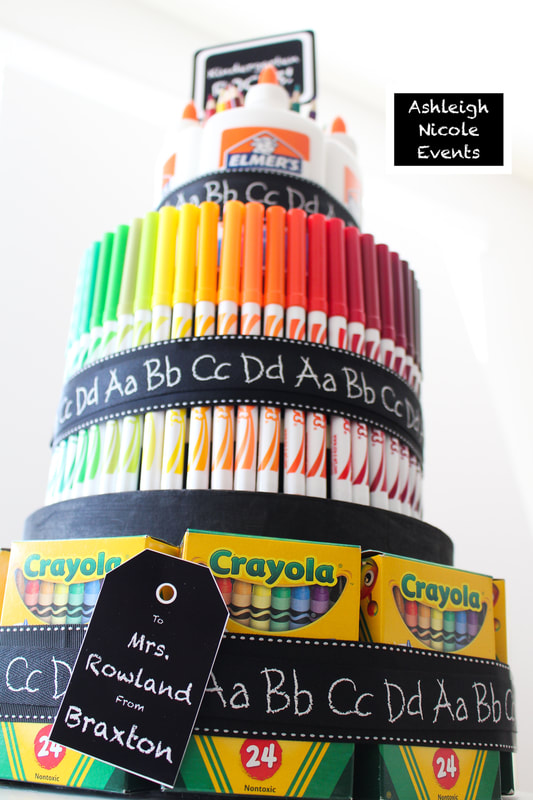 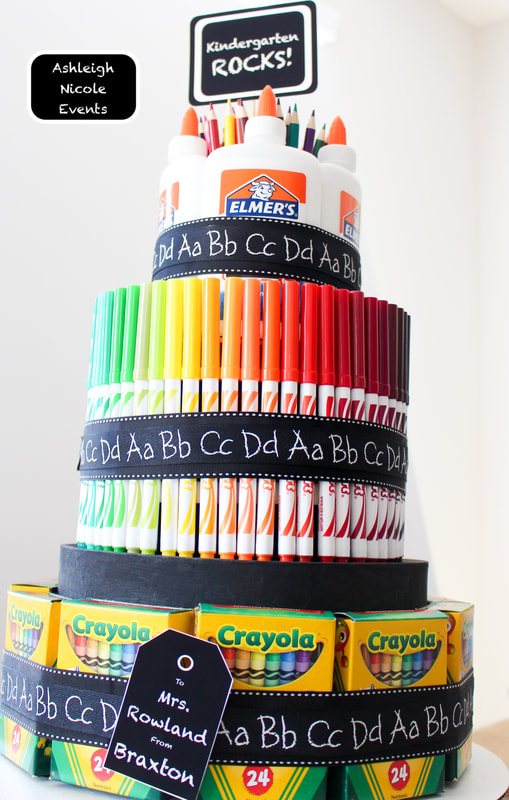 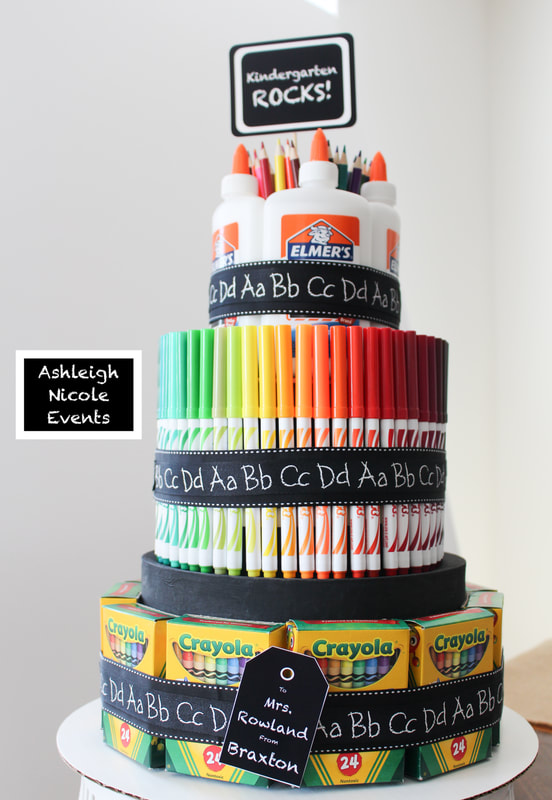  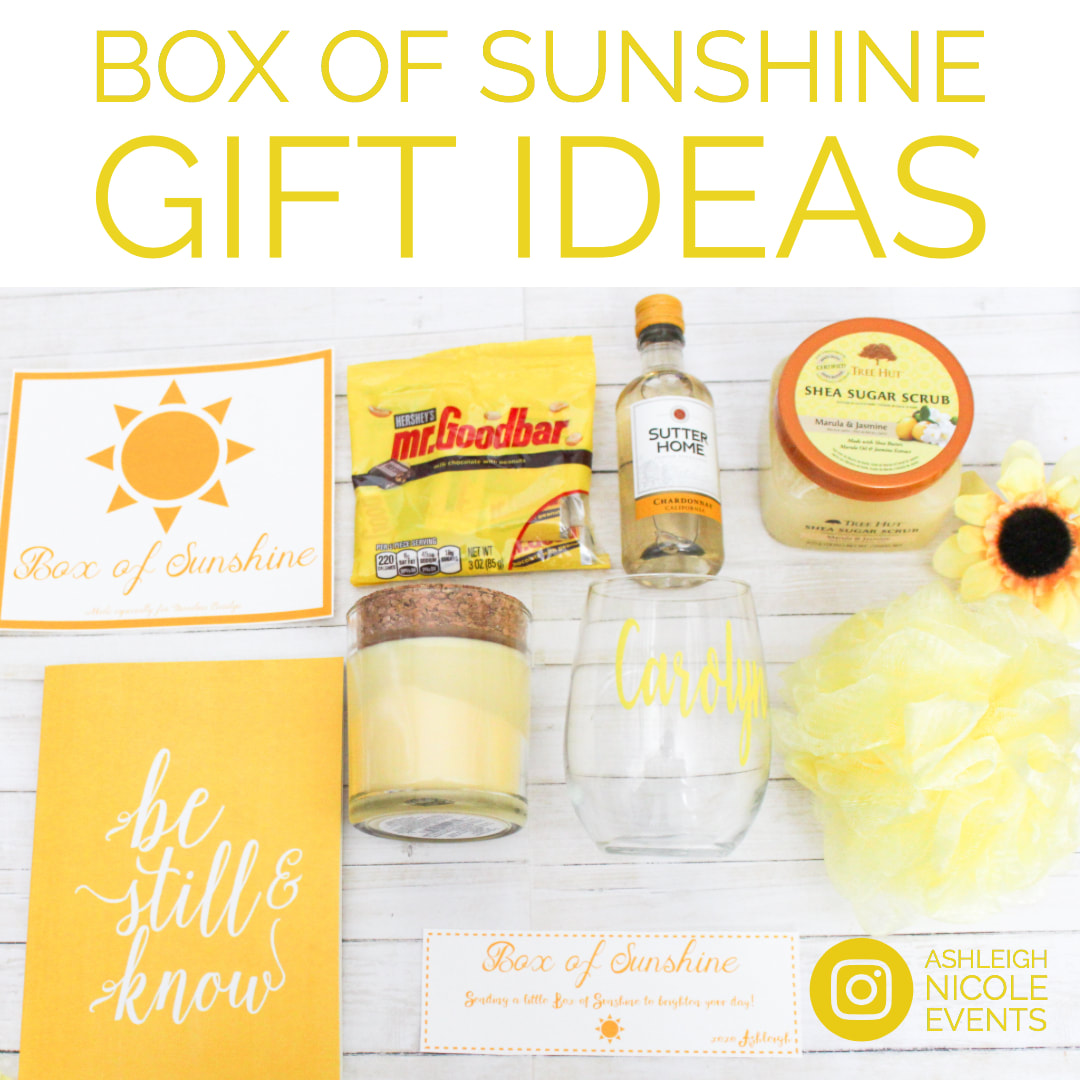 There are only a few things better then receiving fun unexpected gifts in the mail. I live on the opposite coast from all of my close friends and family. I love to send them random "Thinking of you" cards and I particularly like sending "Little boxes of sunshine!" 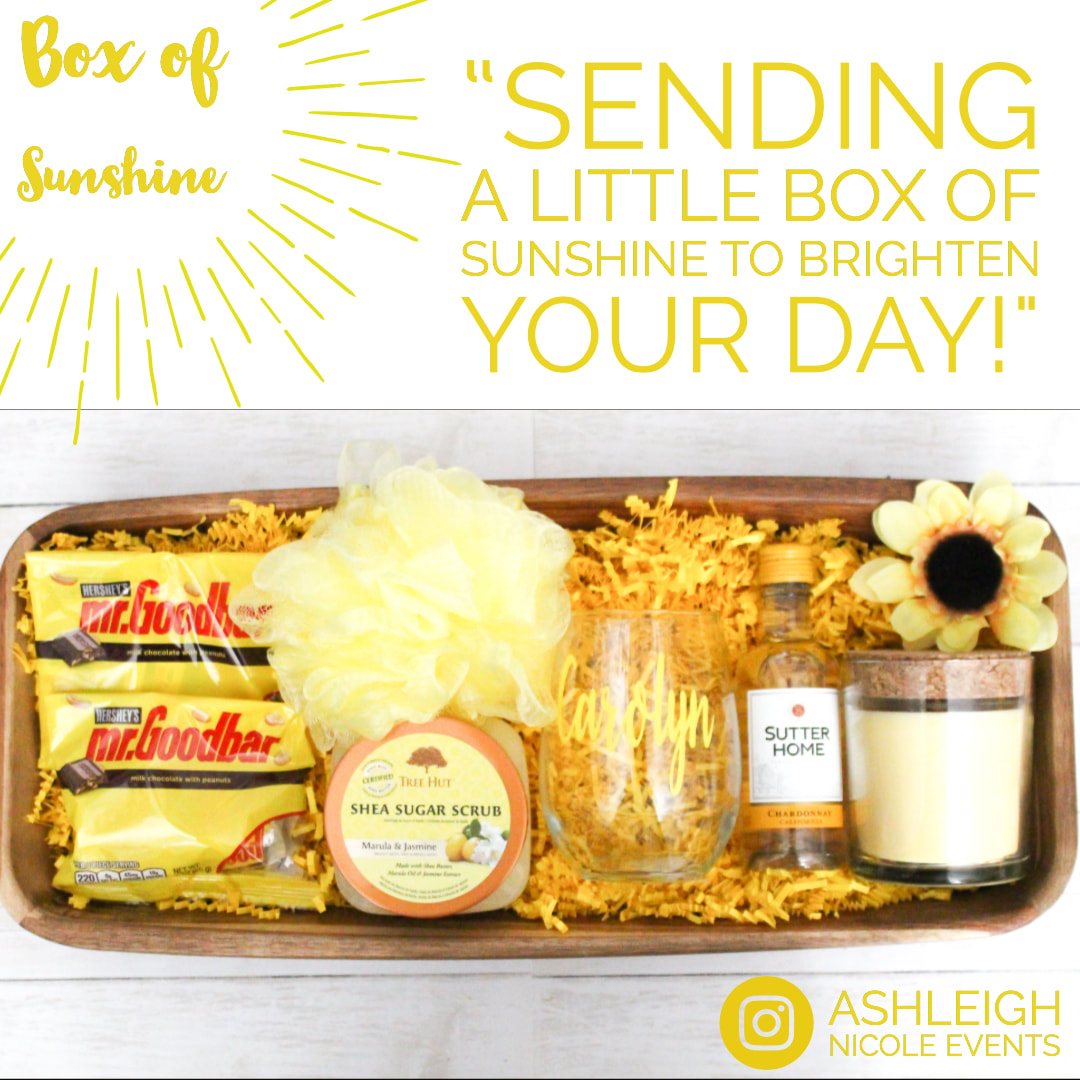 The idea originated from Pinterest, of course. Ive seen it done in other schemes as well...Blue- Gift out of the blue and Red for Valentines day or Christmas. Get creative! 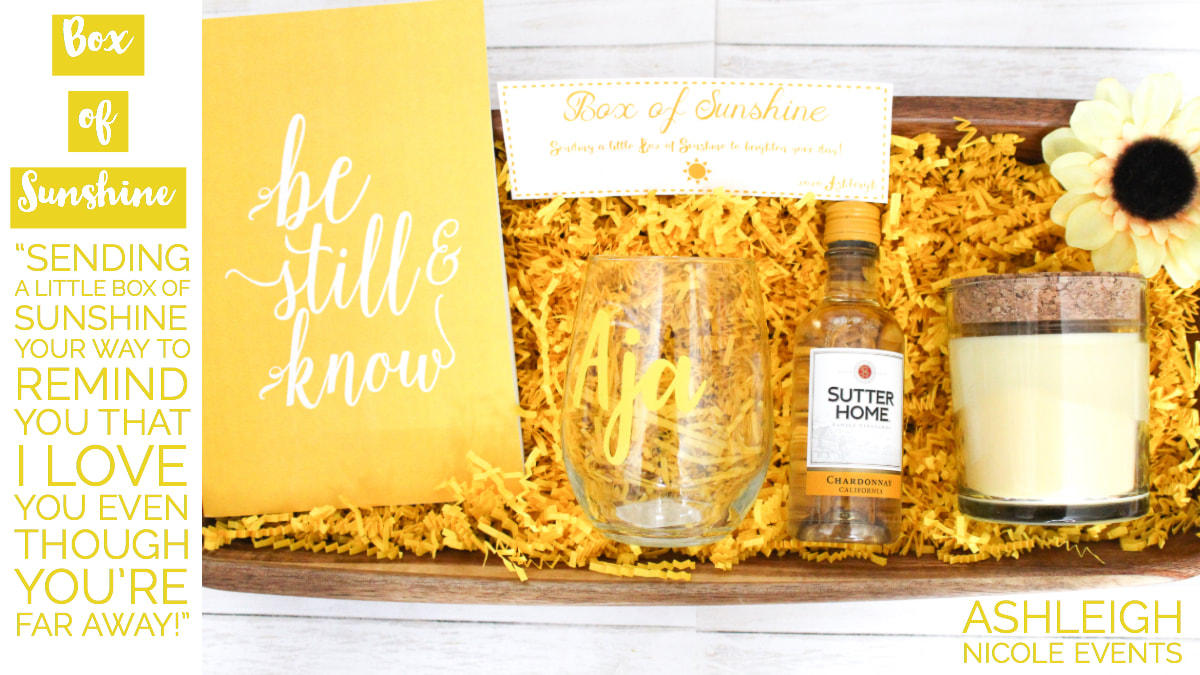 Heres what I included in the recent Sunshine Boxes I created for two special ladies. *Yellow candle *Personalized wine glass *Wine *Body scrub *Loofa *Journal *Mr. Goodbar 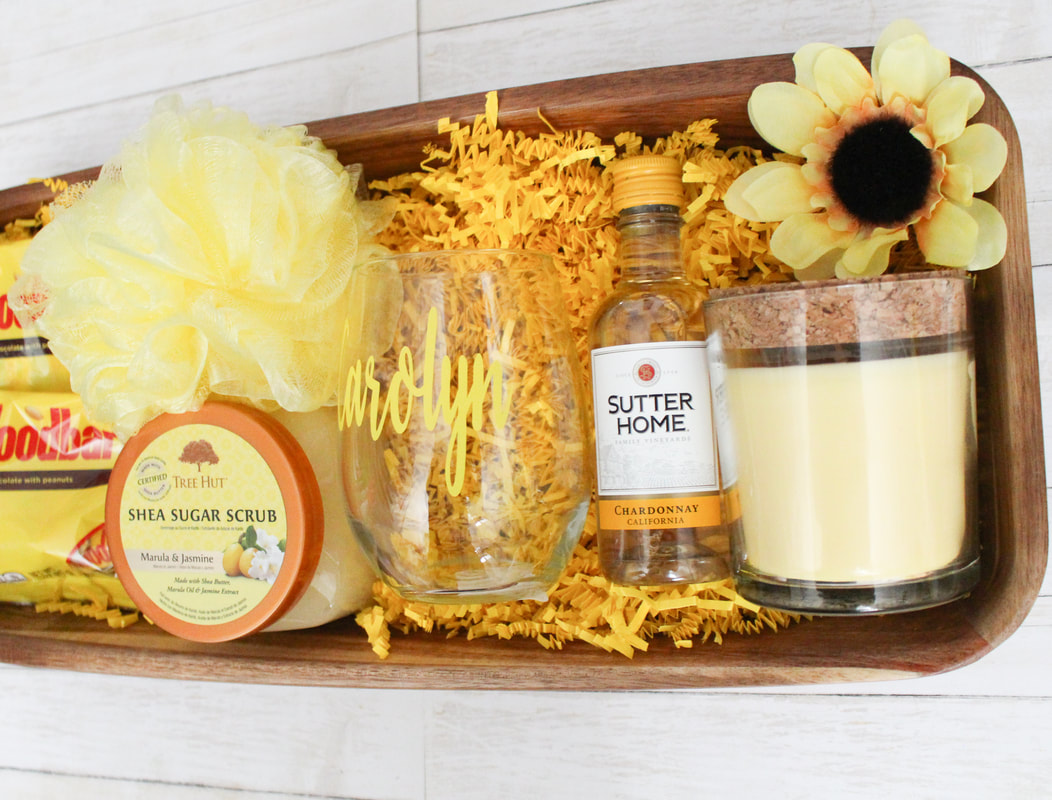 Always include a little note to make it more personal! Wording Ideas *Sending you a Little box of Sunshine to brighten your day... *Sending a Little box of Sunshine your way to remind you that I love you even though you're far away... 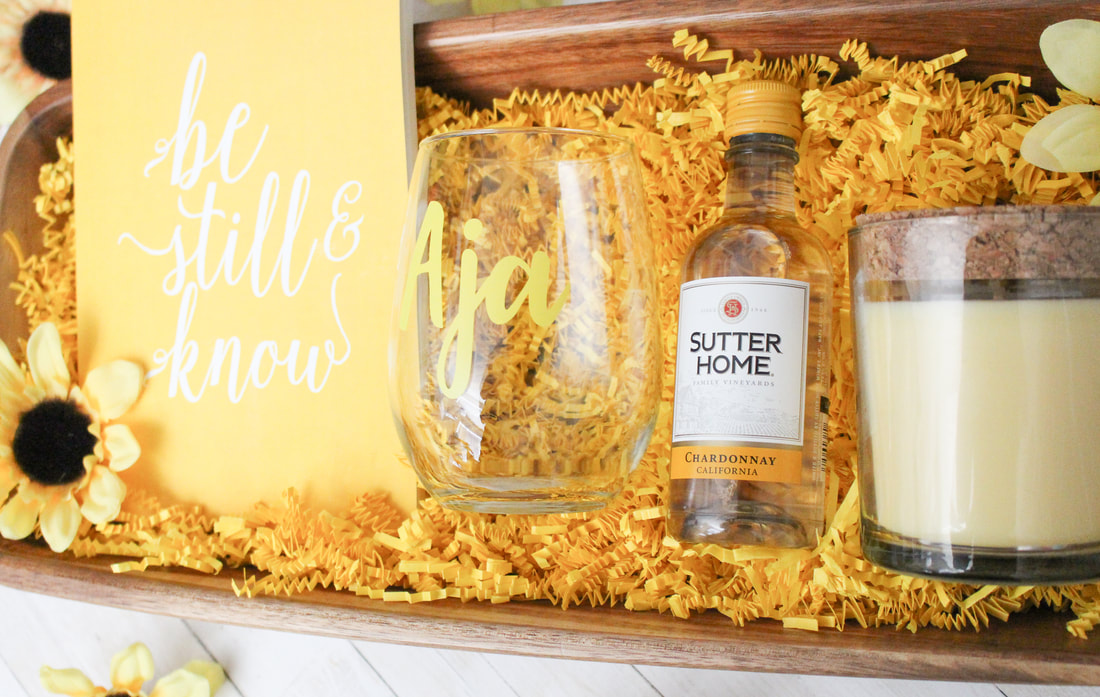 ~Ashleigh Nicole

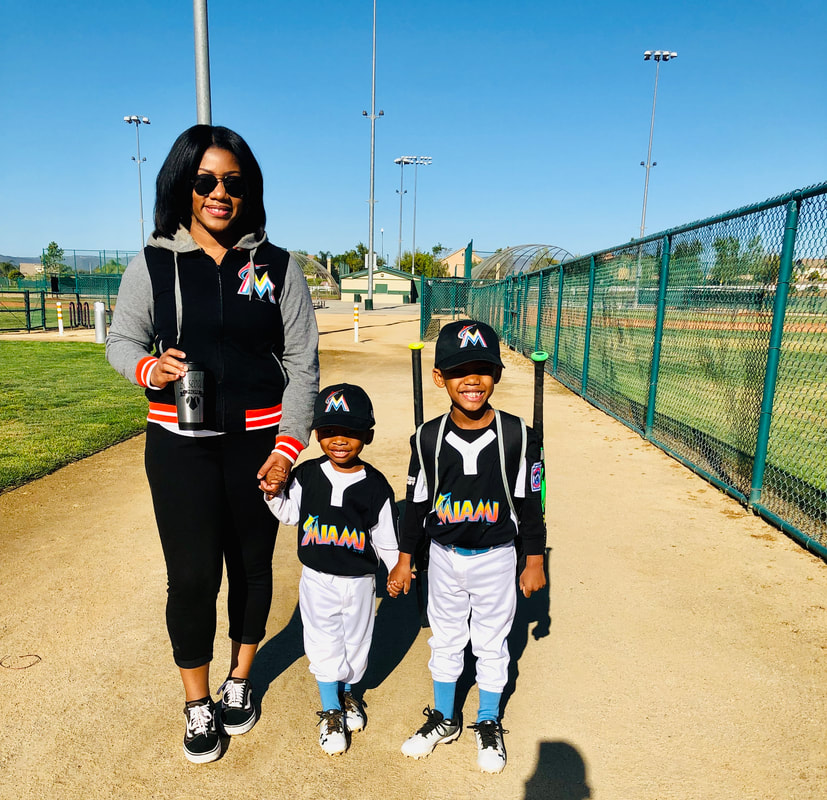
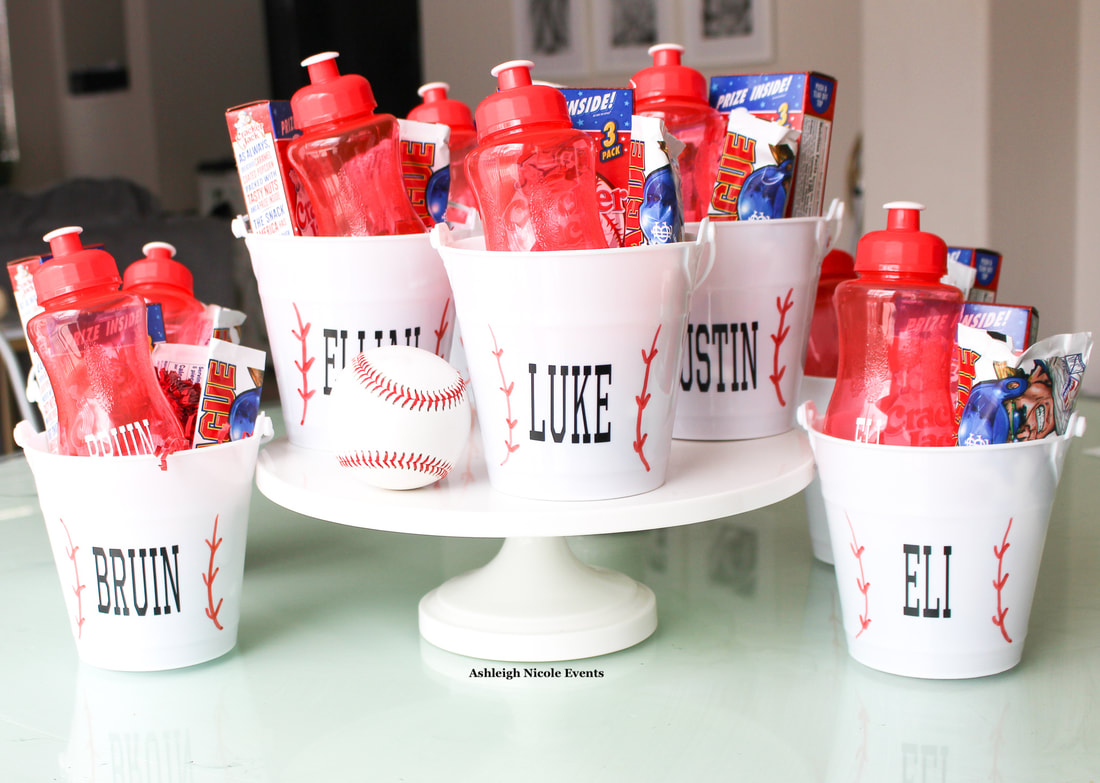
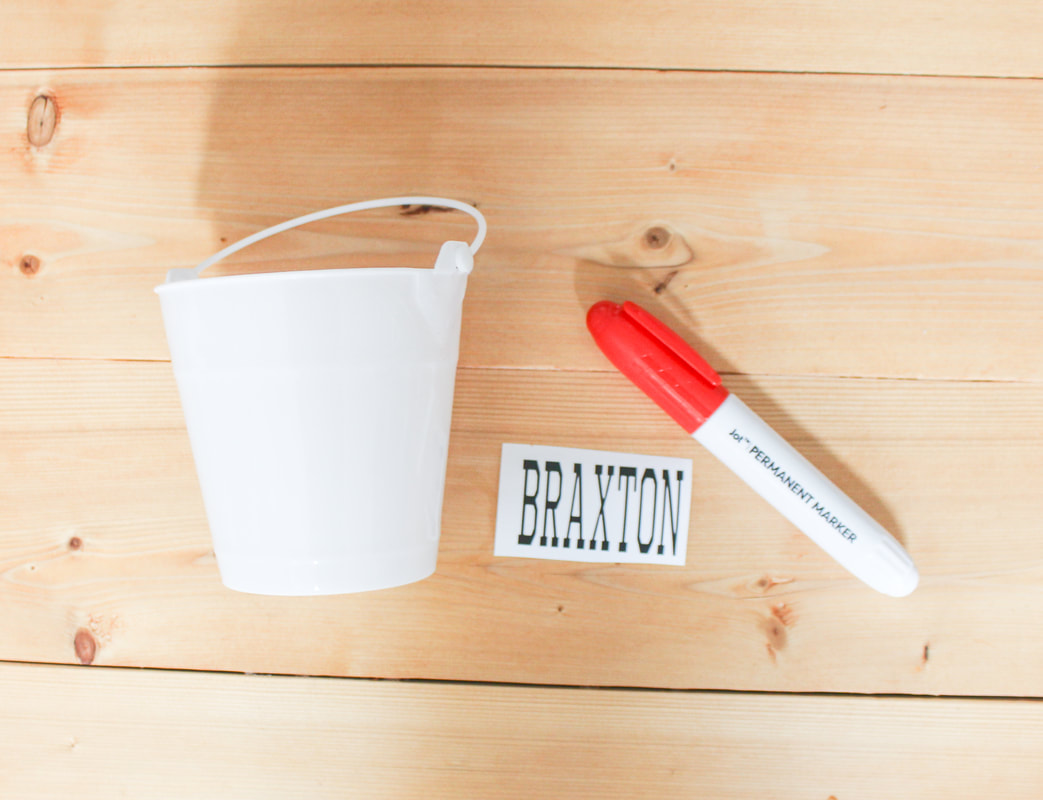
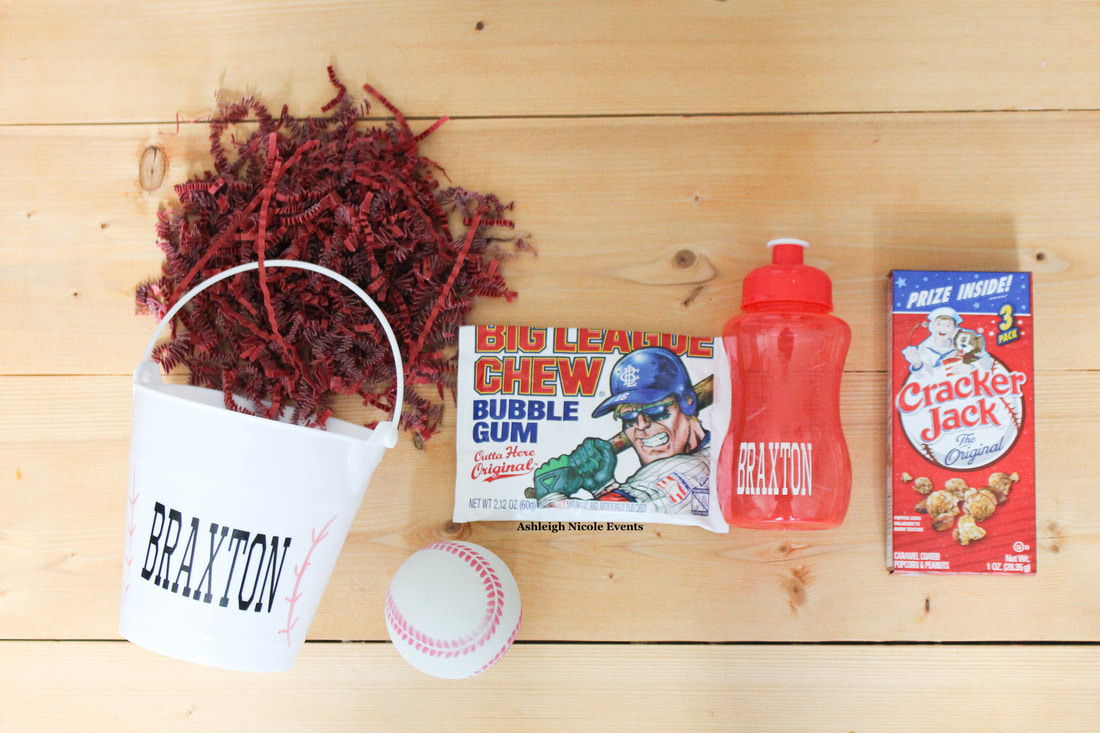
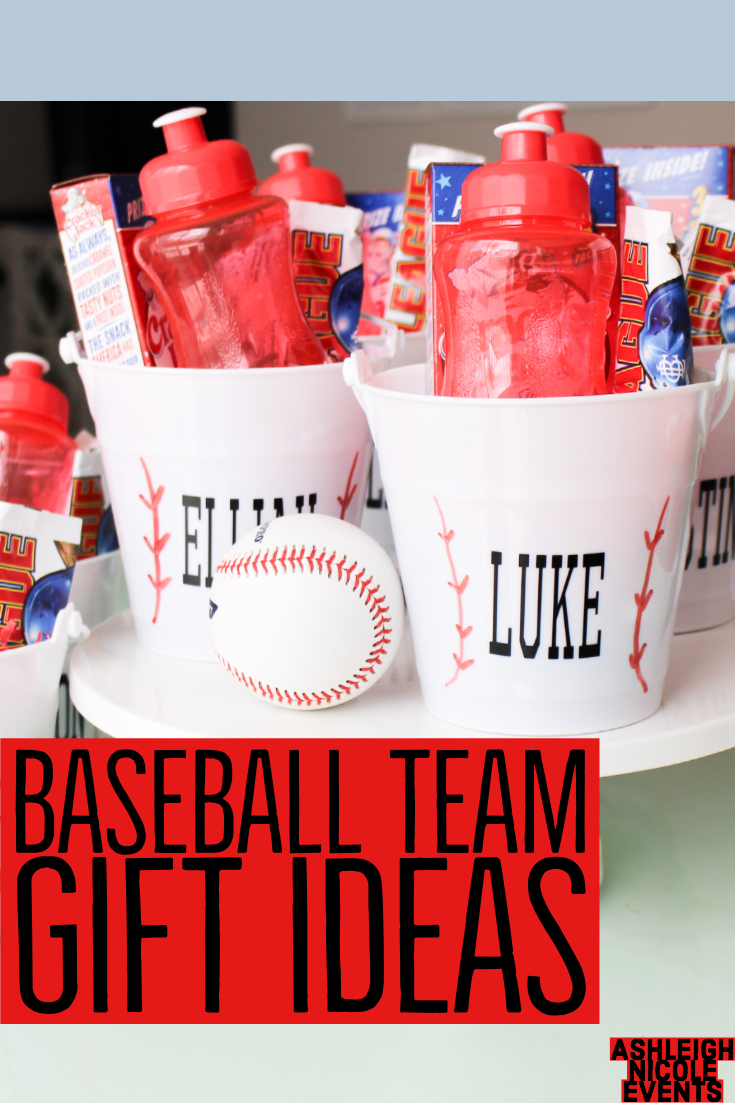
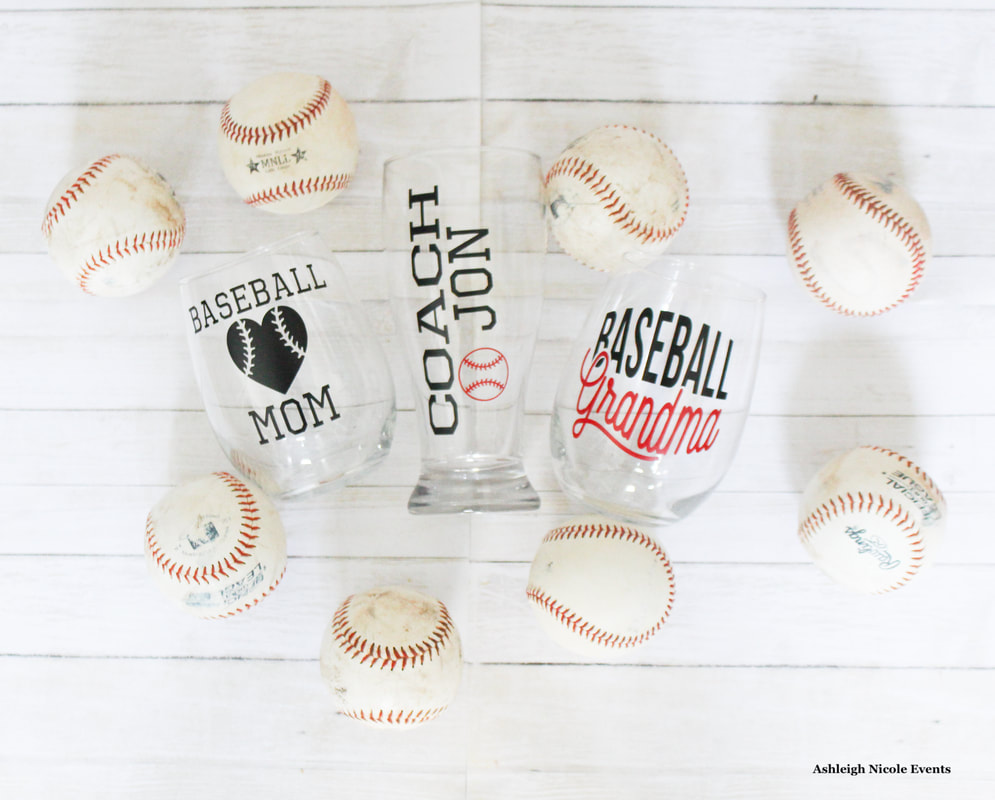
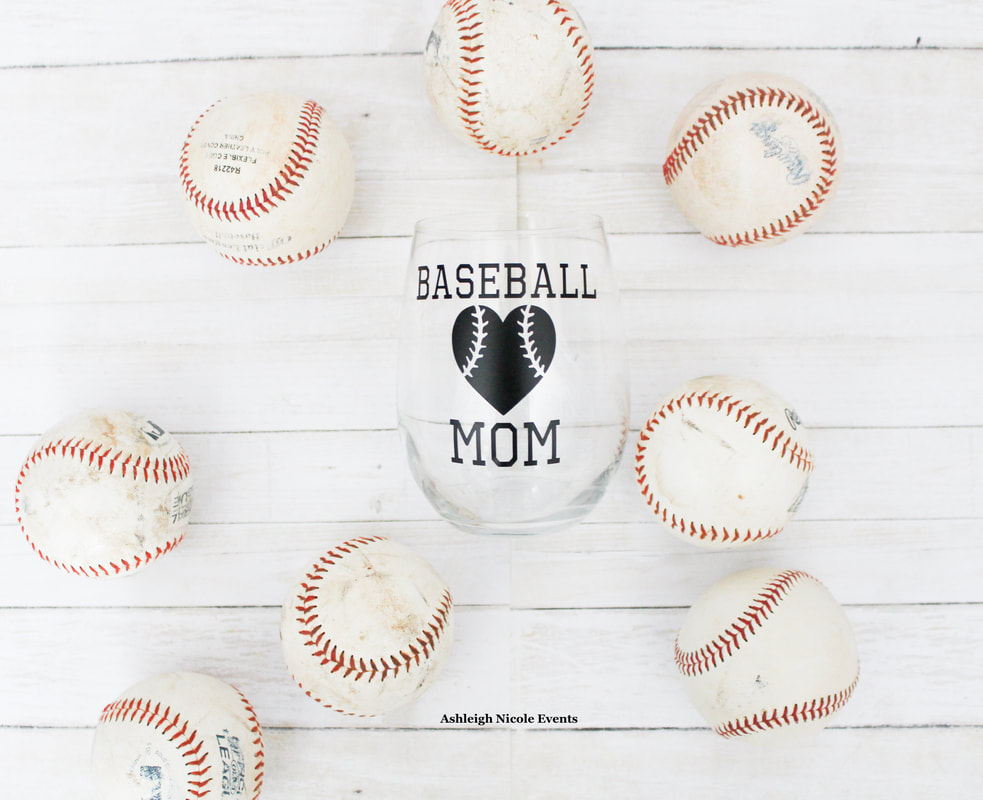
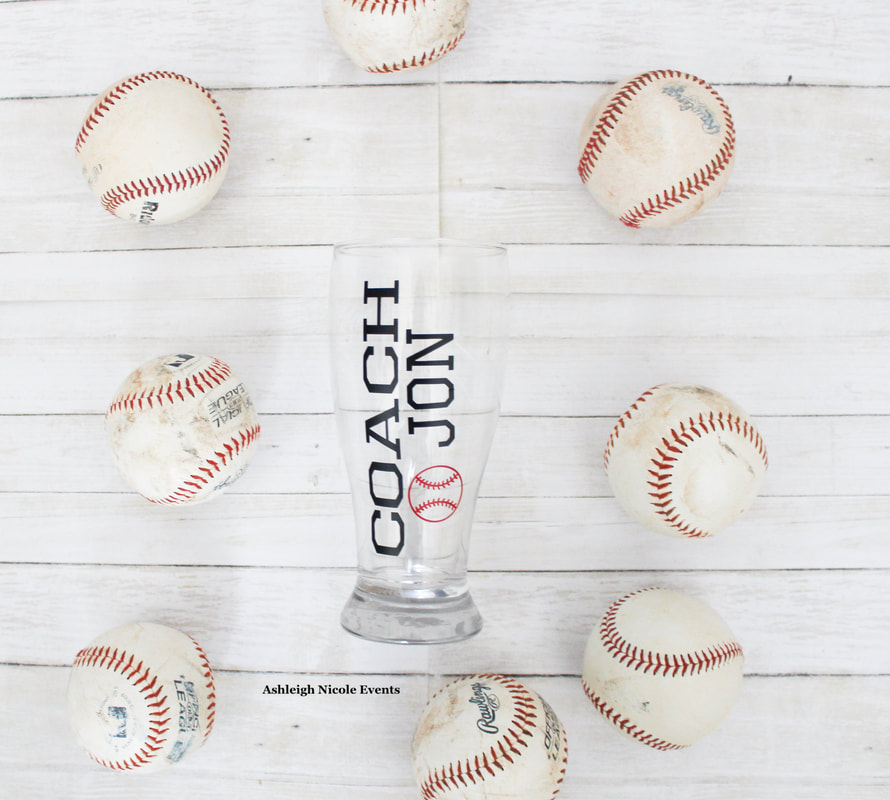
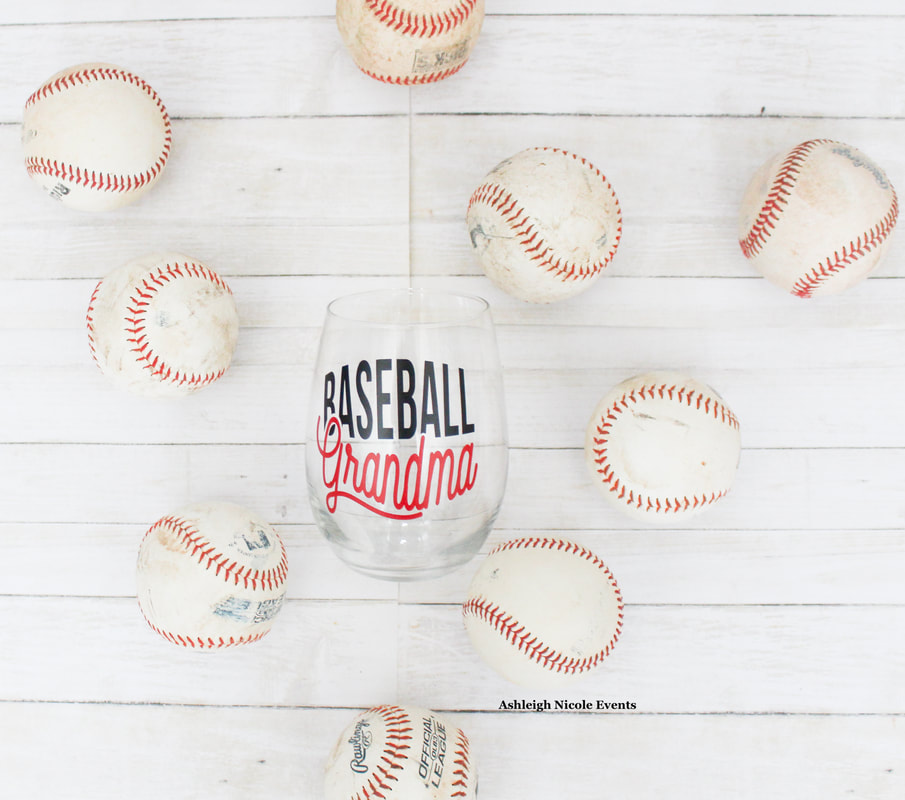
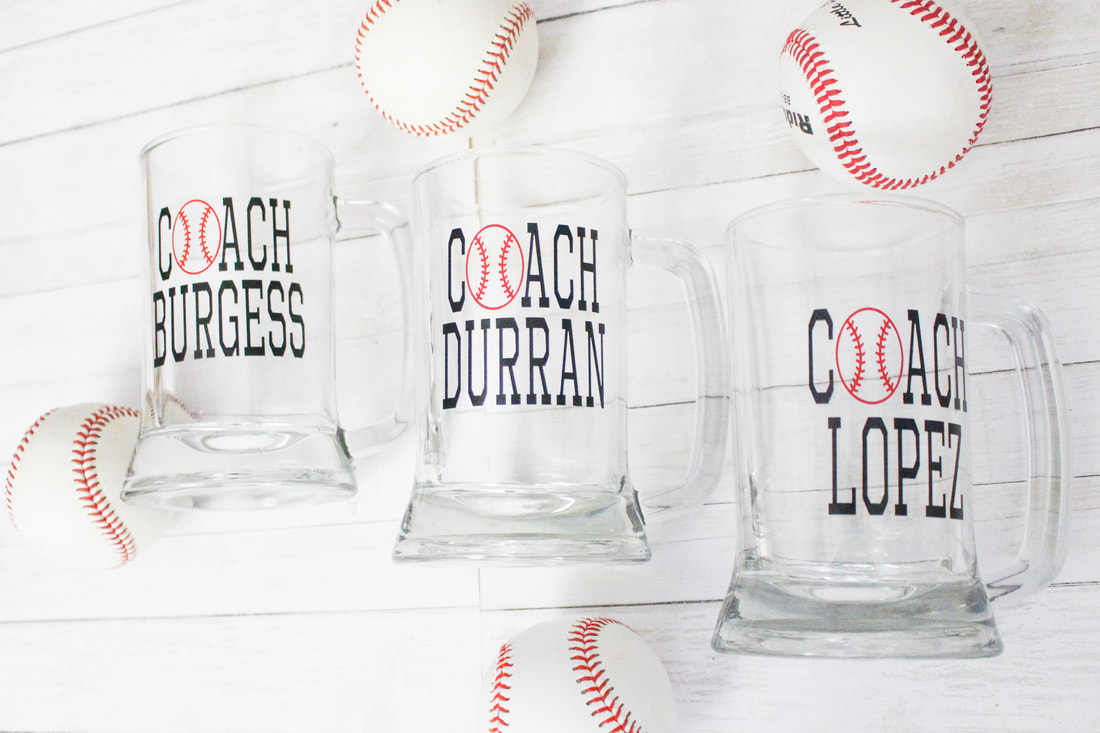
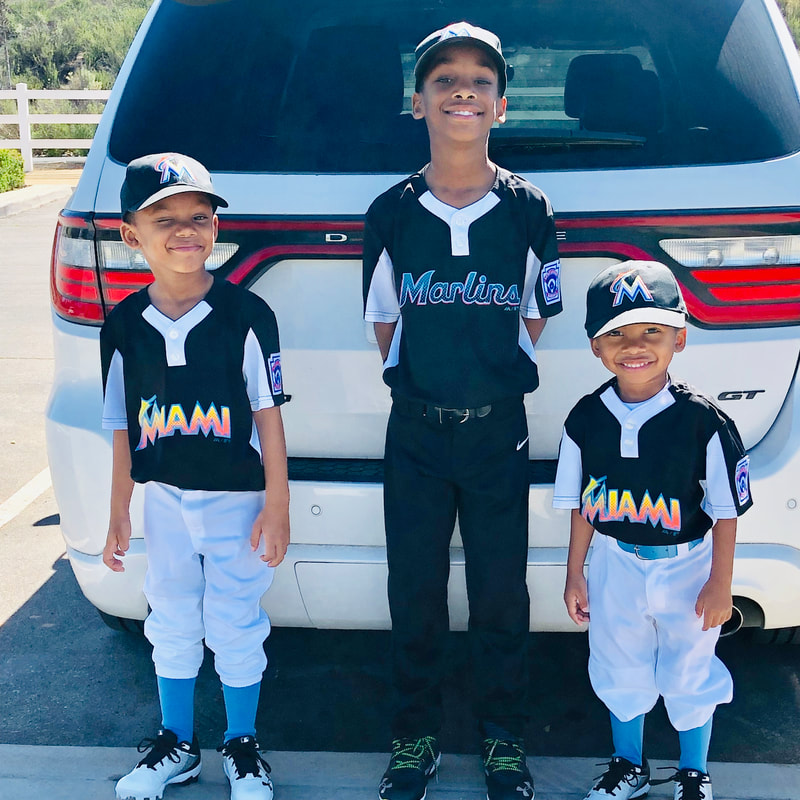
My 3 little boys all play little league baseball and my husband volunteers to coach them after work. I absolutely love watching all of my guys on the field. Making memories that none of us will ever forget.
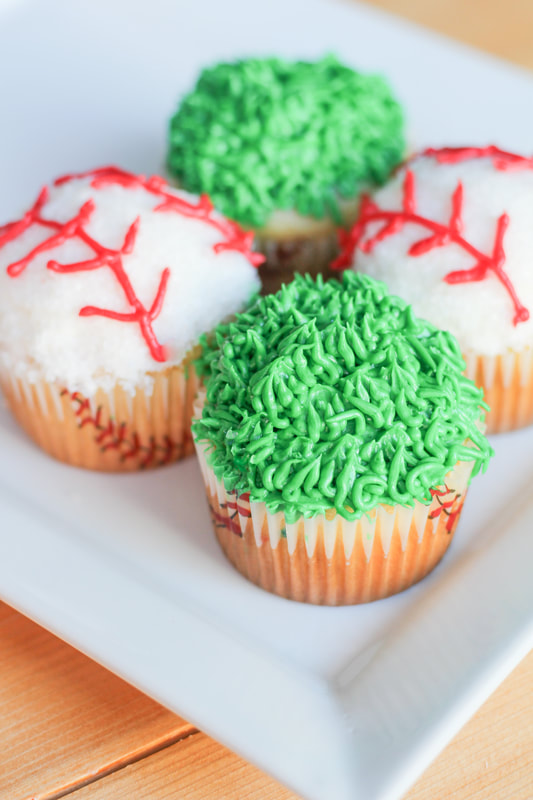
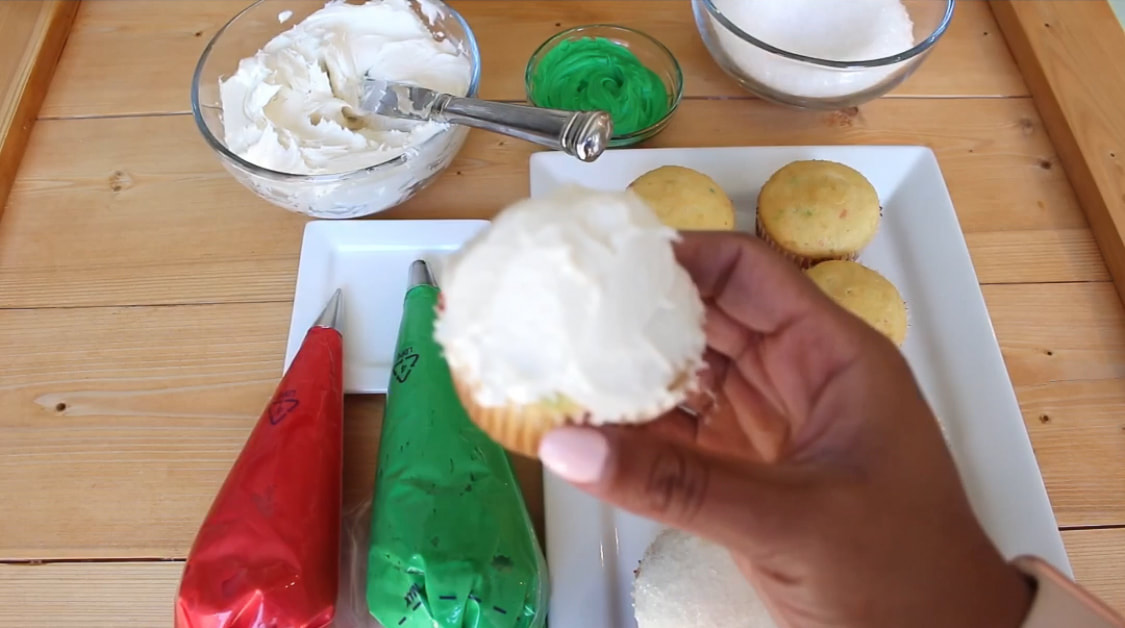
It’s nearing the end of the season so I decided to make baseball theme cupcakes for the team party! Today, I’d love to show you how I decorated them! 
You will need...
Wilton Piping tip #3 Wilton Piping tip #233 2 Piping bag White buttercream Green buttercream Red decorating icing White sugar crystals Cupcakes 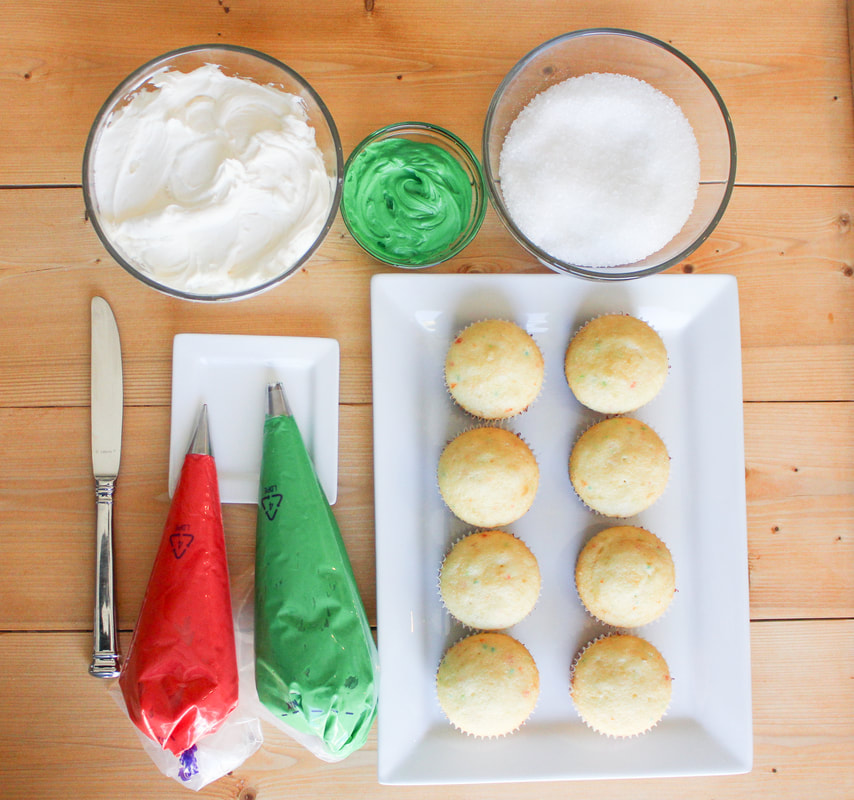

I used regular boxed cake mix and made 24 cupcakes following the directions on the box. I purchased the cupcake liners here from Party City.


Once the cupcakes are baked and cooled, its time to decorate!
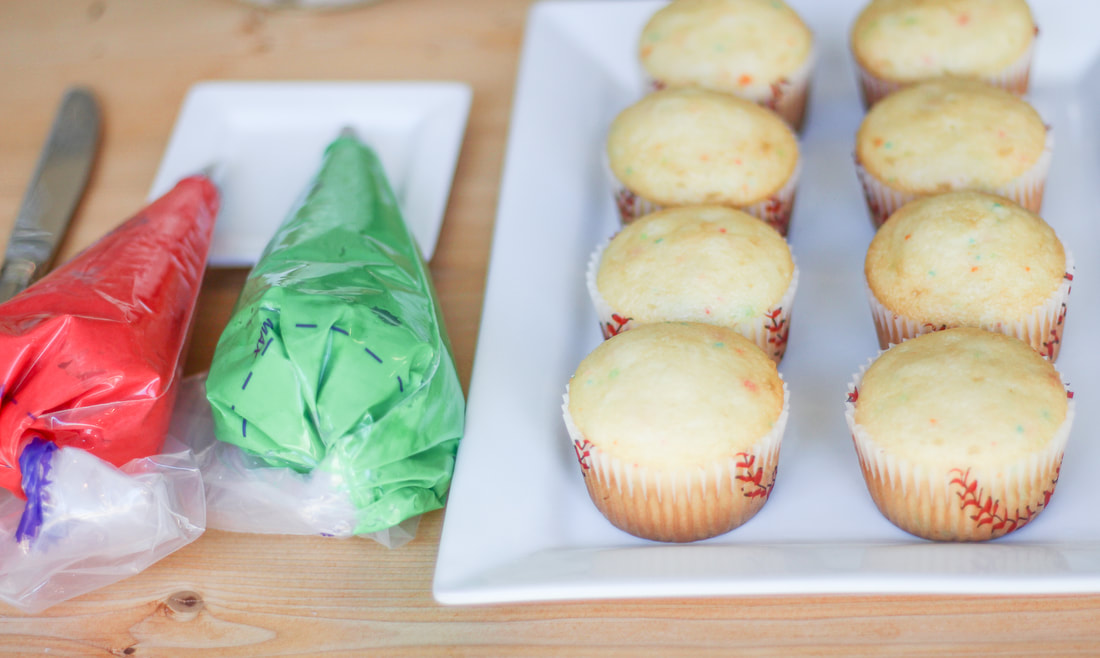
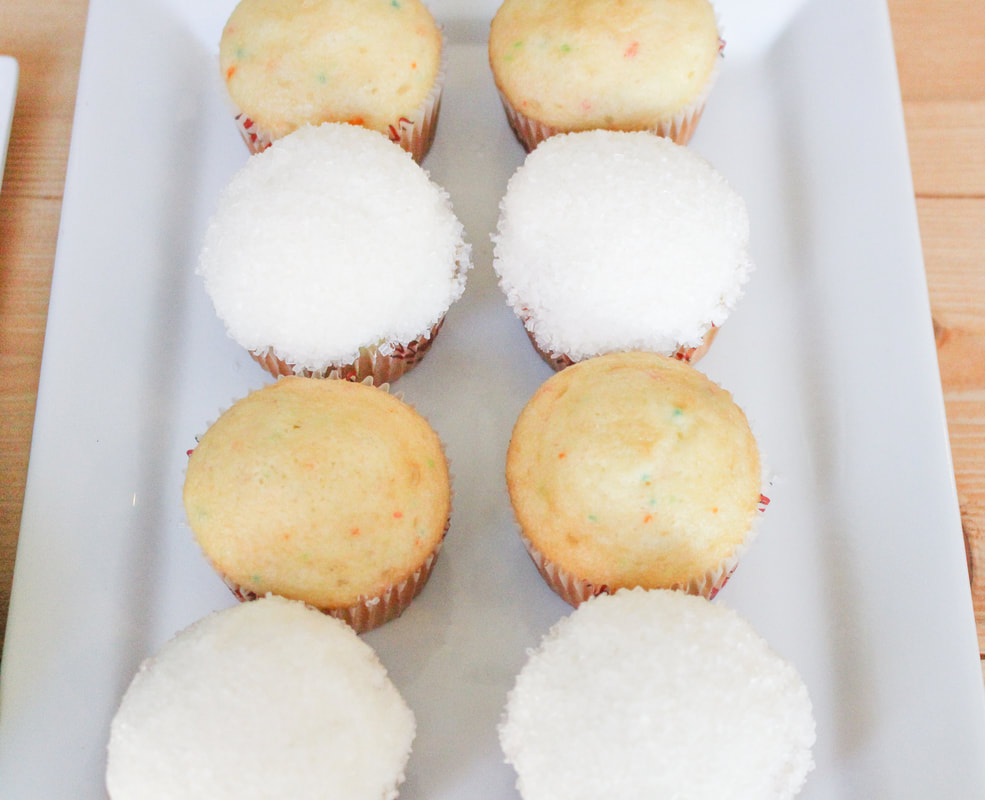
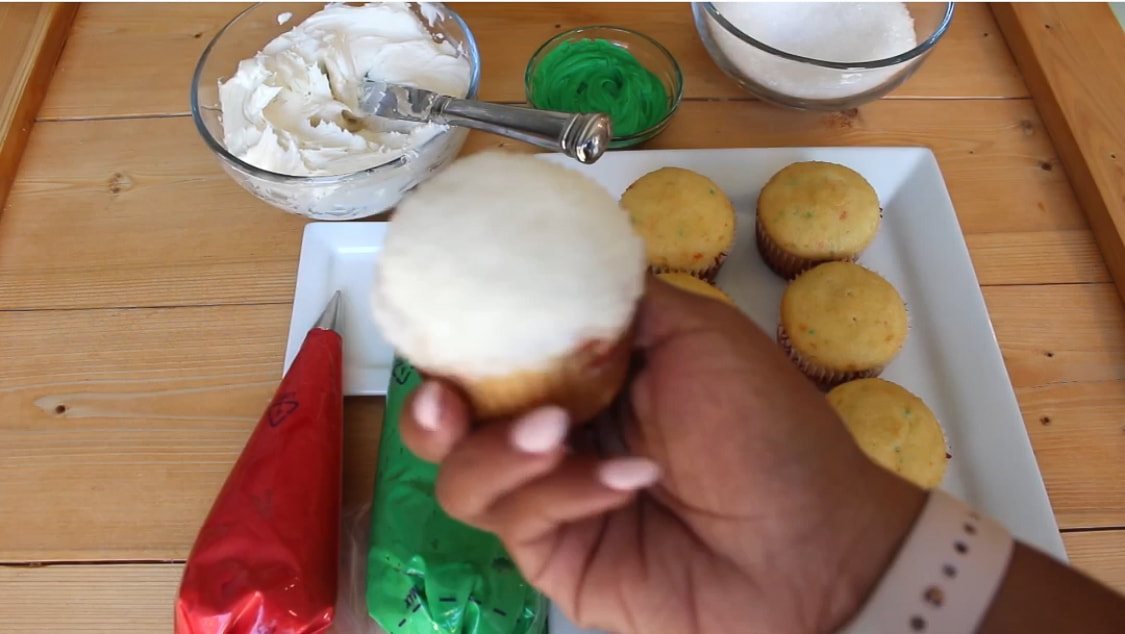
Place one heaping mound of white buttercream icing onto the top on your cupcake. Spread it out to the edges to create a dome shape. I used a butter knife but you can also you a small angled spatula.
Next, gently press the entire cupcake in the bowl of sugar crystals. Be sure to maintain the dome shape as your pressing in the sugar crystals.

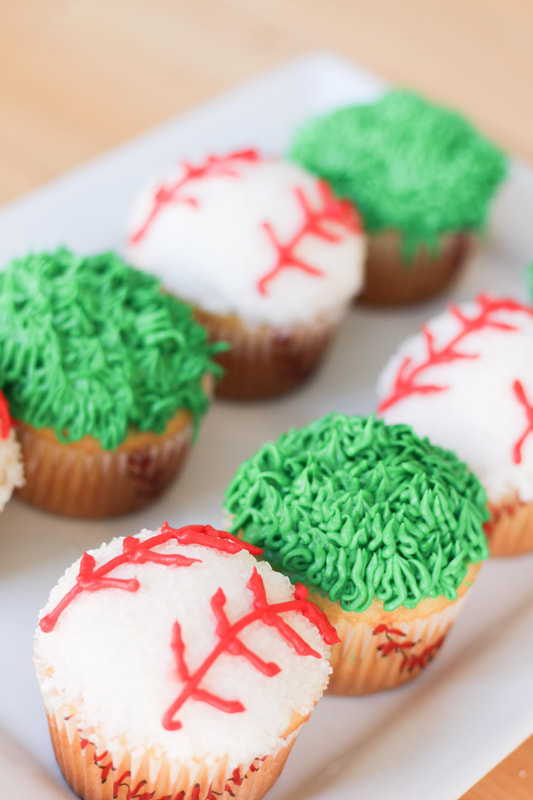
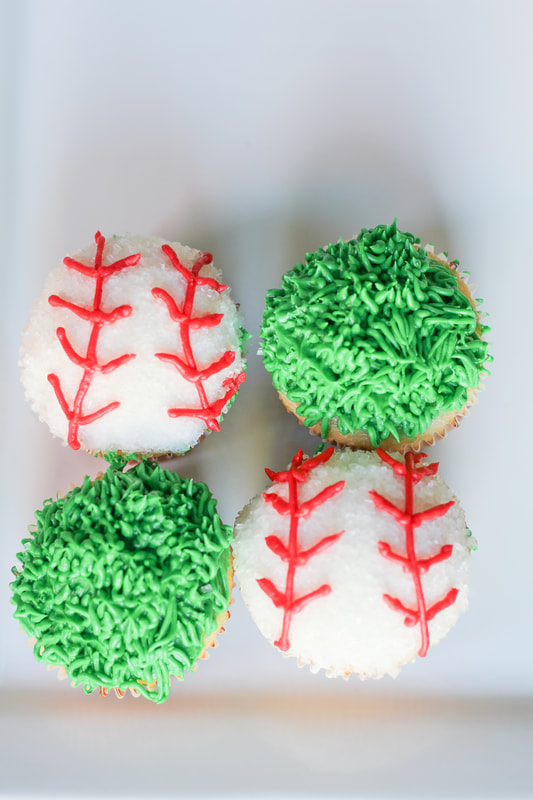
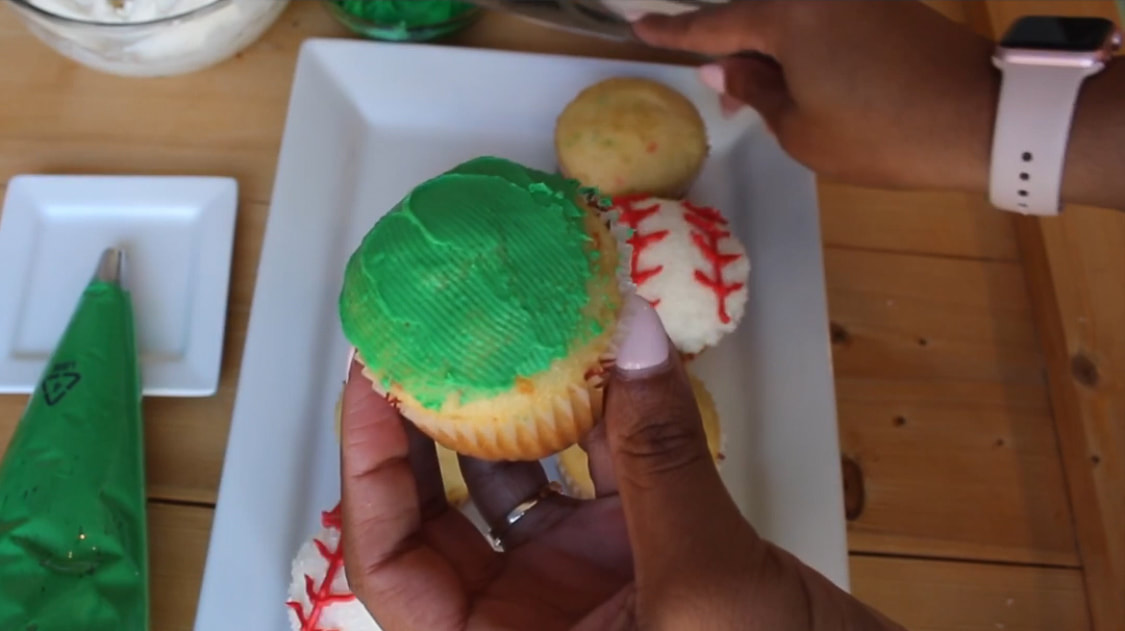
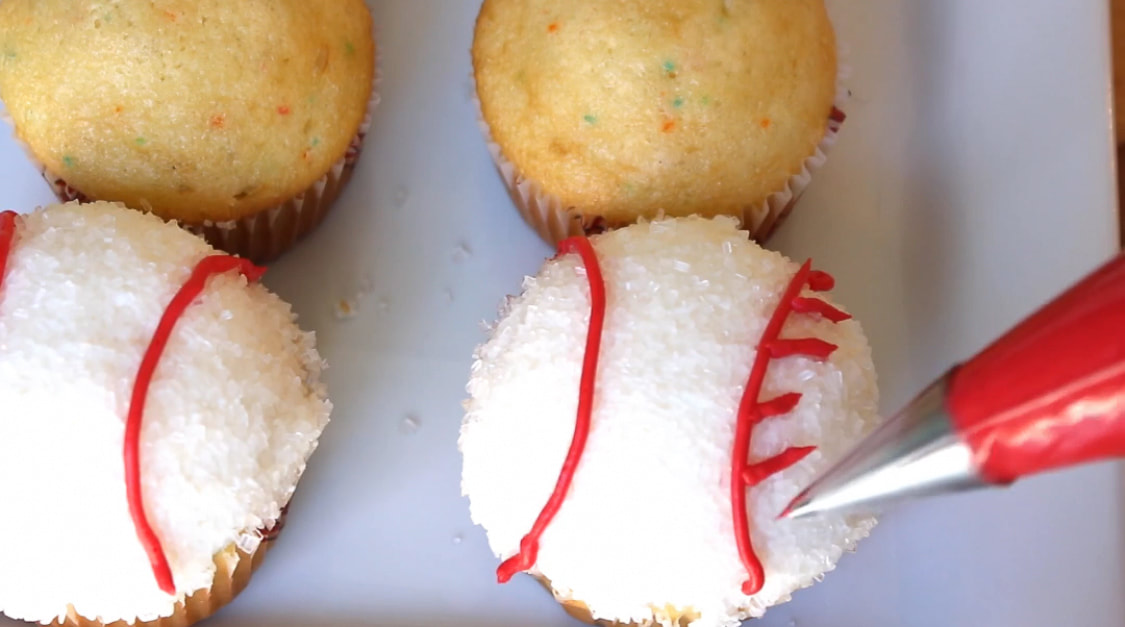
Next, take your red decorating icing in your piping bag with the Wilton #3 tip, start making the baseball stitching.
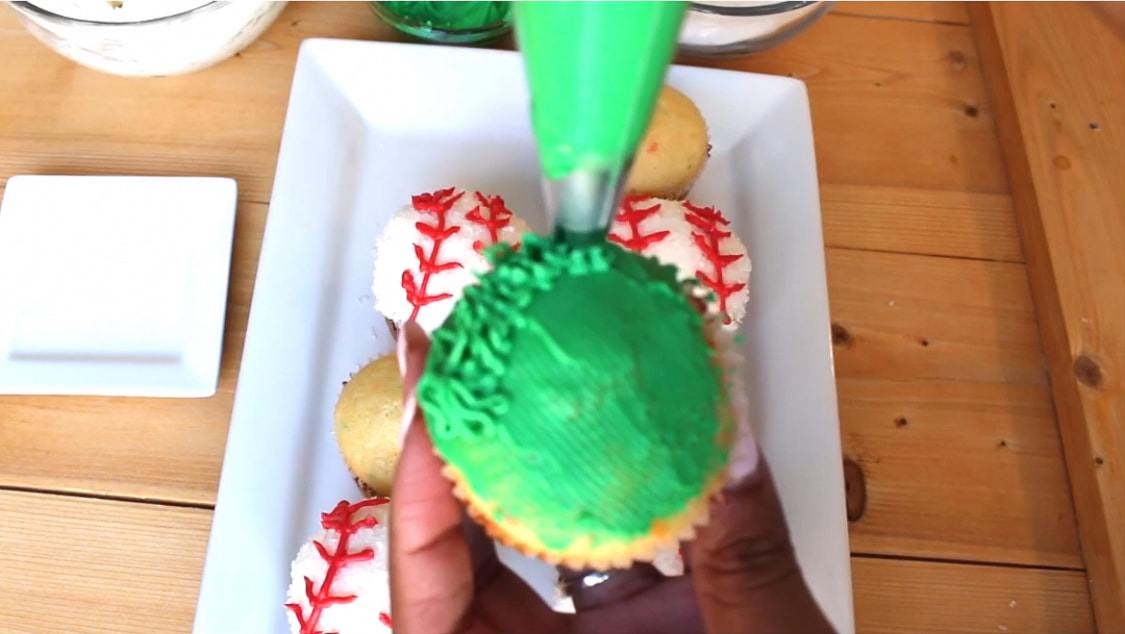
For the grass decorated cupcakes, start by adding a thing layer of green buttercream to the tops of the cupcake. Next, using a piping bag with a Wilton #233 tip add the grass design.
Tip- No time to bake? Use store bought cupcake! Simply purchase pre-made cupcakes with white icing and decorate!

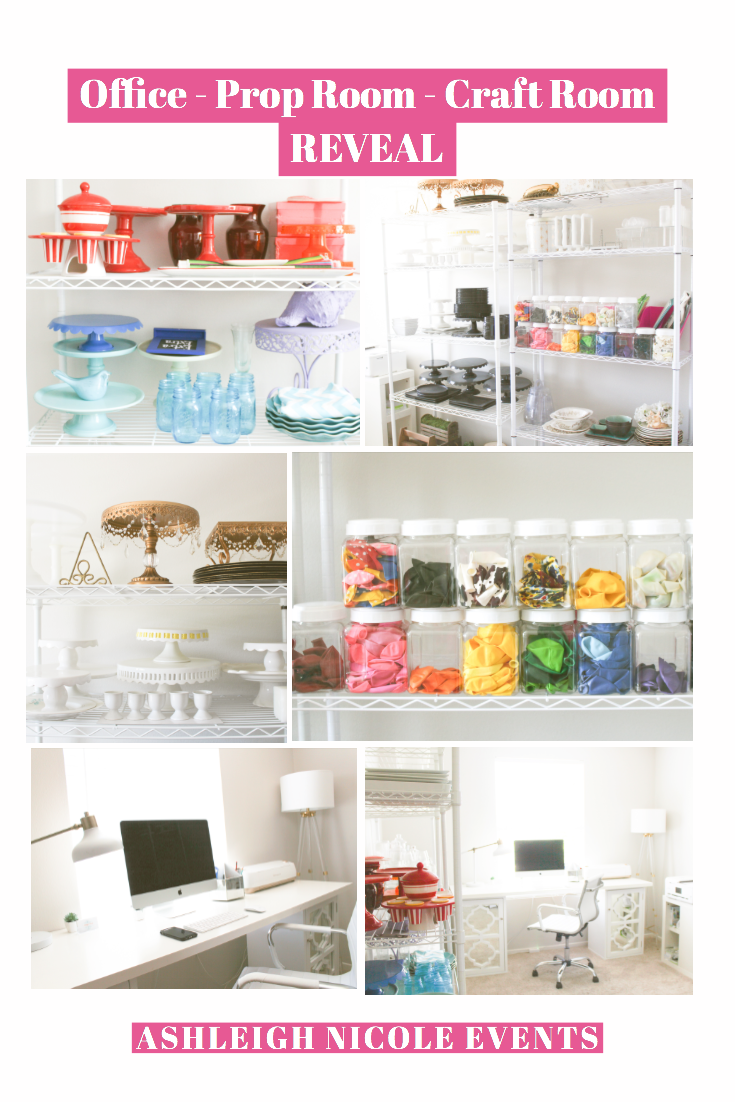

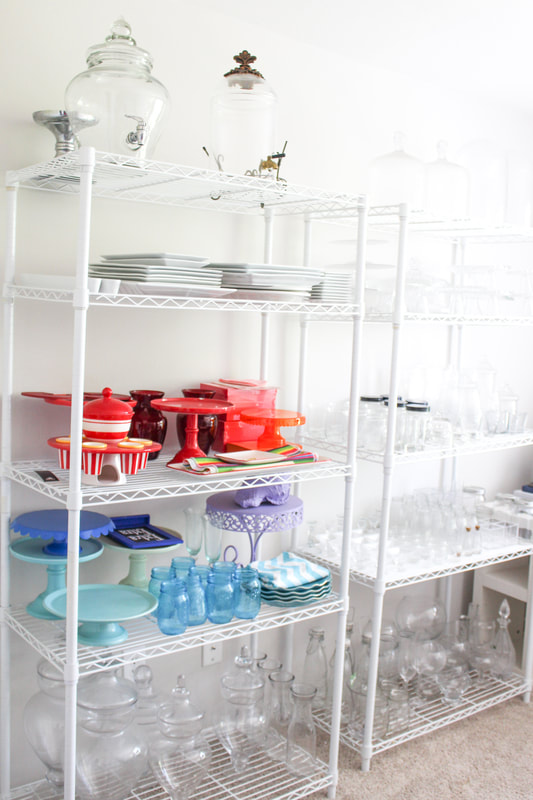
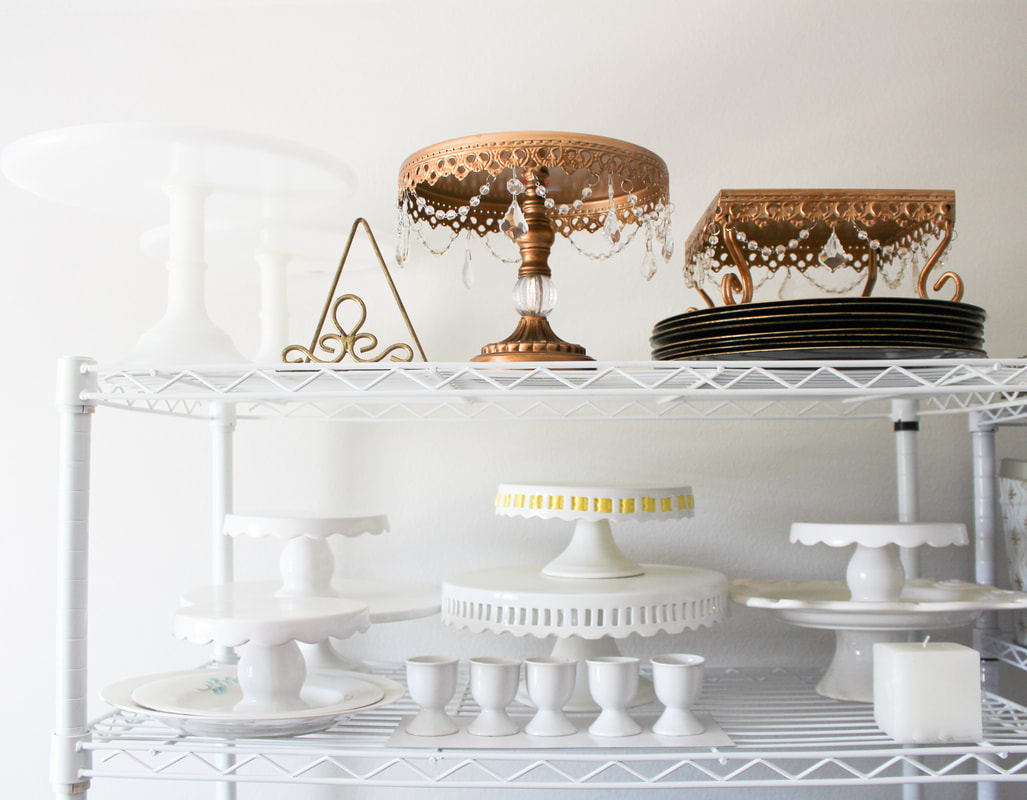
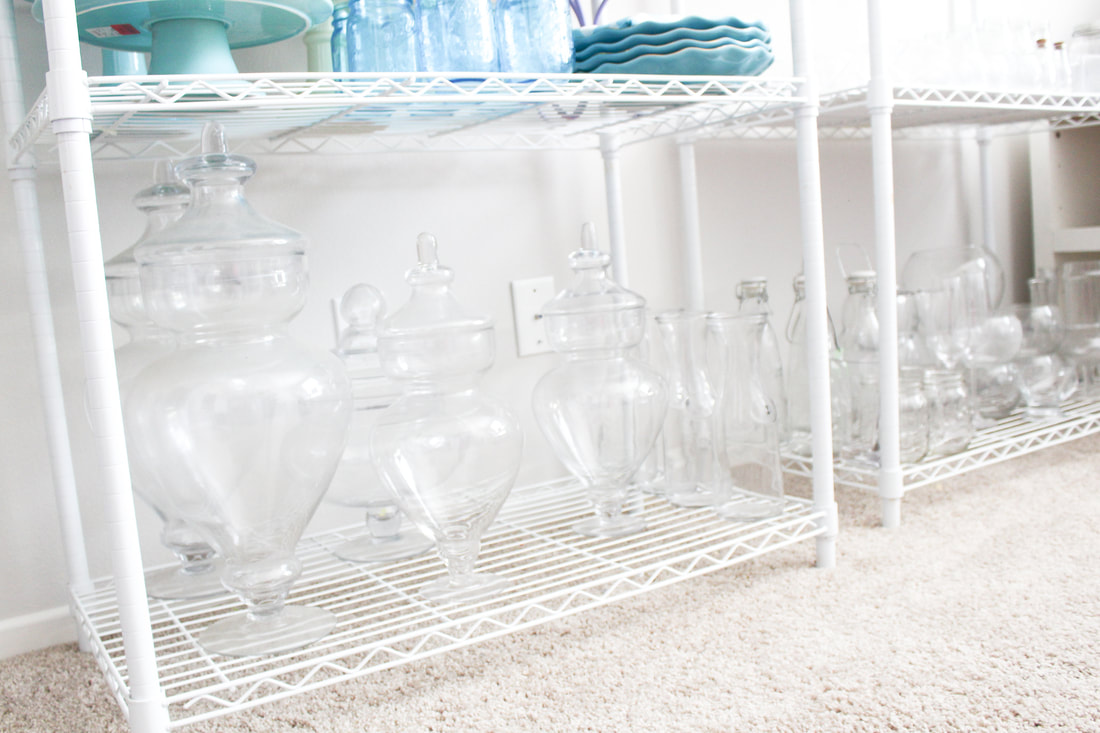
It’s my office/prop/ craft room reveal day!!! Yay! I use this space to store all the things. Craft supplies, event decor, props, etc.
It’s still a work in progress but it works perfectly for now. 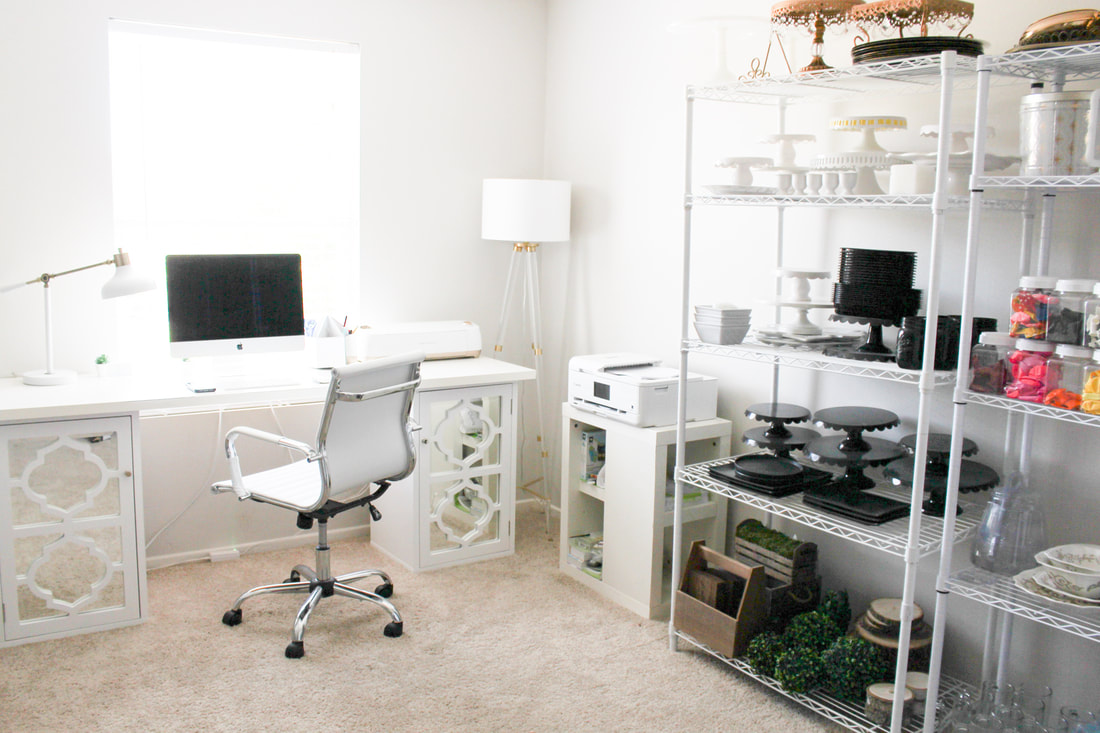
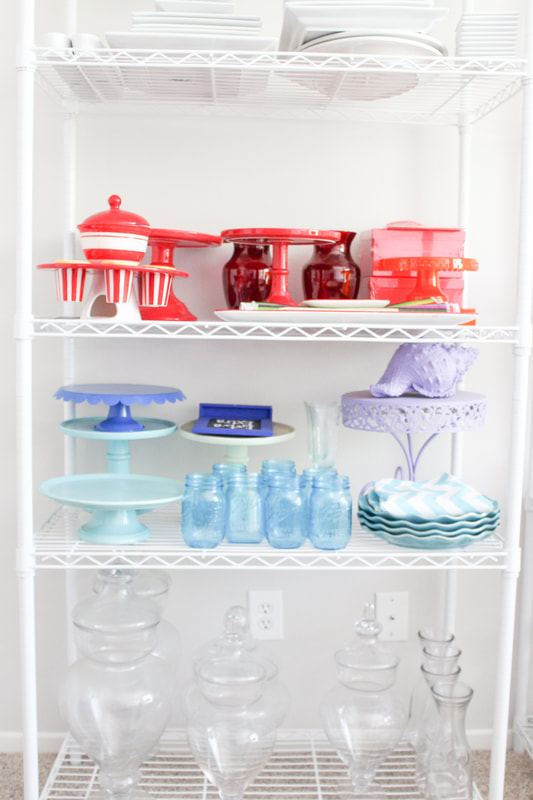
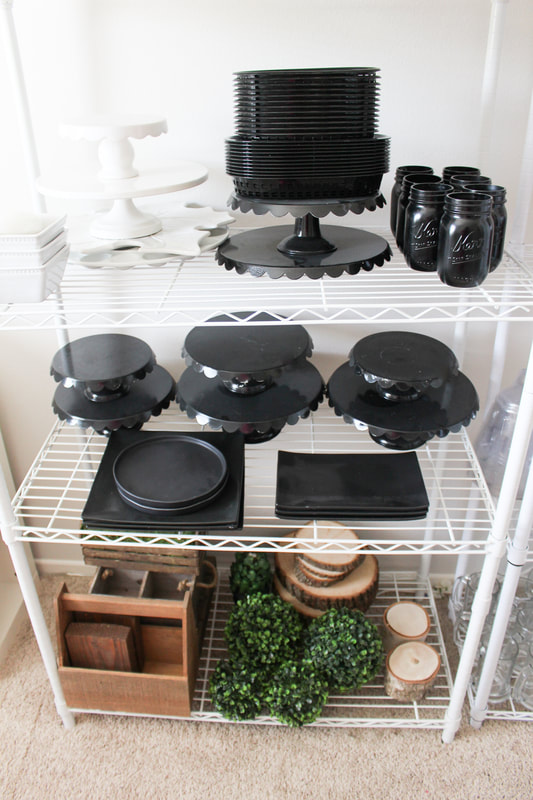
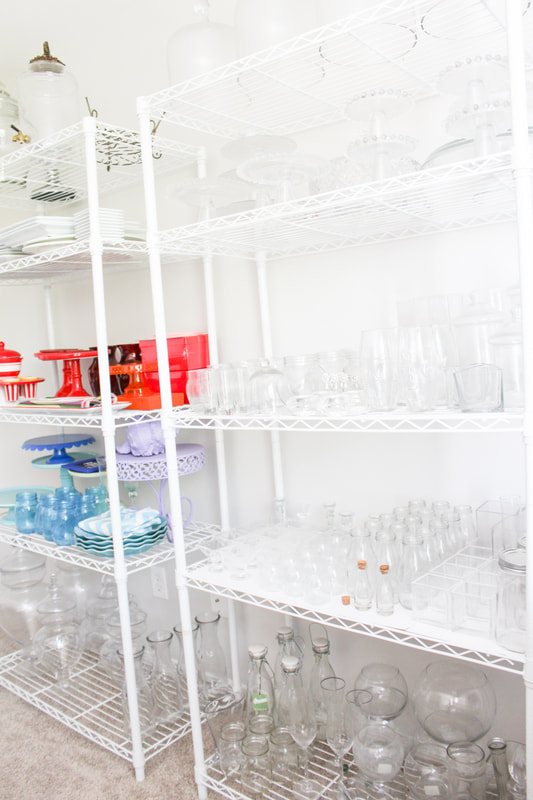
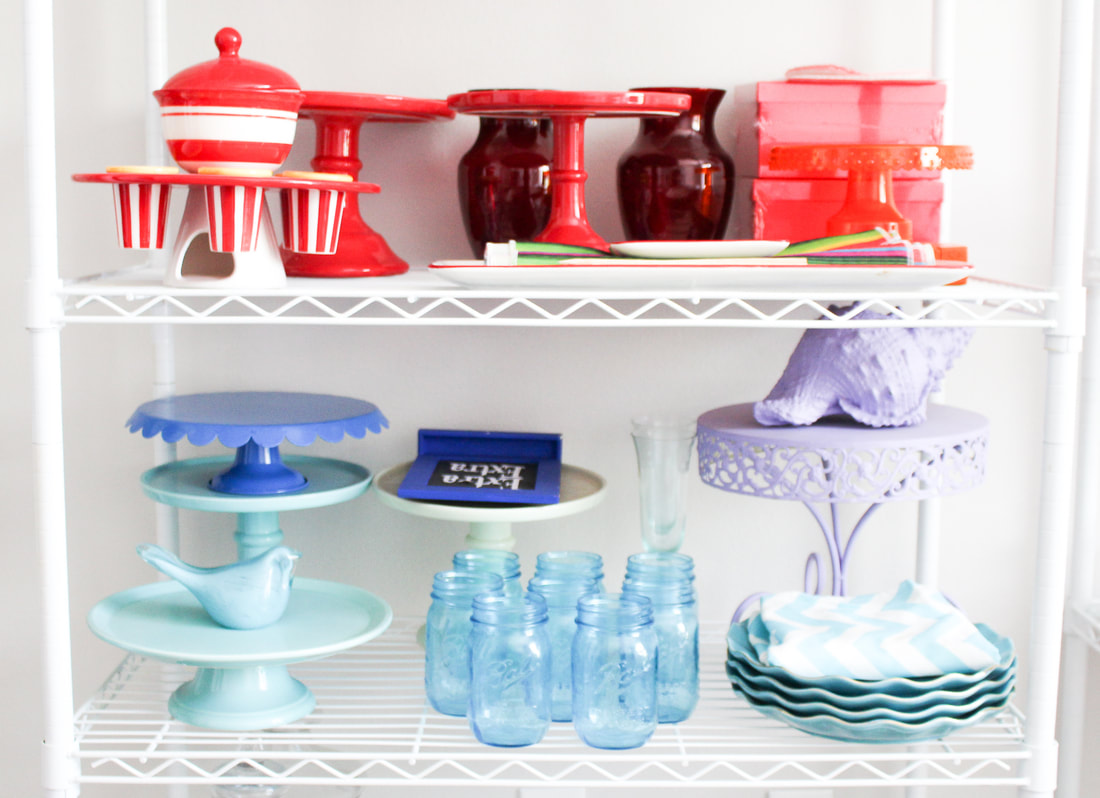
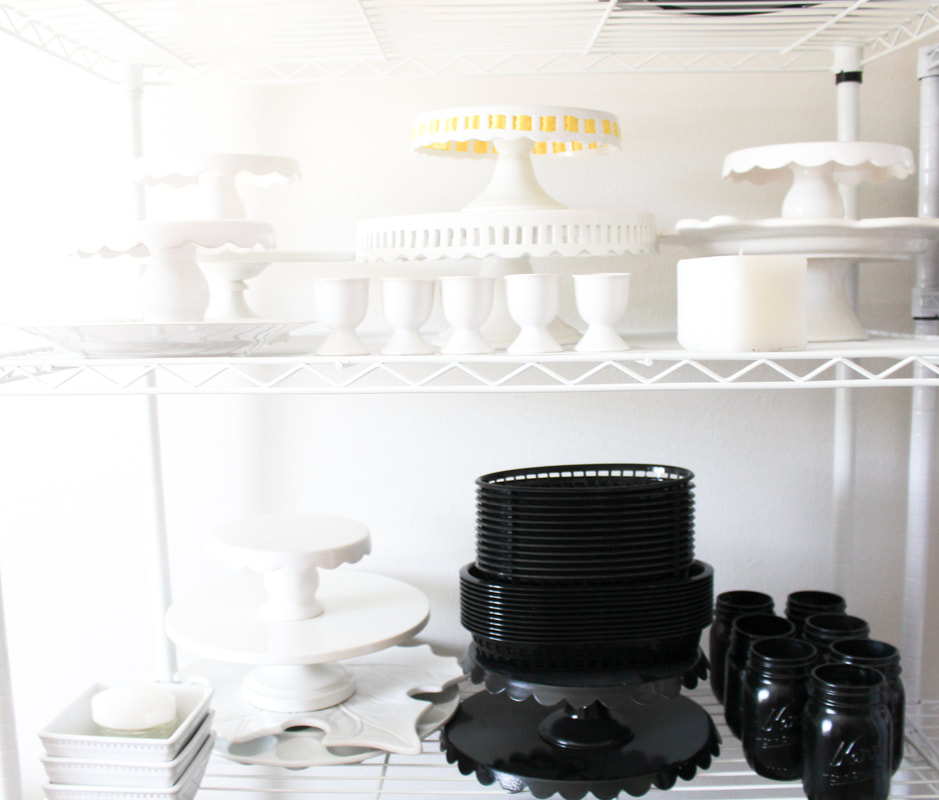
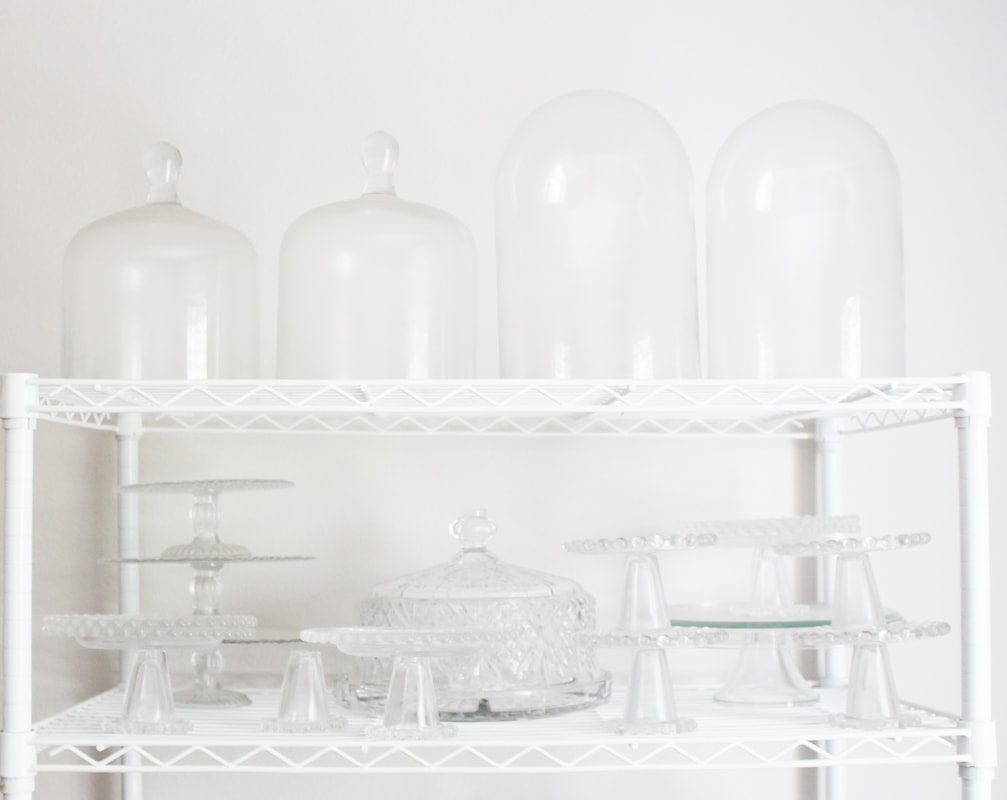
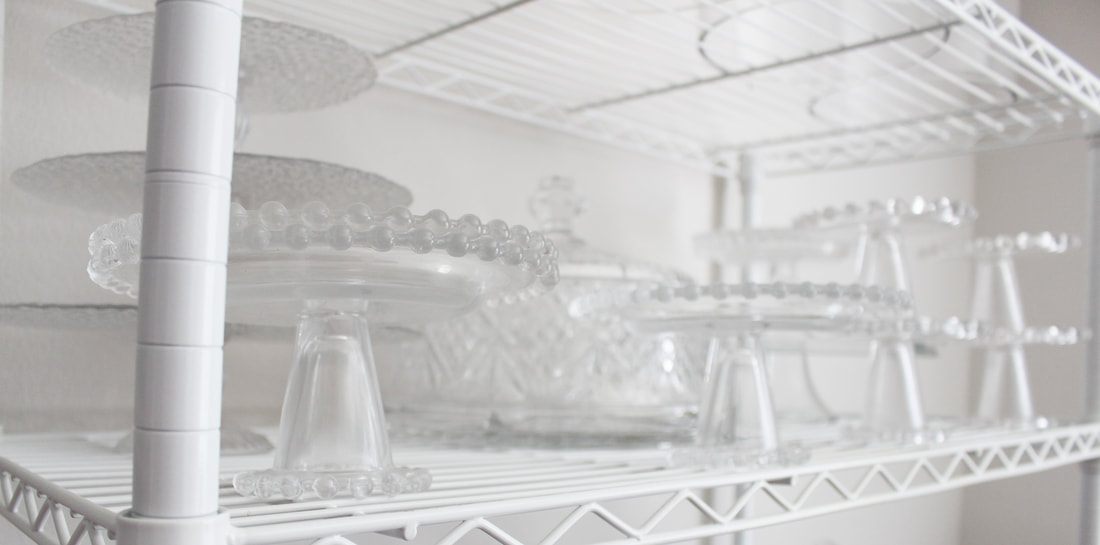
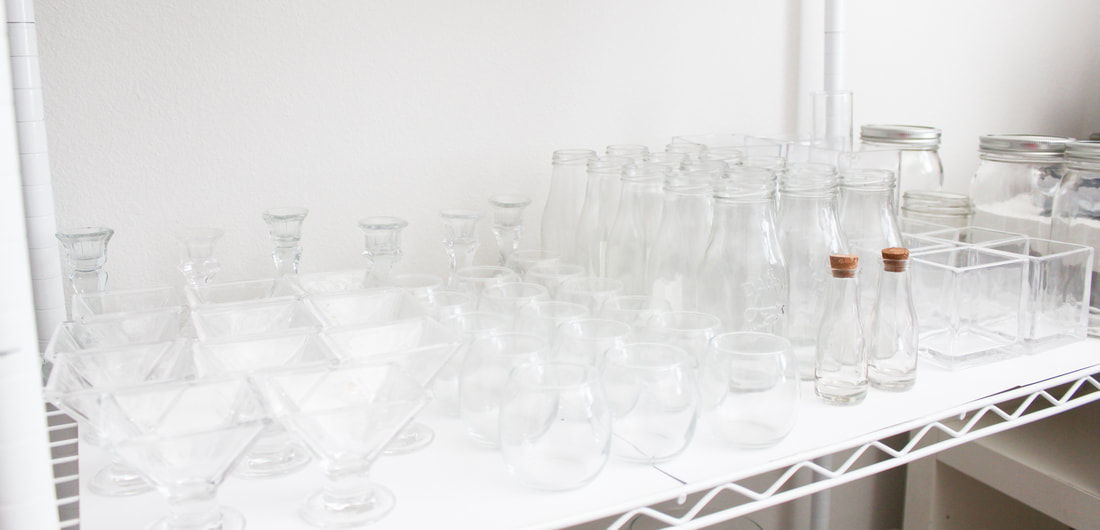
I love having everything grouped together by color. It’s so much easier grabbing things I need when it’s organized this way.
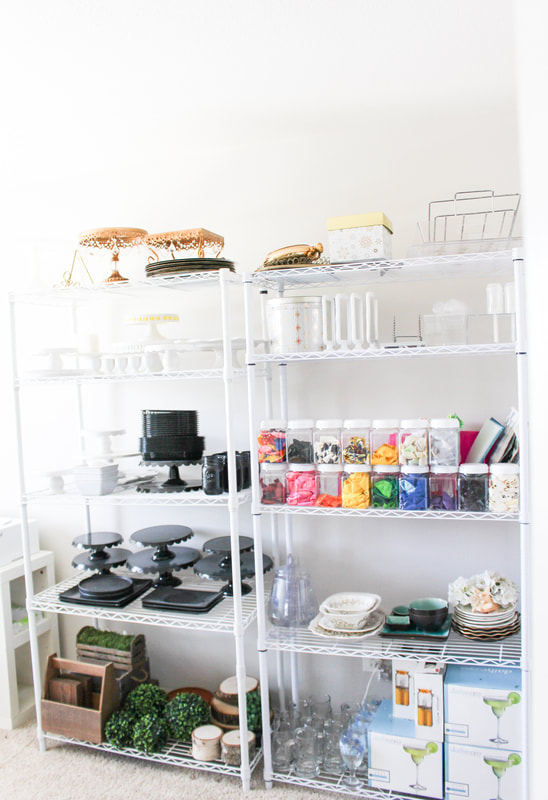
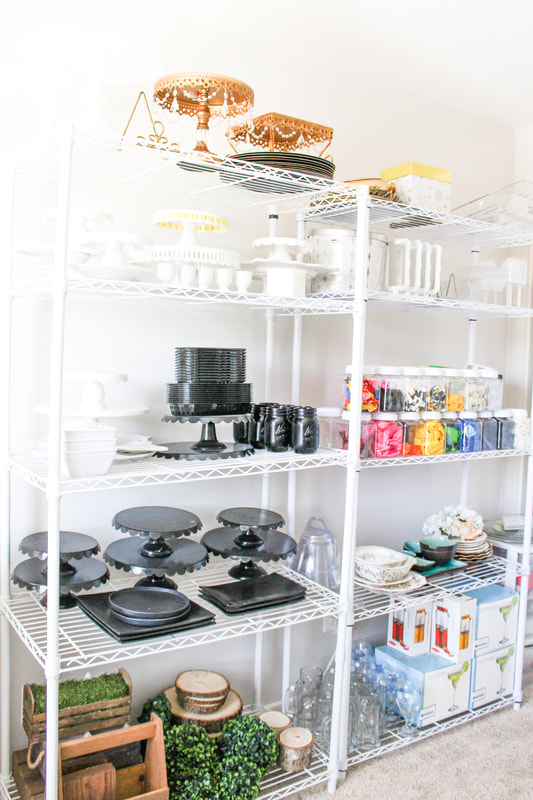
I’ve collected my cake stands and platters from mainly HomeGoods and World Market. (Two of my favorite stores)
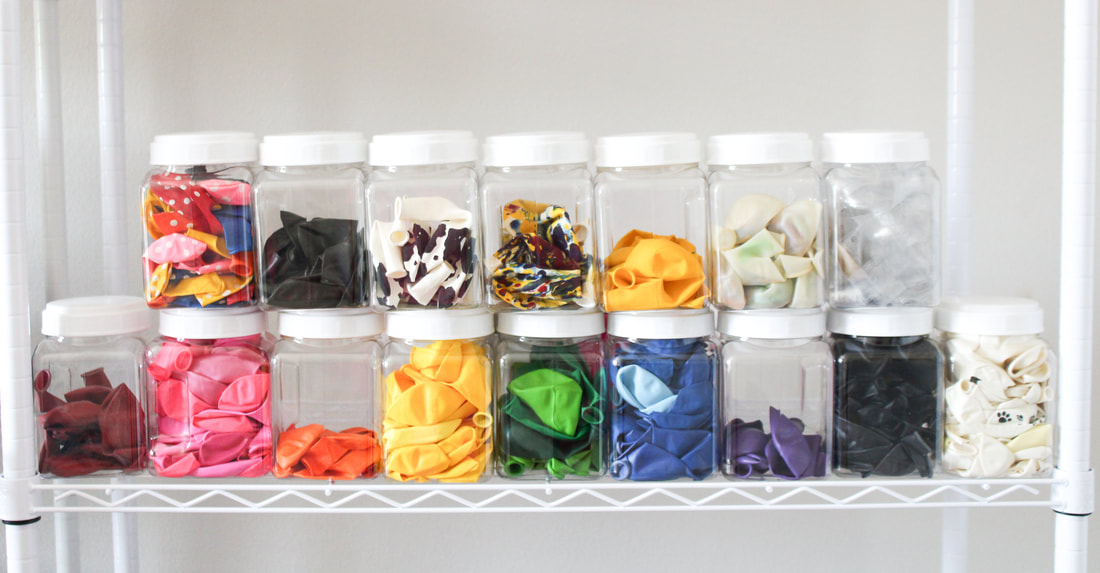
I found these cute little storage containers from the Dollar Tree! They store my balloon collection perfectly!


My desk is probably the piece that I love the most about the space. I purchased it here from Home Depot. It’s came with a larger center piece but I use that in my bedroom. I actually purchased two of these console sets and use the other one as a tv stand in my living room. Inside the desk cabinets is where I store my Cricut vinyls and random craft supplies. 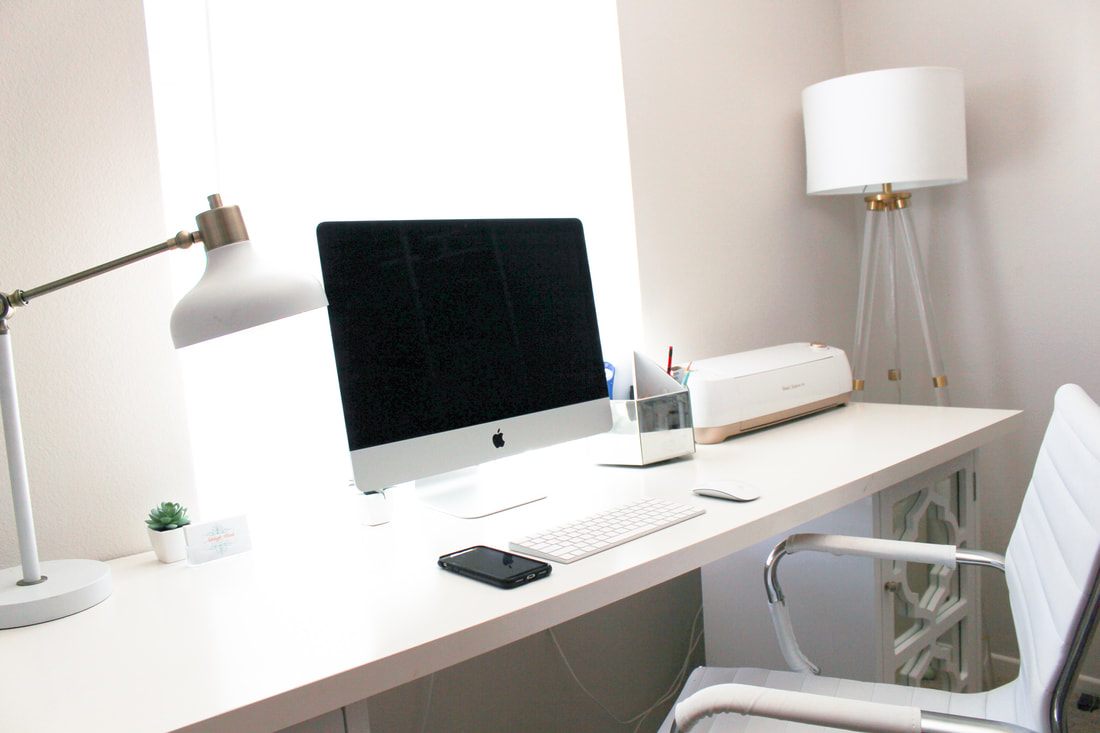
The only area of the room not pictured is the closet. That’s where I store my event table linens. I also have a 3-drawer plastic storage unit to hold ribbons, card stock and craft supplies. Once I get that organized I’ll update this post. Promise! 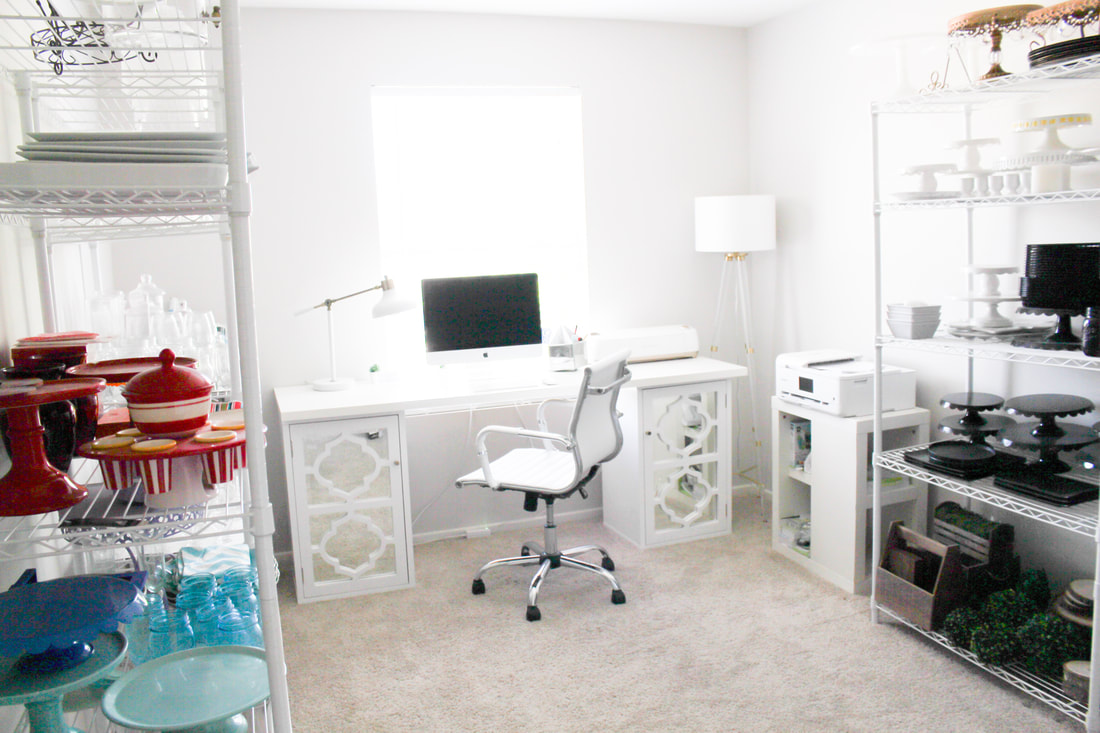
Eventually, alllll of this will be moved downstairs to the other spare bedroom and this space will become something completely different! Stay tuned!
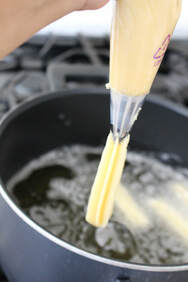
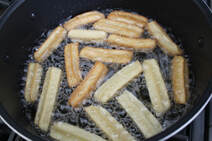
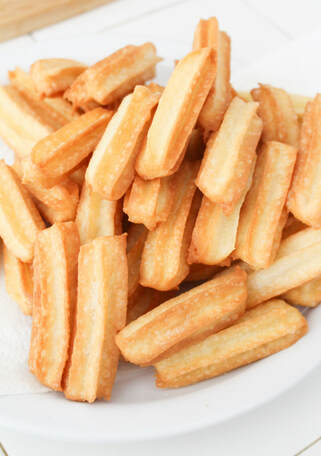
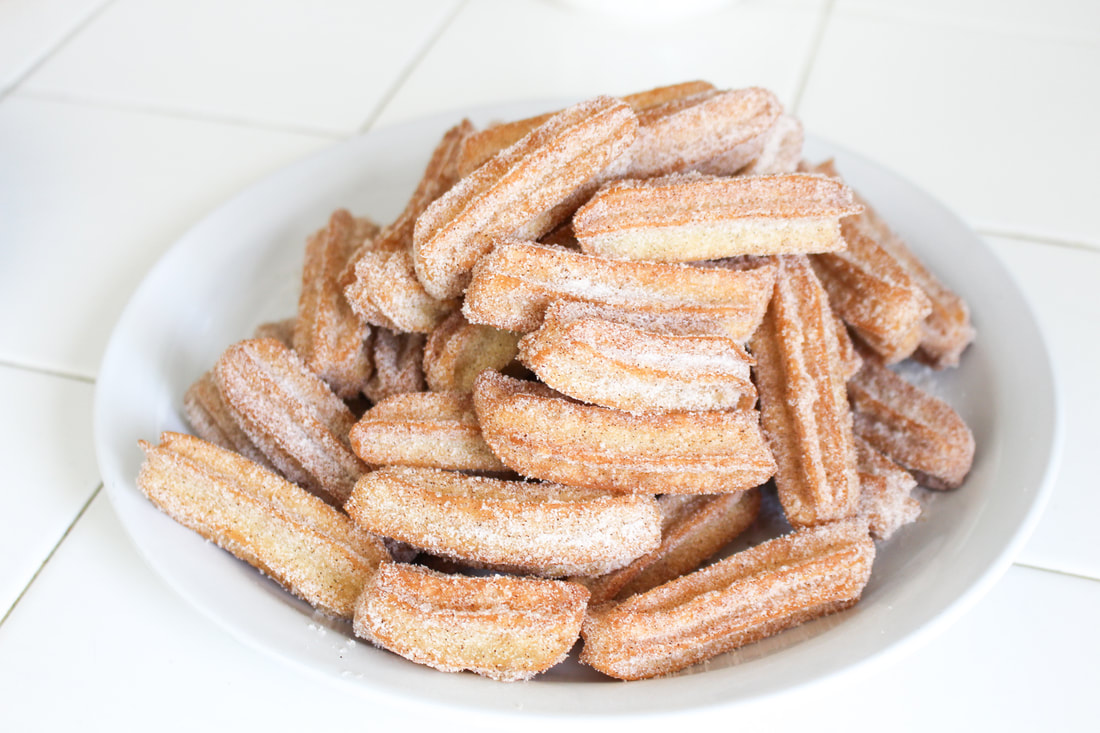
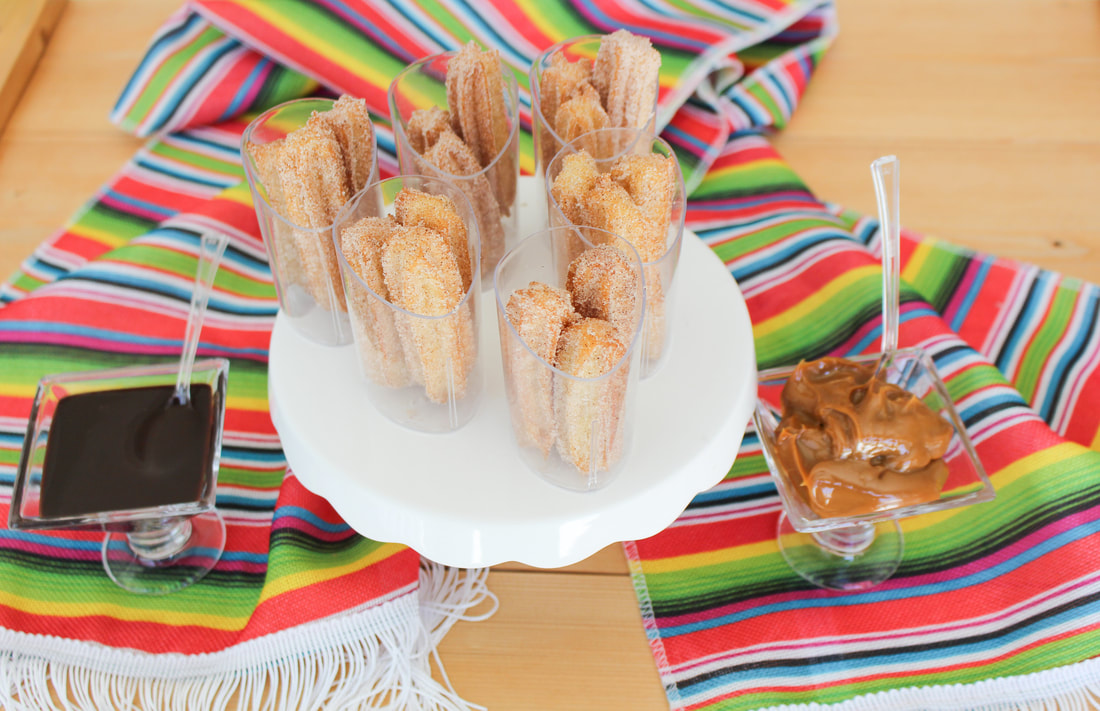
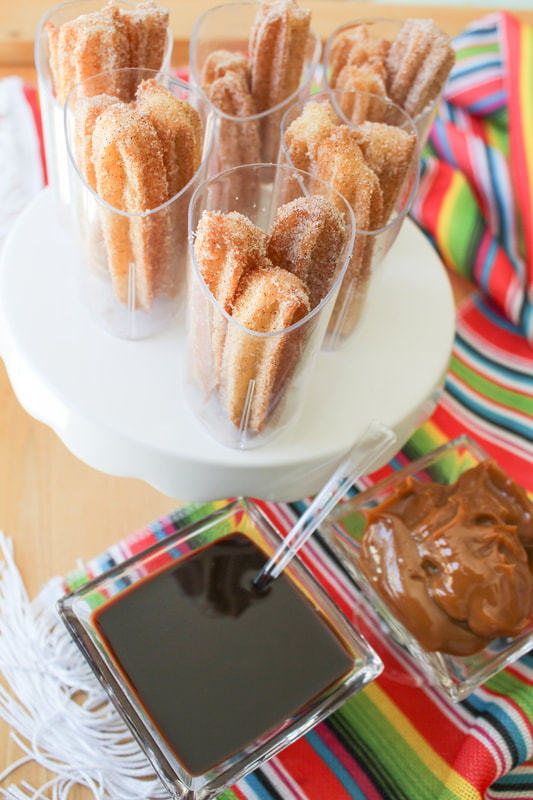
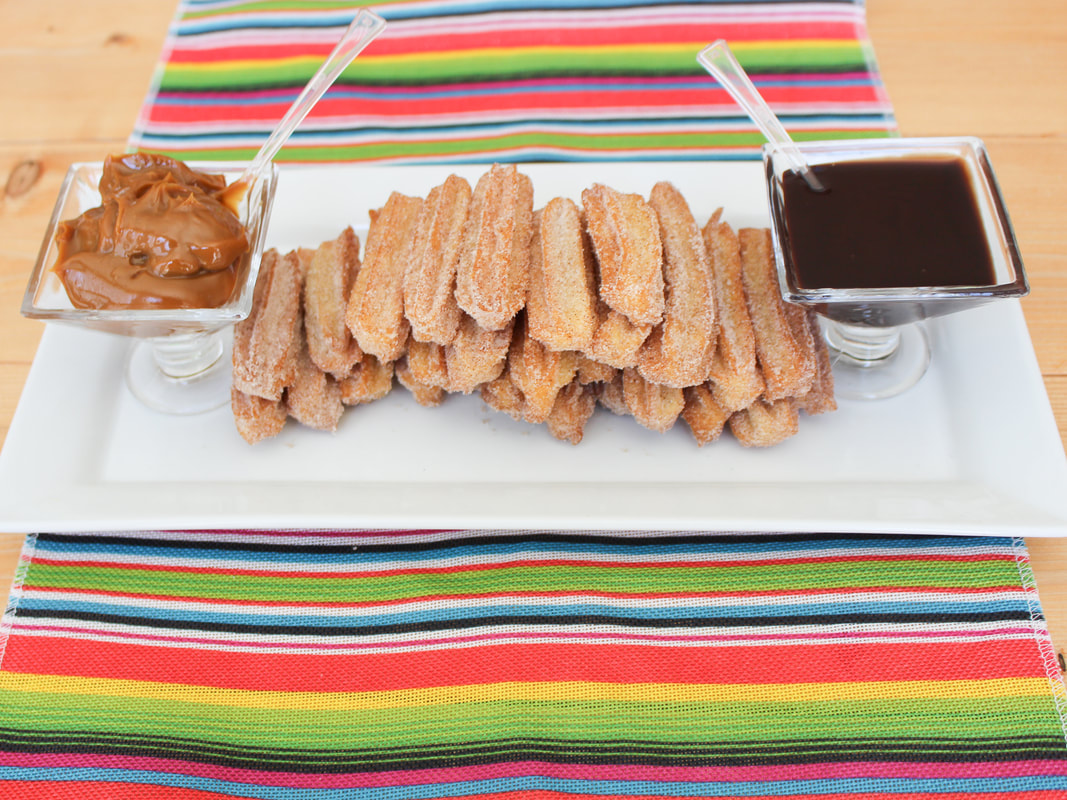
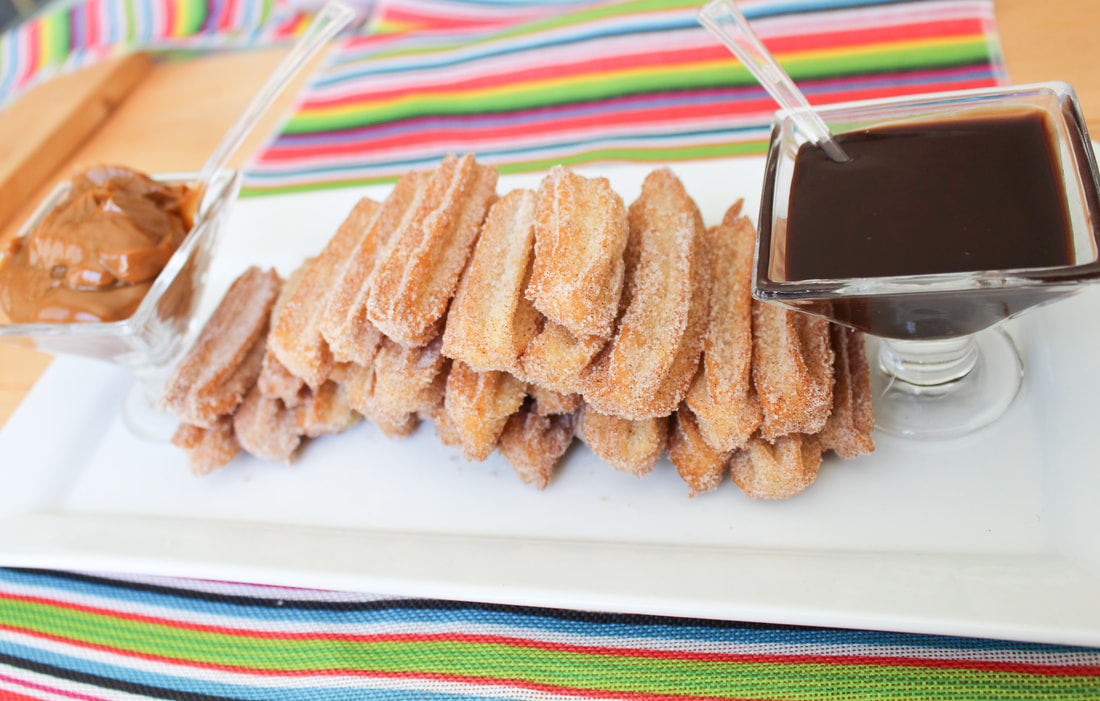
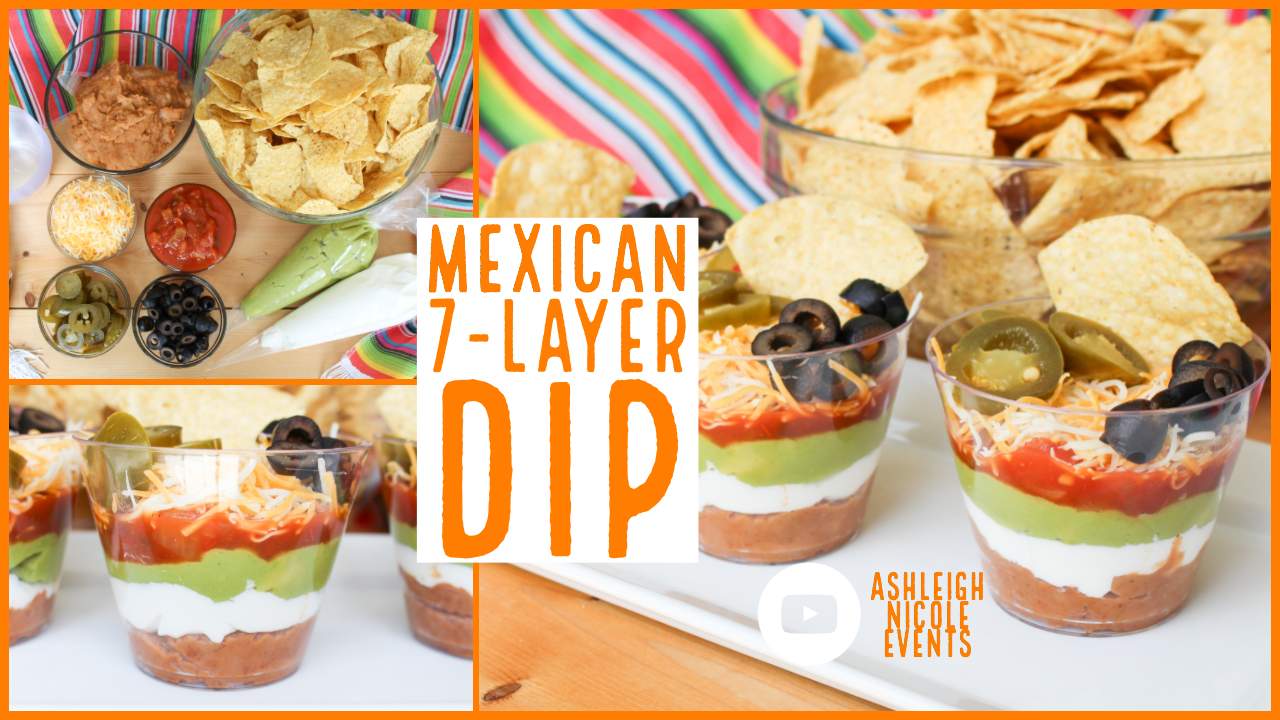 These are sooooo good! I love presenting them in small individual cups instead of one large dish. They are also extremely hardy and filling. Im honestly stuffed after one cup! Check out the video below to see how its made! Ingredients 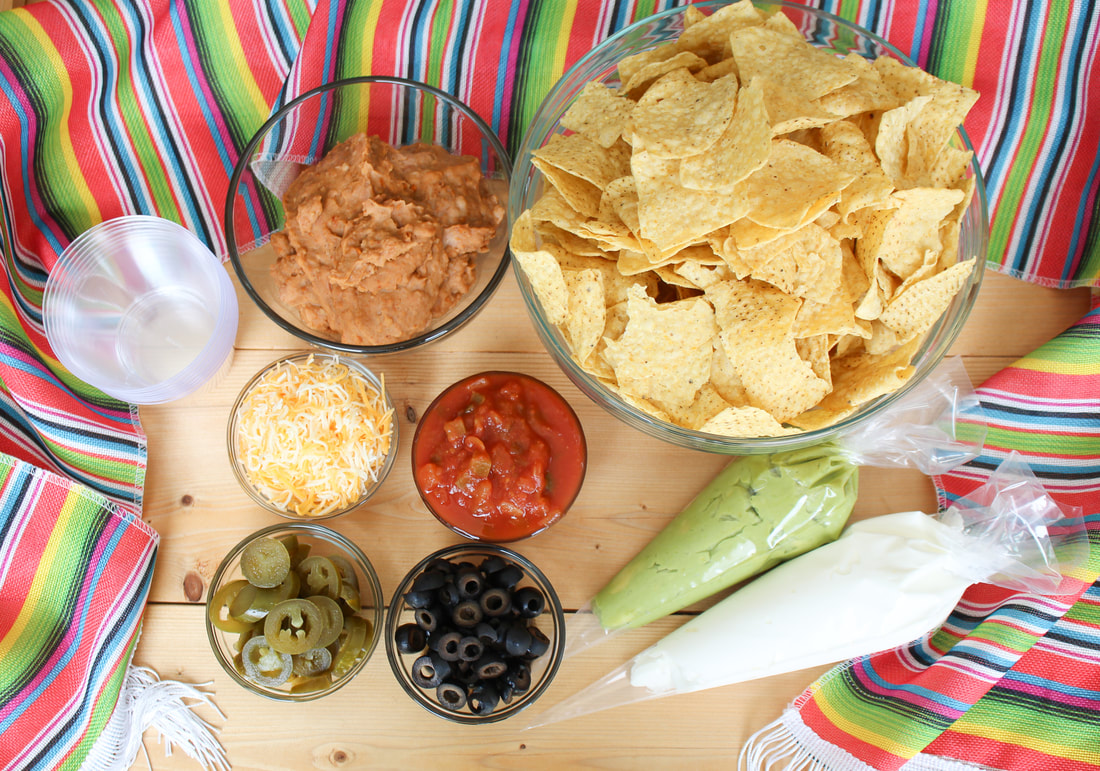 Layers (from bottom to top) Refried beans Sour cream Guacamole Chunky salsa Mexican cheese Black Olives (sliced) Jalapeños (sliced) Garnish with a tortilla chip Serve with a bowl of Tortilla chips! 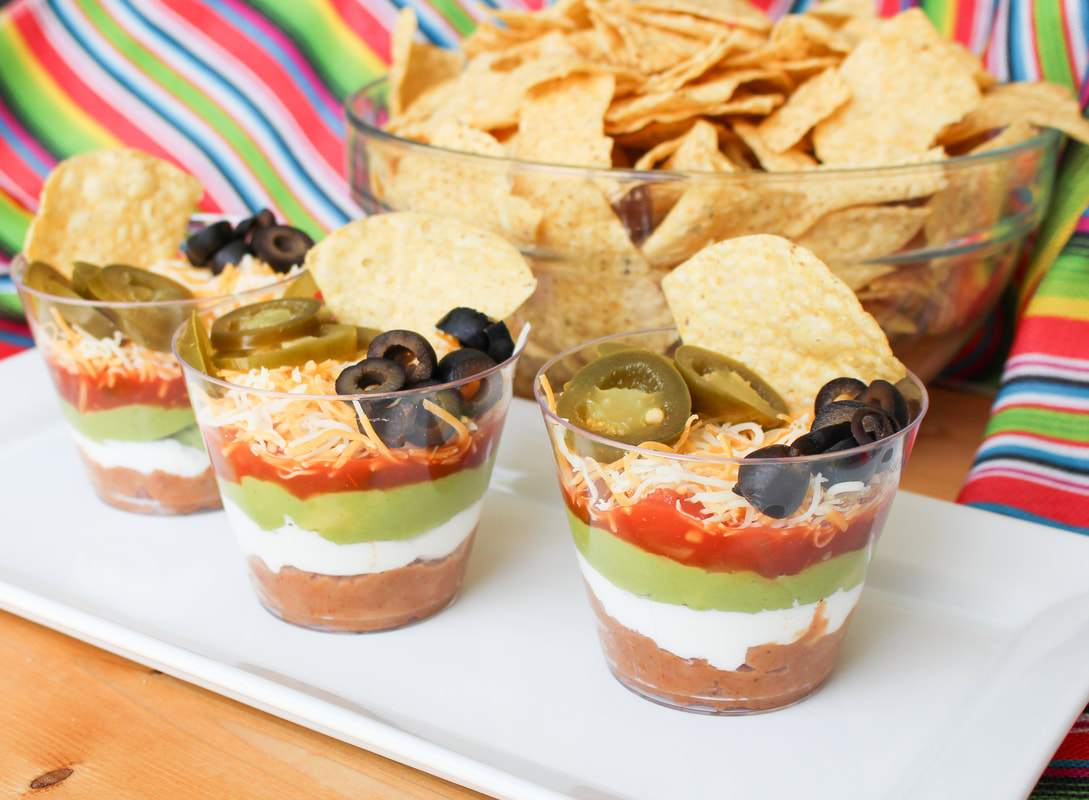 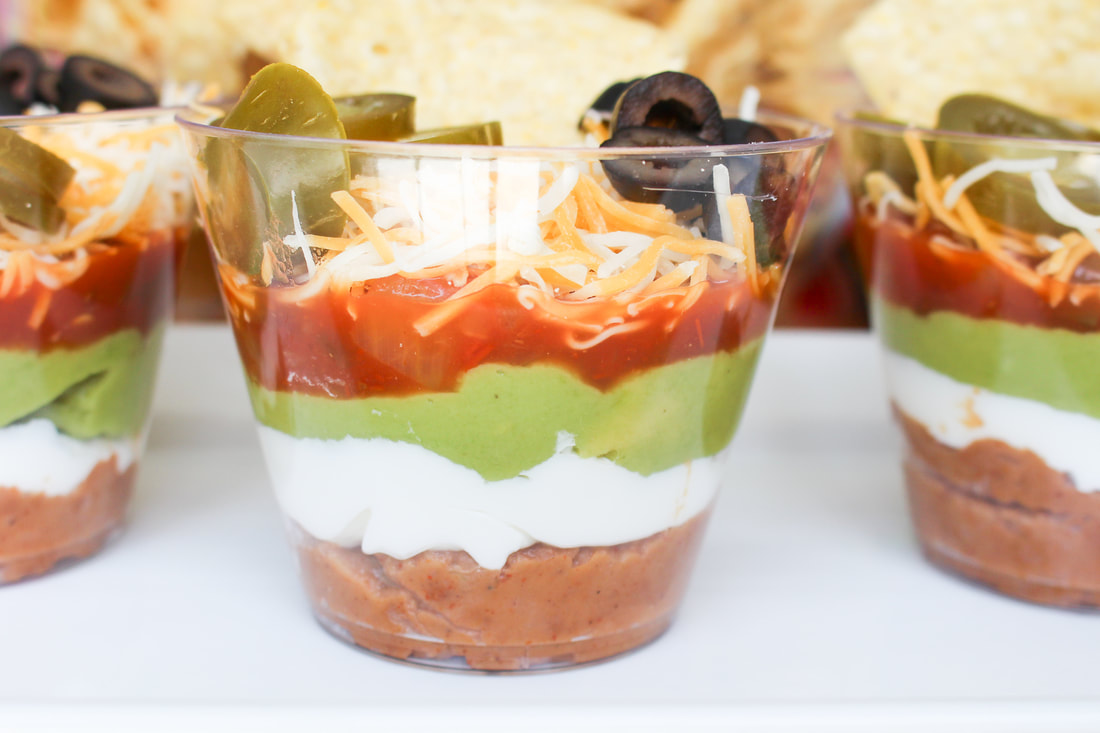 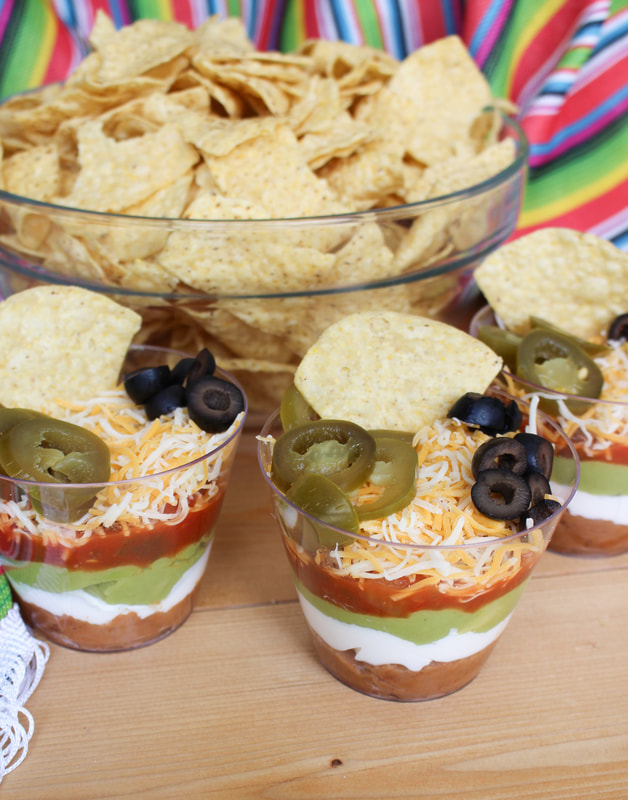  Since living in California I've LOVED churros. Cinnamon and sugar perfection! Today I would like to share how I make churros at home! With just a few ingredients, you'll have the yummiest dessert ever right at home! Lets get started! 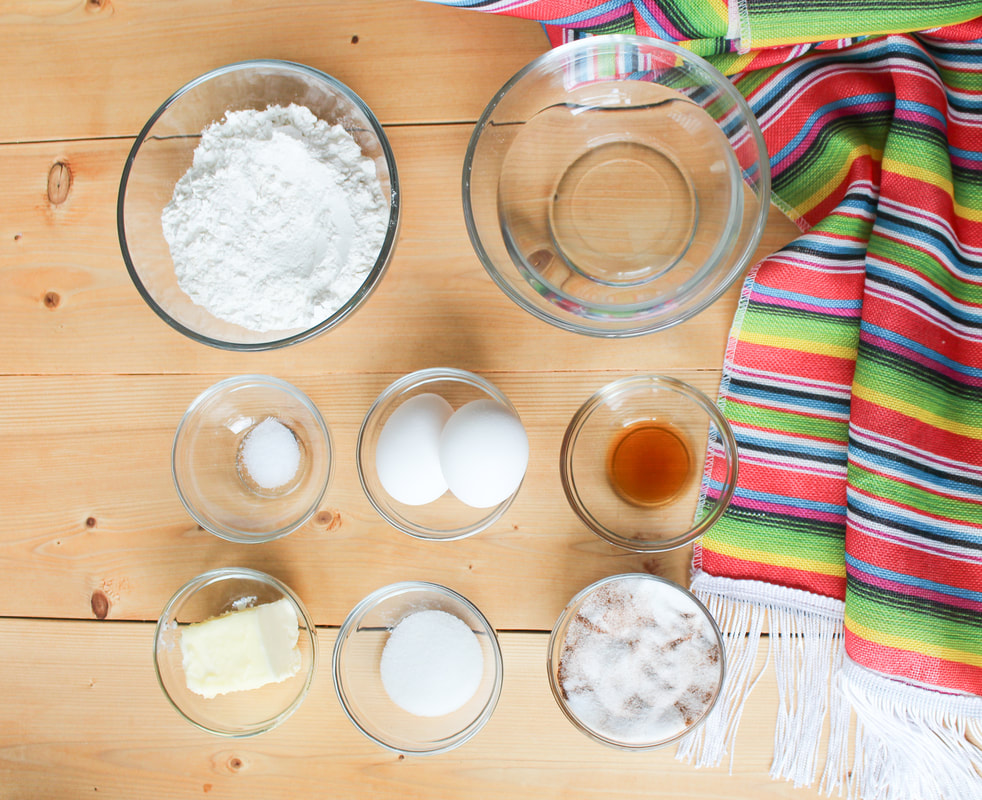 Ingredients |


 |  |  |
The Ashleigh Nicole Blog!
DIY - Events - Motherhood - Home Decor - Lifestyle
Archives
October 2019
August 2019
June 2019
May 2019
February 2019
January 2019
December 2018
April 2016
November 2015
October 2015
September 2015
Categories
All
2019 Resolutions
Christmas Crafts
DIY Football Snack Stadium Display
Pantry Organization
Valentines Day Living Room Decor
 RSS Feed


 |


