|
HAPPY NEW YEAR everyone!!! This year we decided to stay-in and celebrate in the comfort of our home. We ran by the local grocery store to pick up sparking cider and then we stopped by the Dollar Tree to pick up some party supplies. 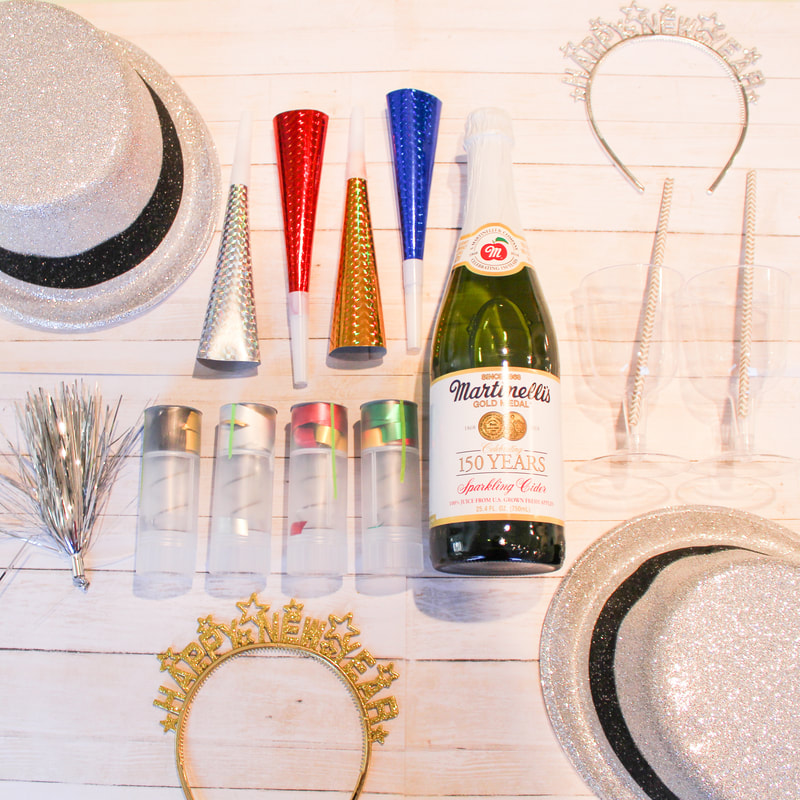 At the Dollar Tree, we loaded up on confetti poppers, glitter hats, horn blowers, plastic wine glasses, silly string and ring pops (not pictured). Watch all the festivities below!!! The "Ring in the New Year" ring pops were super easy to put together and a nice treat to end the night! 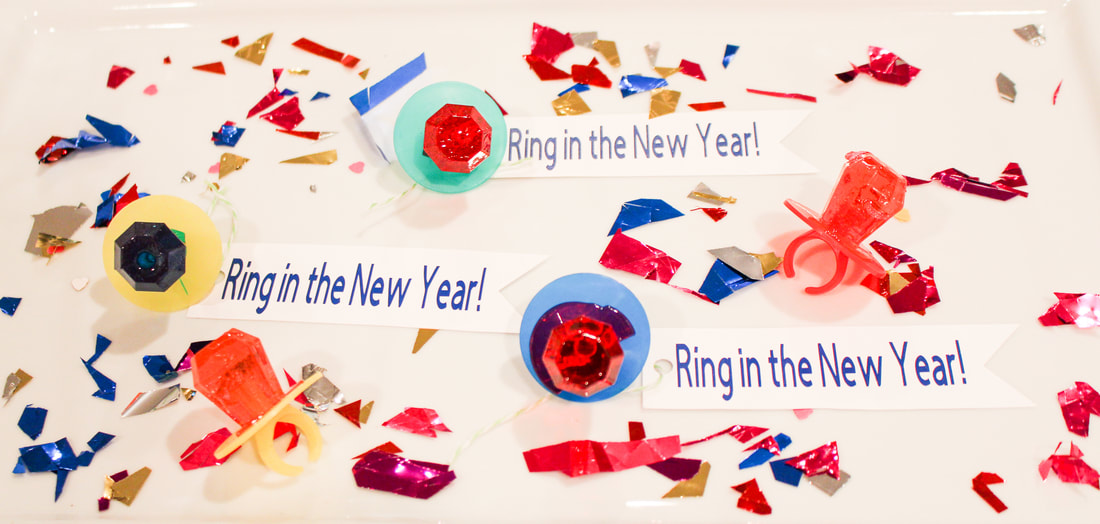 The kids had so much fun! They even asked if we could celebrate again tonight. (Umm no) lol
1 Comment
 I asked my husband, Durran 2,097,578 times what he wanted for Christmas this year and he always gave the same answer... “Nothing babe, I have everything I want”.  I walked around a few stores and nothing stood out. He has every video game known to man, he’s good on shoes and clothes. He’s not a jewelry guy and he has cologne he hasn’t even opened yet. I was stuck. 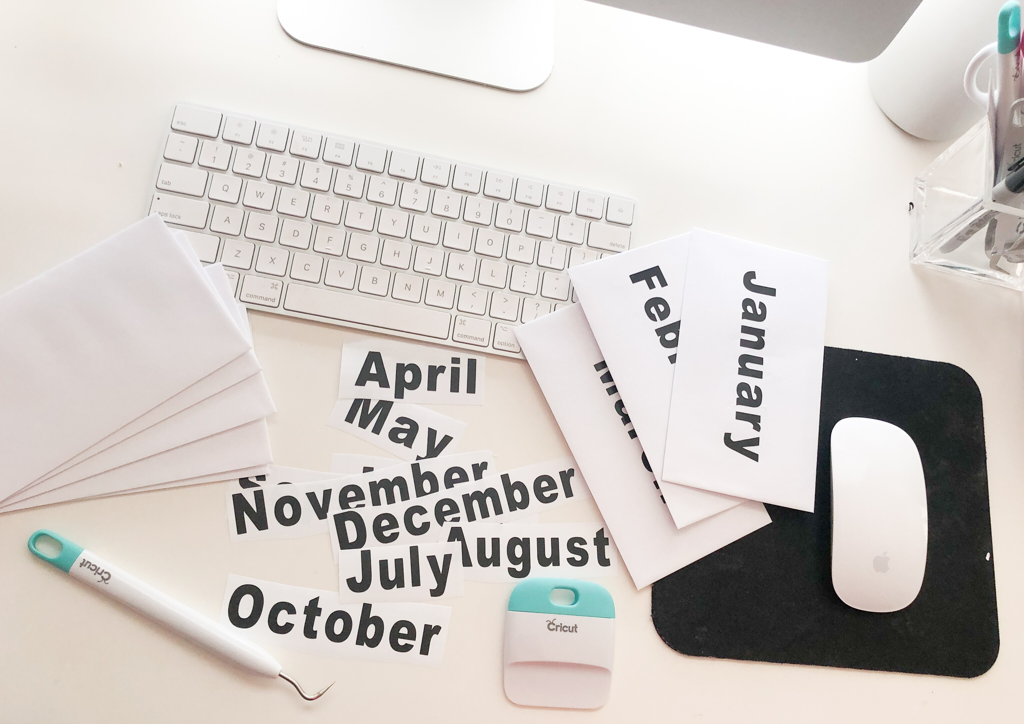 Then I started to think of what he would like that I can’t necessarily buy from a store. His “love language” is Quality Time so I decided to give Durran the gift of Time! 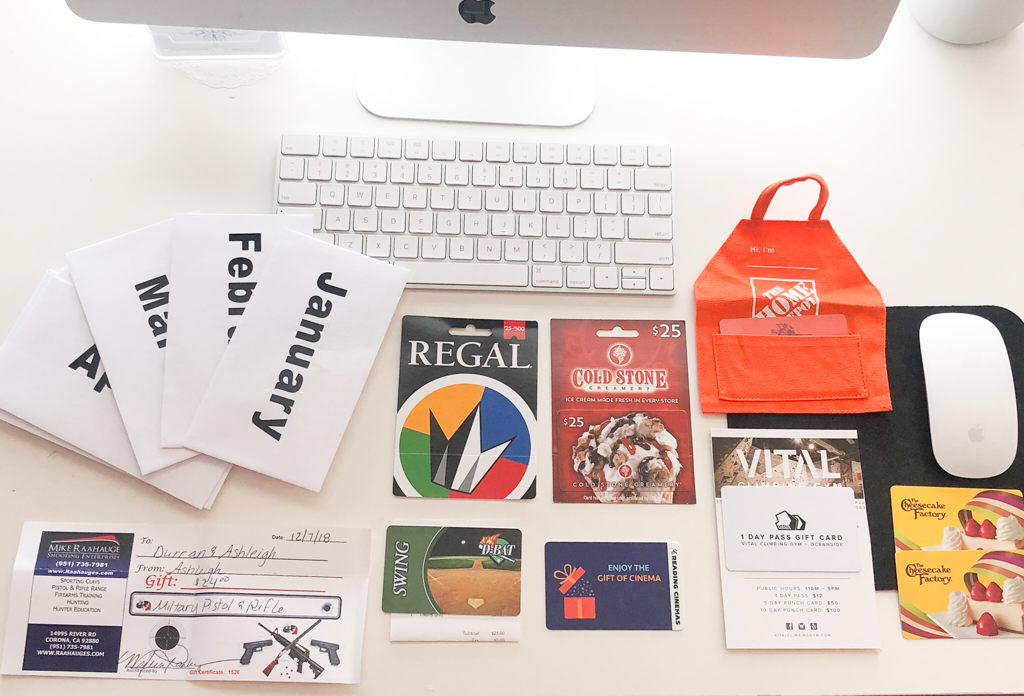 I preplanned 12 dates for the whole 2019 year. I planned indoor rock climbing, movies, our favorite ice cream place and restaurant, gun range and baseball batting cages. I even added a Home Depot gift card so we can build something together! Cute right!?!  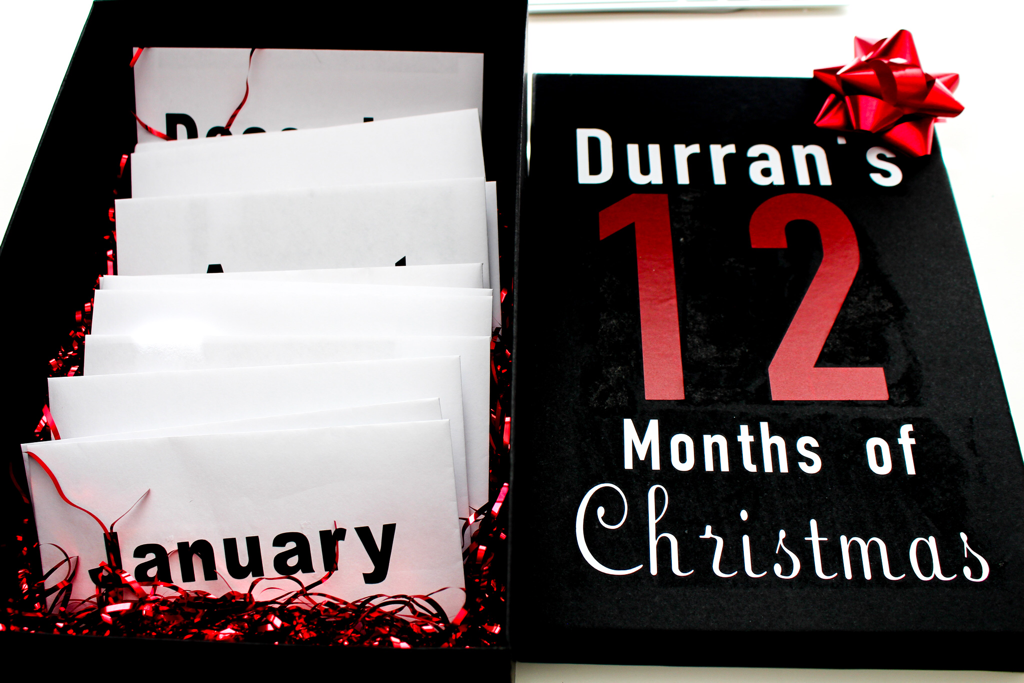 Not pictured is wine tasting, picnic at the lake, our favorite burger place gift card and casino night at Pechanga! 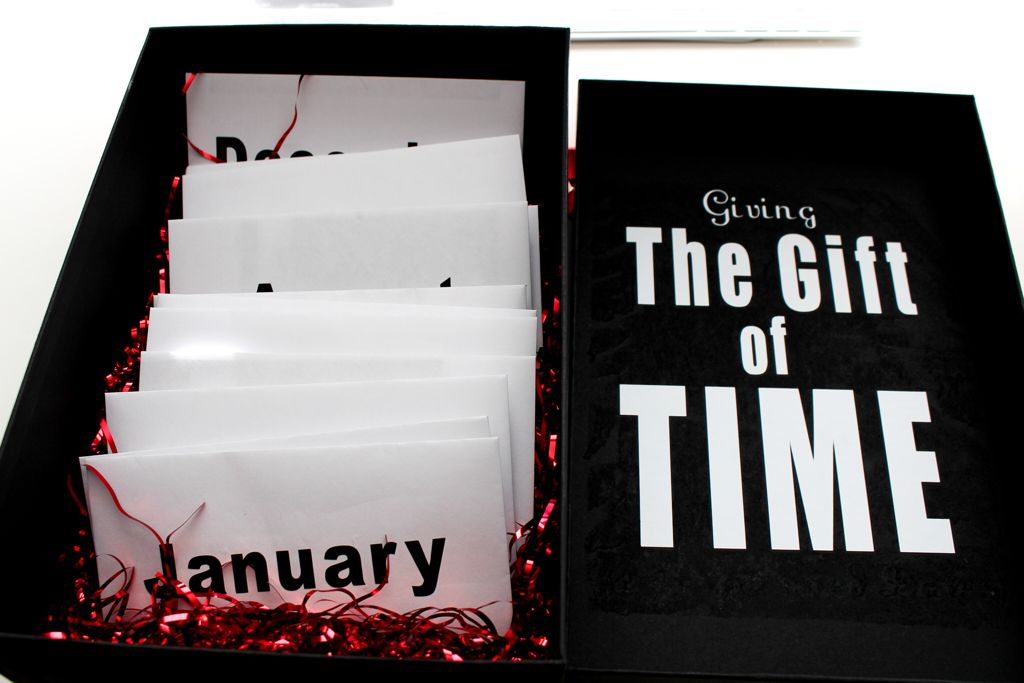 (Above picture is inside of the lid)
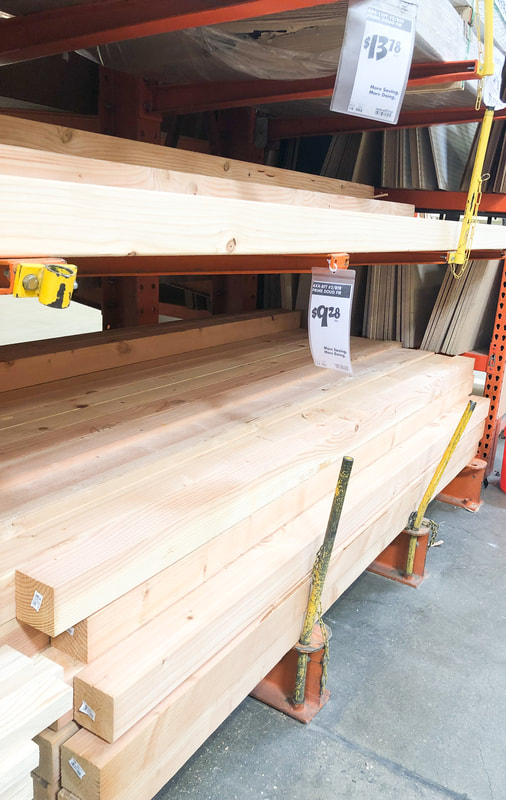
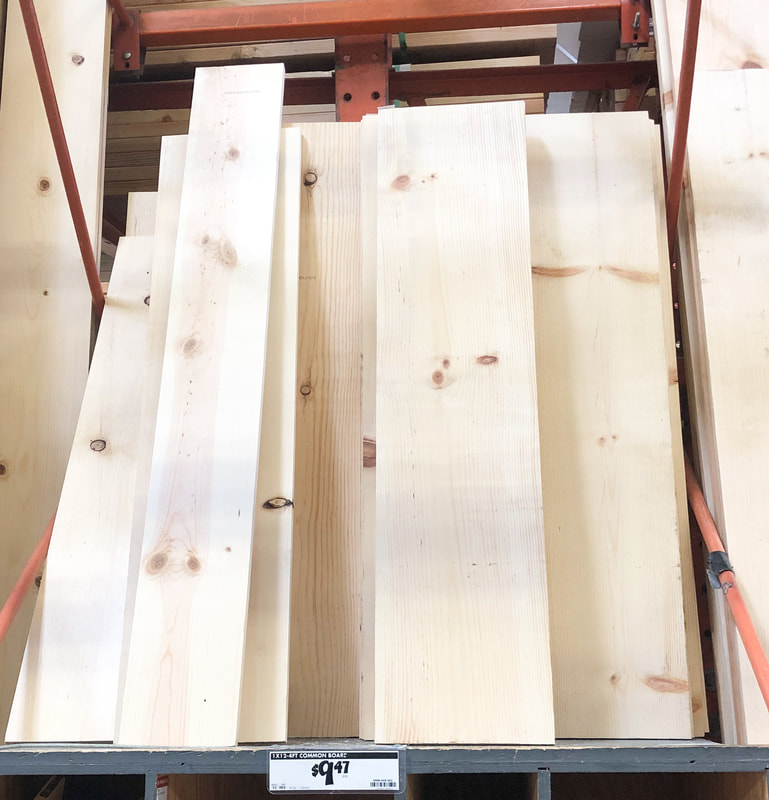
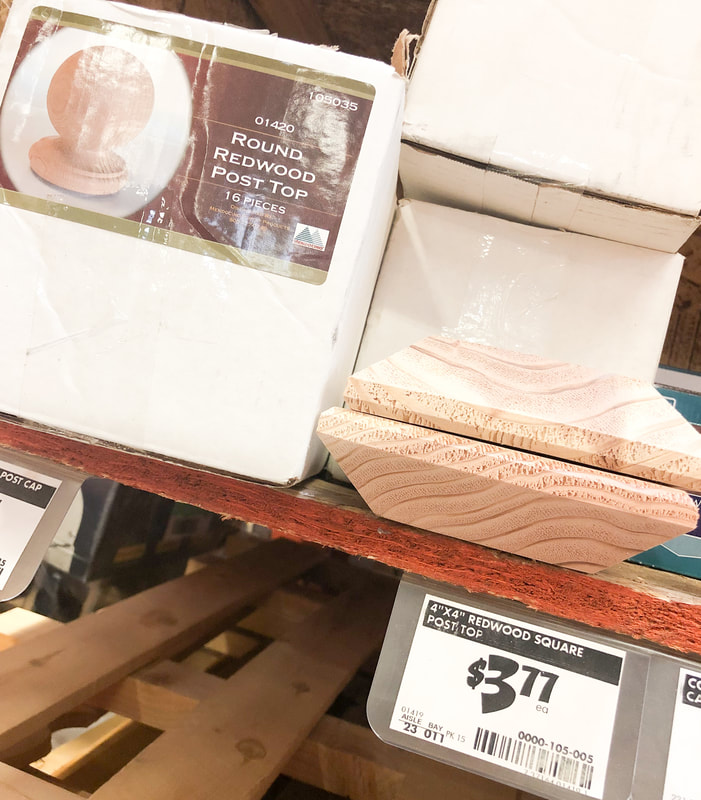
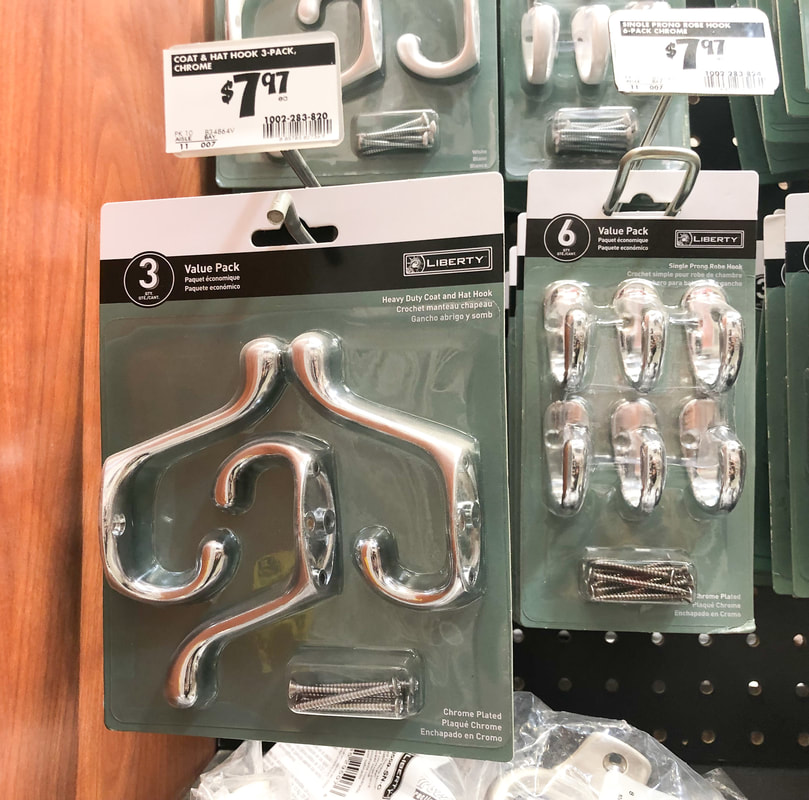
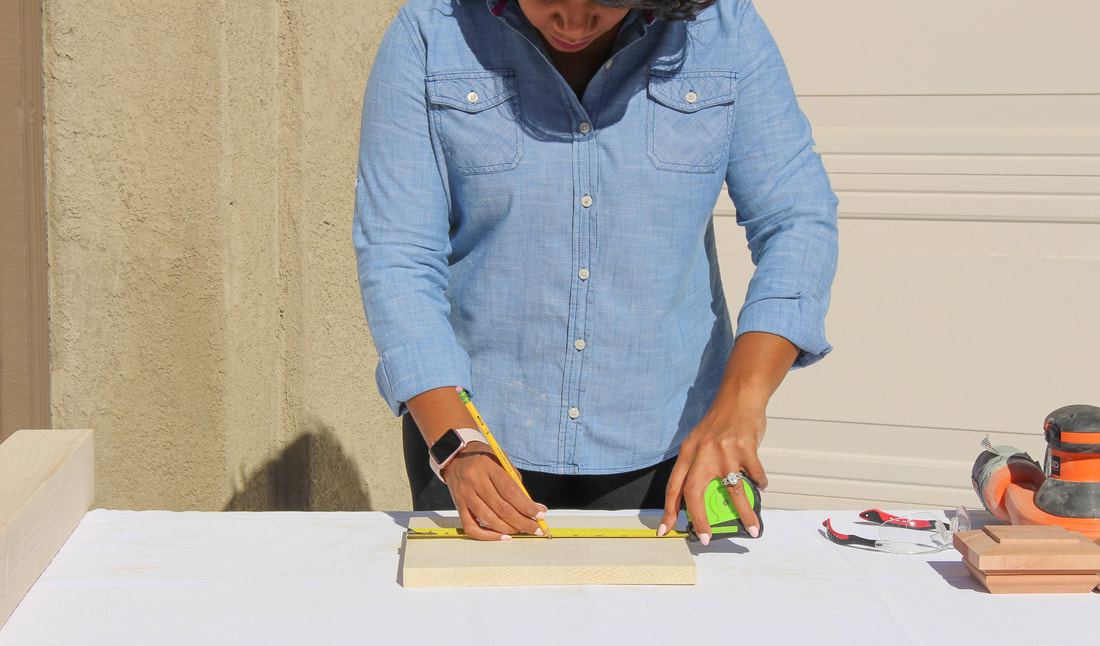
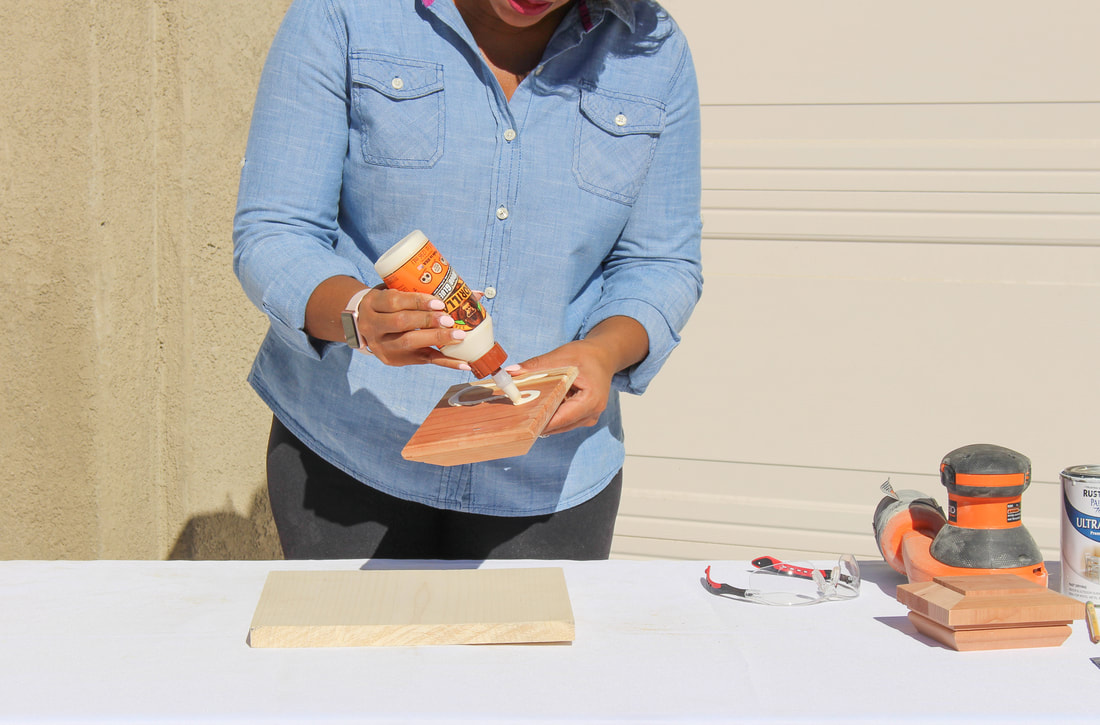
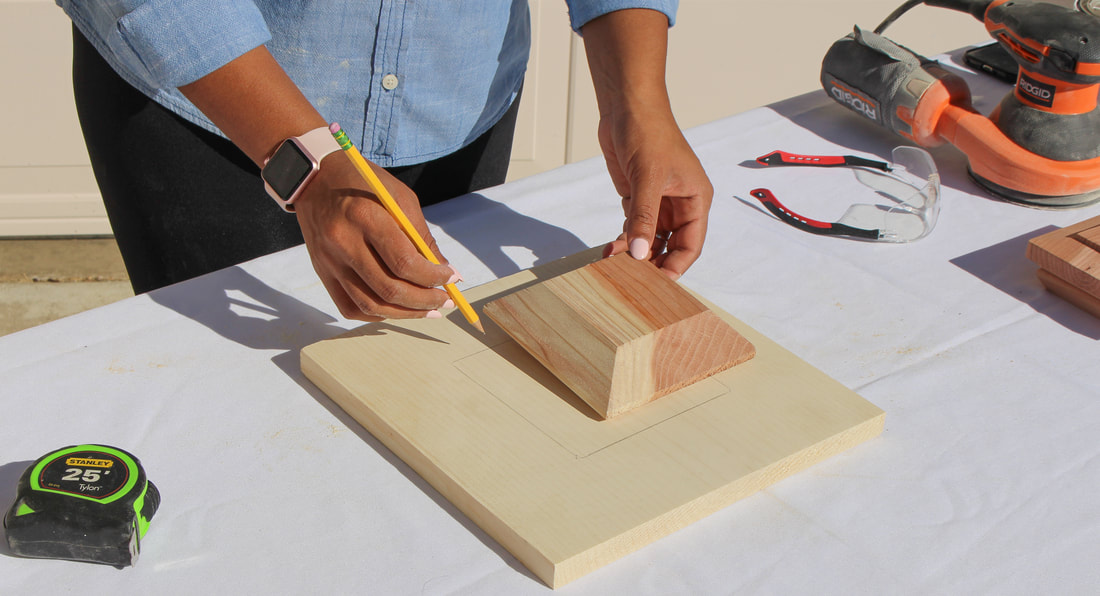
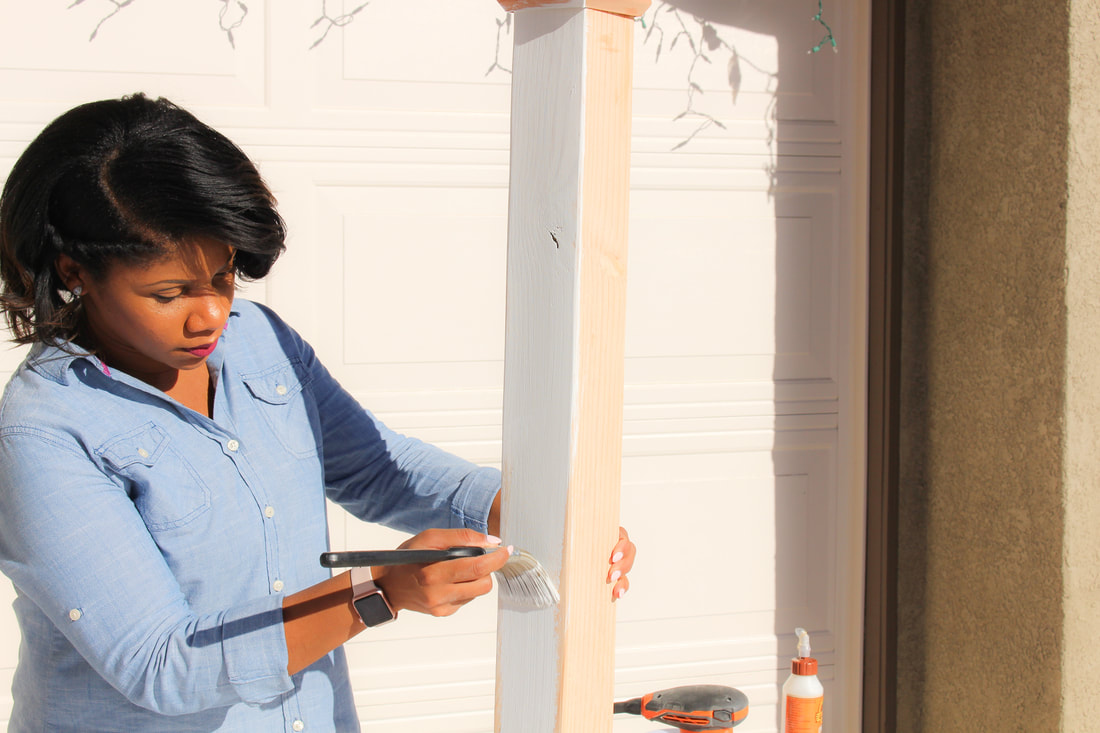
So excited to give him this gift Christmas morning and for the year to come of quality time! MERRY CHRISTMAS!!!  Guys, look at this stocking post! Just look.... Nice right?! My husband made one for our sons playroom but forgot to take pictures of the steps. 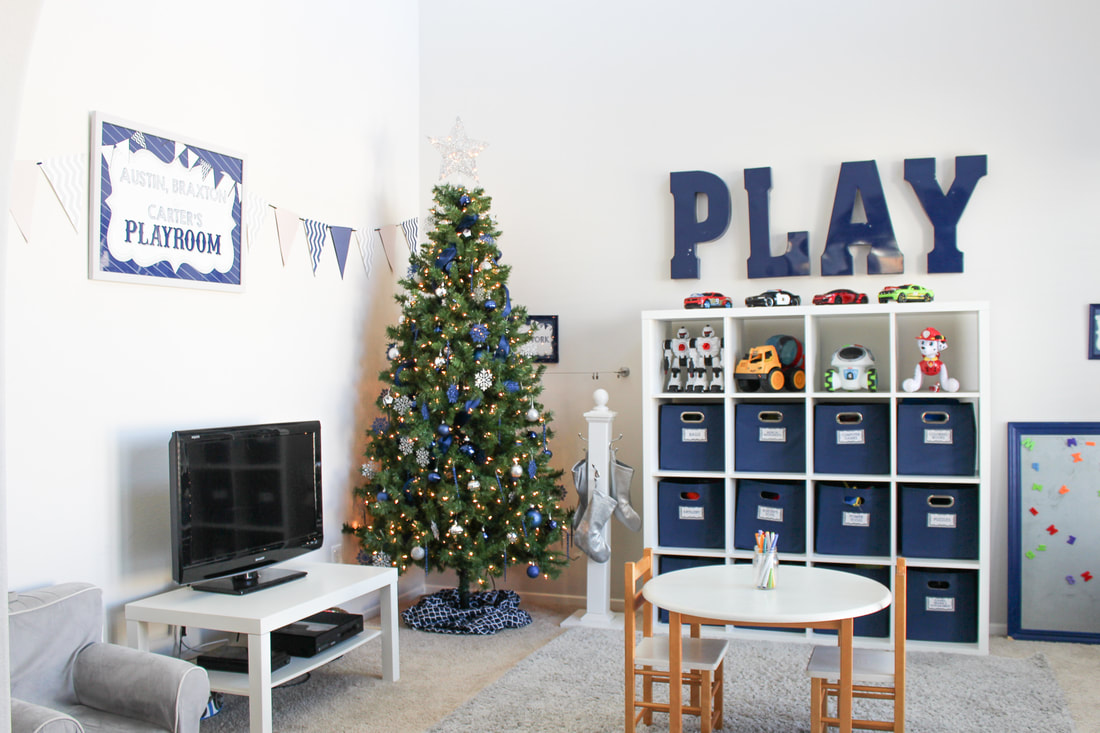 Rest assured, I got your back. We had enough lumber to make another one! All I needed to get was another post cap. Easy peasy. This time I’m going to make it by myself with my husband only giving me verbal help.... if needed 😉 #girlpower Here we go..... 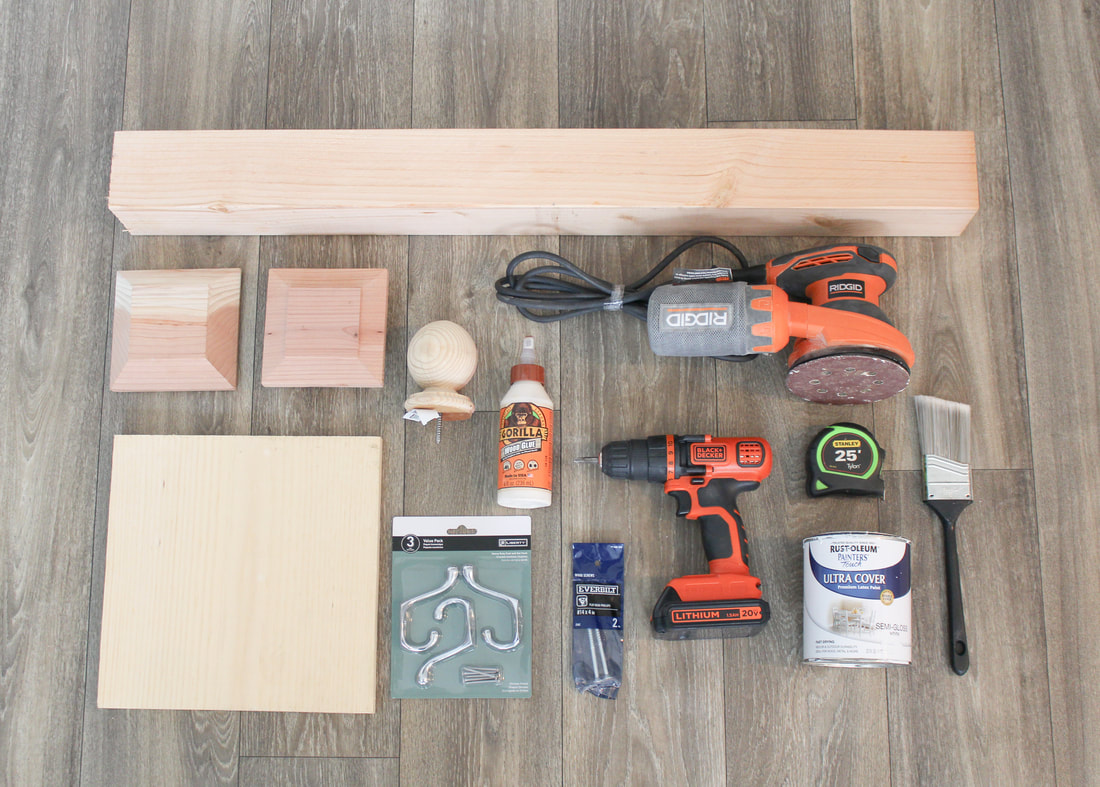 Materials 4x4x8 post 1x12x4 Common board Top Post cap (with indentation) Bottom Post cap (without indentation) Round post top 2- 4” Wood Nails Wood glue Hooks Paint/Stain of your choice Paint brush Tools Sander Drill Drill bit Measuring tape
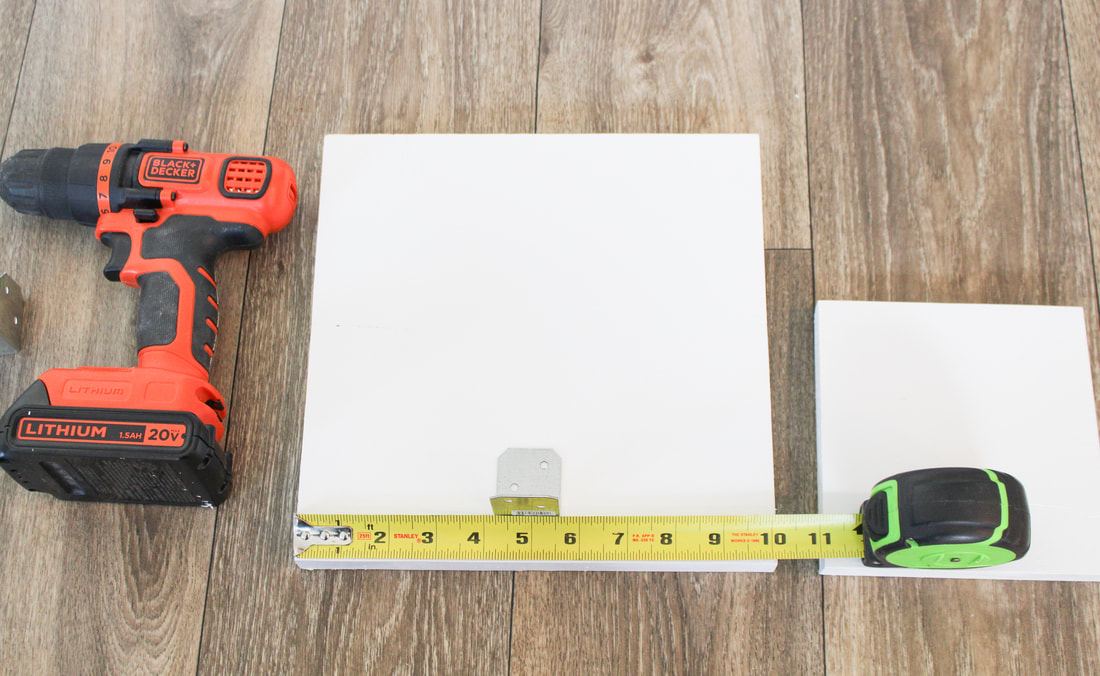
Cut List (Home Depot will gladly cut your wood for you) 4x4x8- Cut at 4ft. 1x12x4 common board- Cut at 12x12 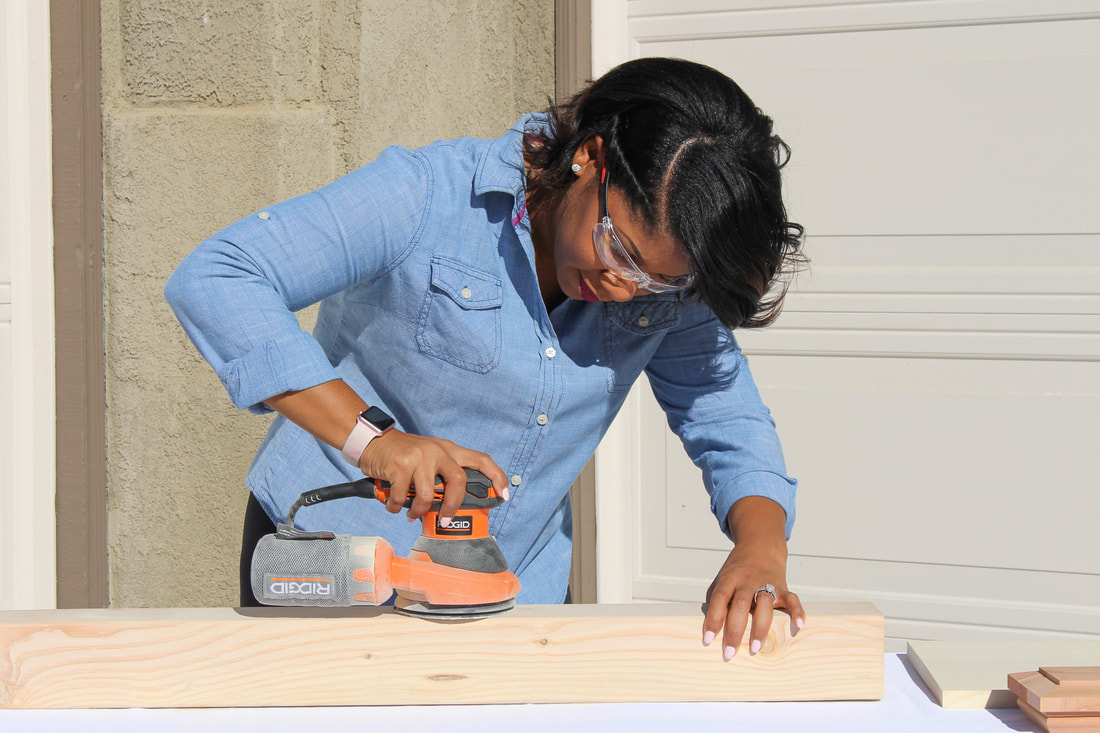
Steps
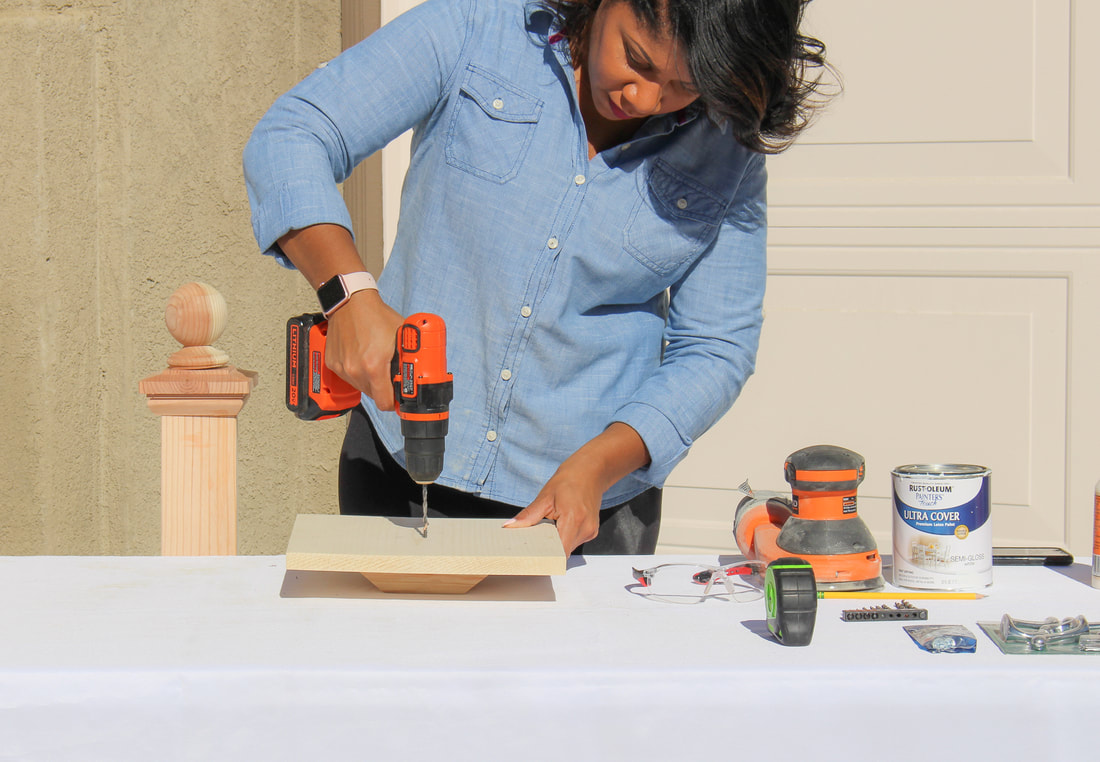
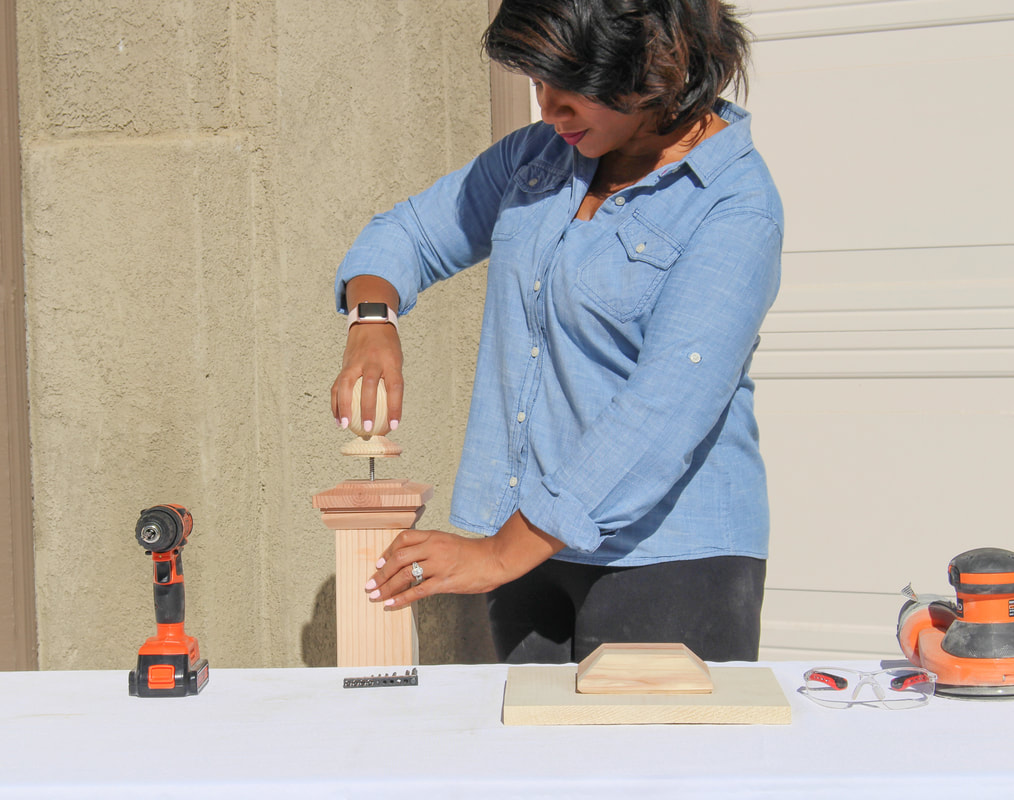
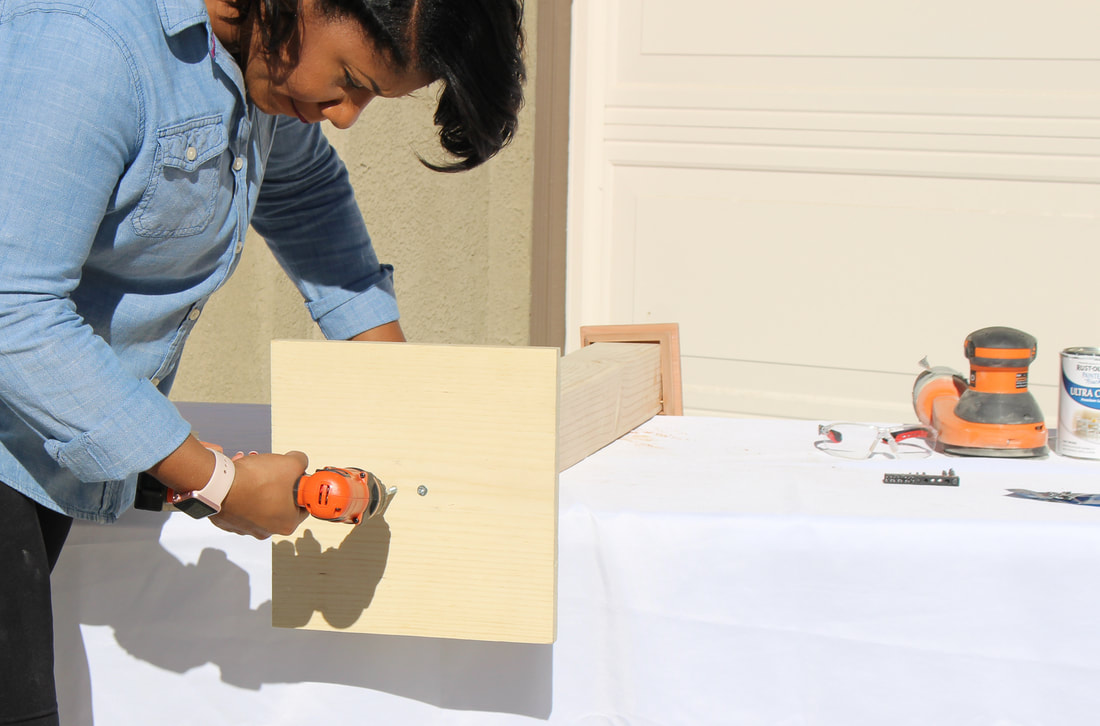
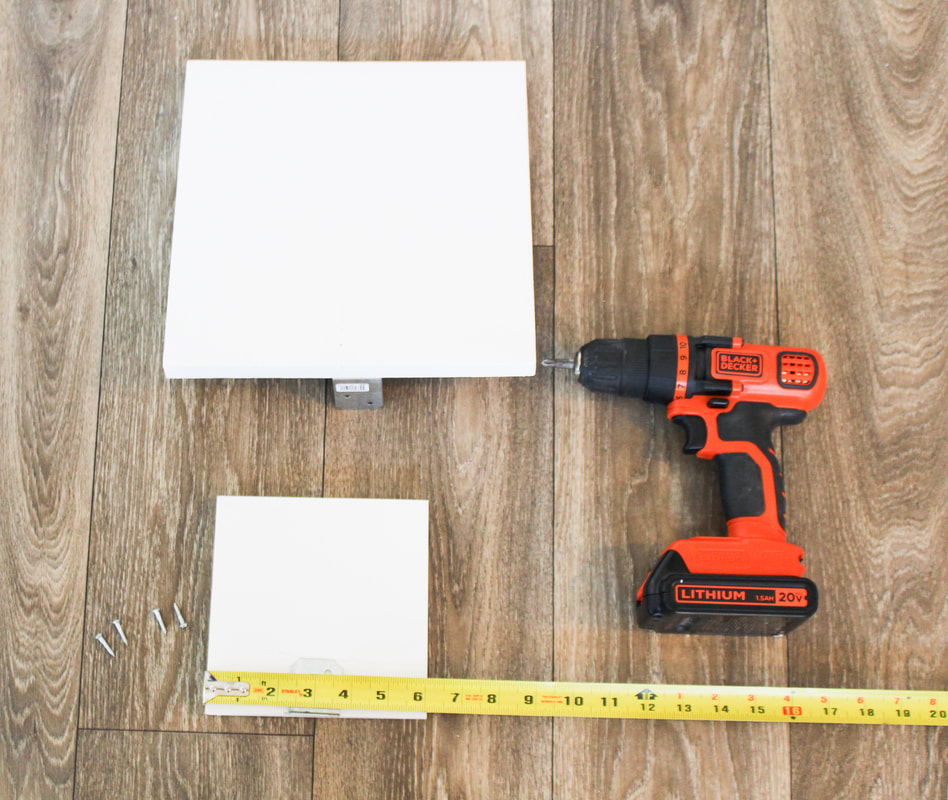
Sand 4x4 post and 12x12 board until smooth. Measure and mark the drill spots on the 12x12 base, bottom post cap. Tip- Once measured, draw a box in the center to show exactly where to glue bottom post cap. Pre-drill to avoid splitting any wood. Now add wood glue to the bottom post cap and place in the pre-measured area on the 12x12 base. Adhere top post cap with wood glue. Allow to dry. Stand up the 4x4 post vertically and position base pieces on pre-measurements area. Make sure your pre-drill holes line up. Drill the two 4” nails through the bottom of the 12x12 base and bottom post cap, all the way through to the post. Tip- if drill bit isn’t long enough to pre drill through the base and 4x4, create a small indent using the holes through the bottom post cap and pre-drill directly into post. We’re nearing the finish line! On top of the top post cap, make another pre-drill hole. This is where the round post top will go. The round post topper already came with screw so just twist it into your pre-drilled hole. Tip- Make sure you test you drill bit sizes on a spare piece of wood to ensure the the perfect fit. Dust off any sawdust and choose a paint or stain of your liking. I chose white to coordinate with our Playroom furniture colors. Last, add your hooks! I used 3 hooks total. I hope your enjoyed this tutorial! Please don’t hesitate to ask any questions!!! 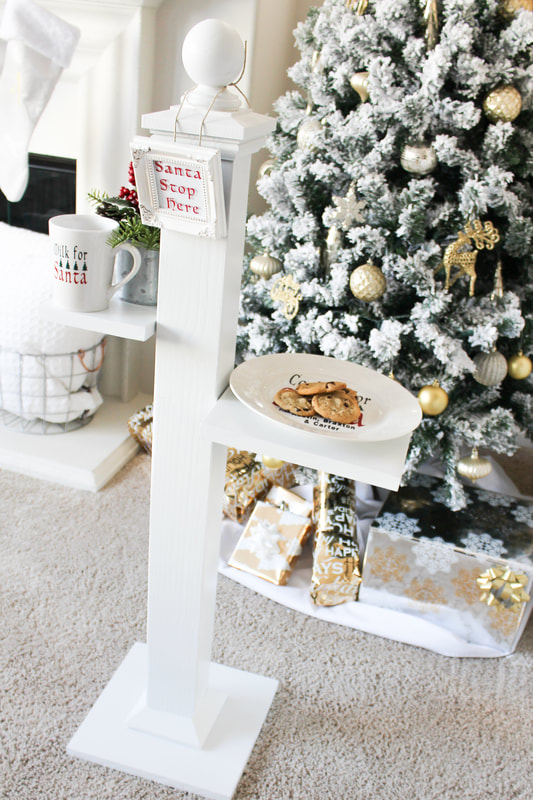 Soooo I did a thing. A good thing. I had extra wood leftover from the Christmas Stocking Stand so I made a Cookie Stand for Santa’s milk and cookies! Cute right? 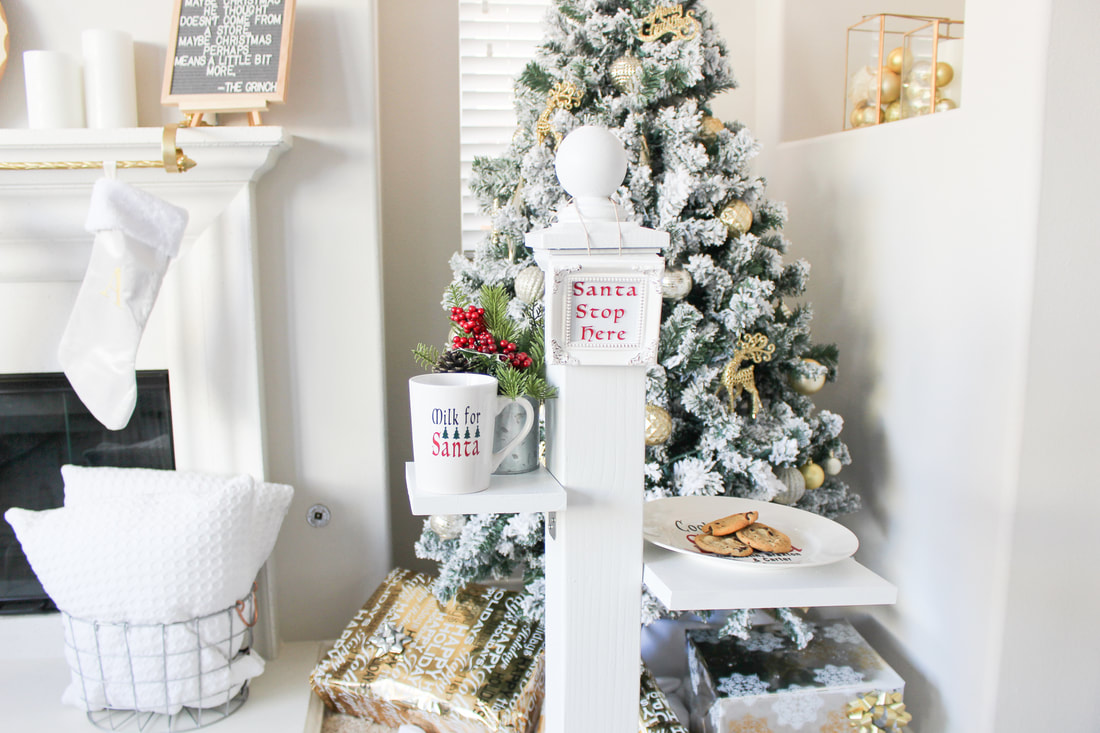 This tutorial will start at the assembled post. Learn how to make the post using the YouTube tutorial below! Materials 10x10 common board 6x6 common board 2 L shaped brackets 8 wood screws Ruler Drill 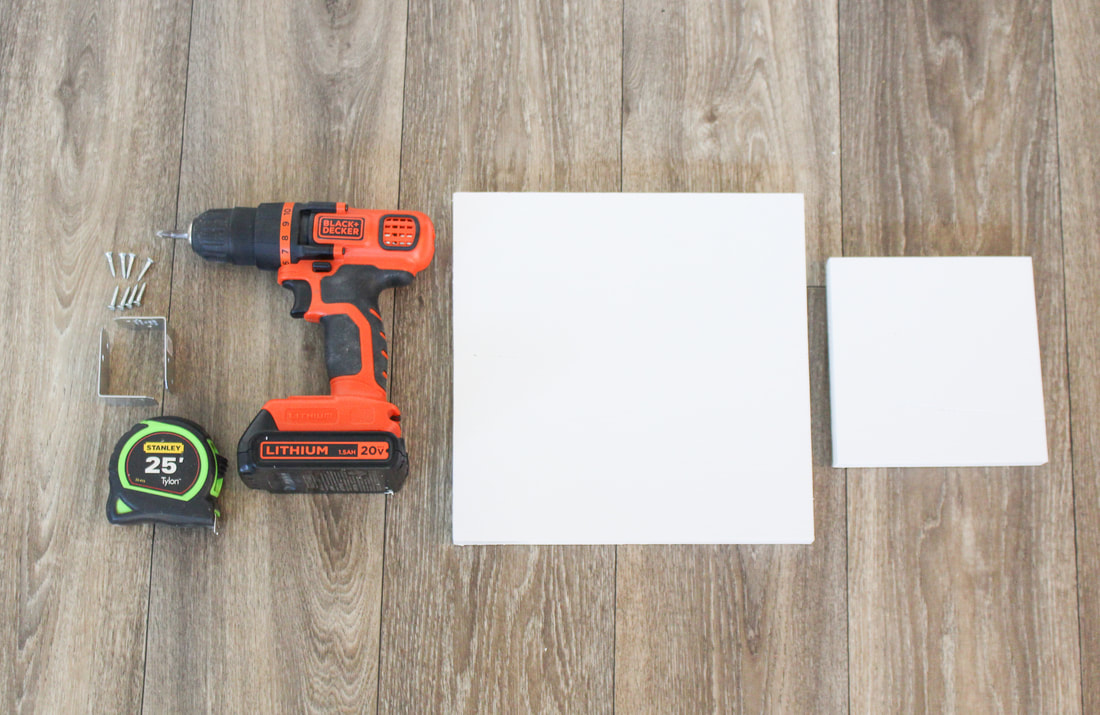
 Measure and align the 10x10 and 6x6 boards in the position you’d like on the post. I staggered my alignment by putting the smaller board slightly higher then the larger board. 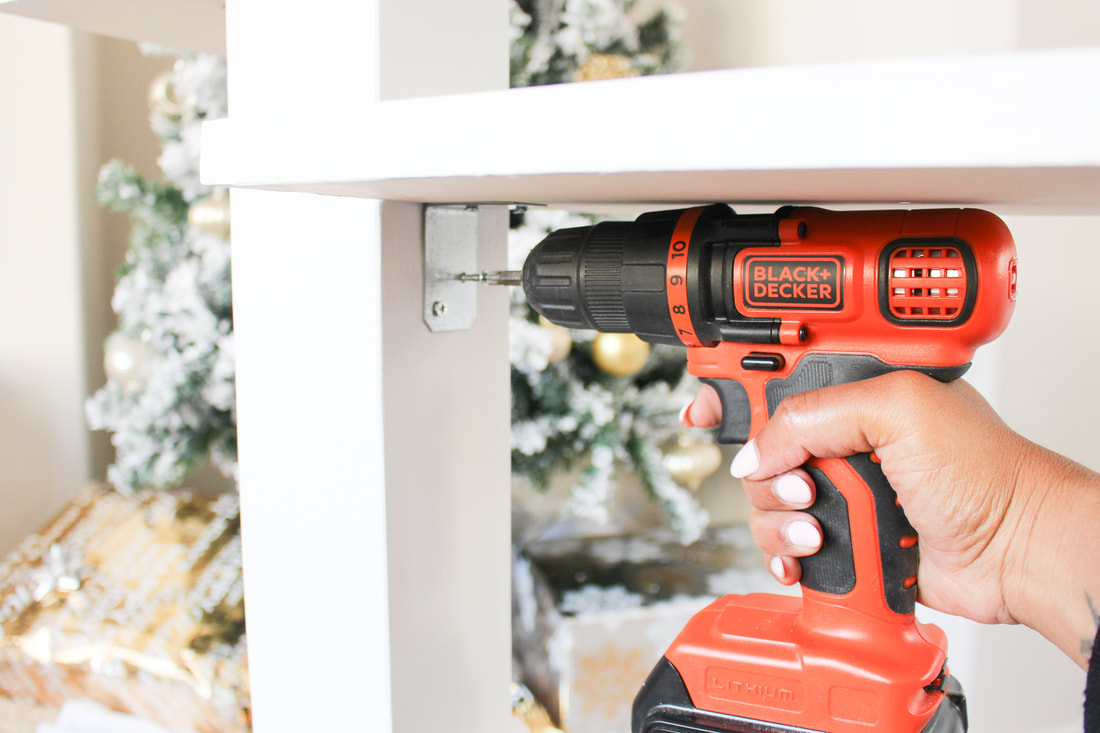 Attatch with wood screws. 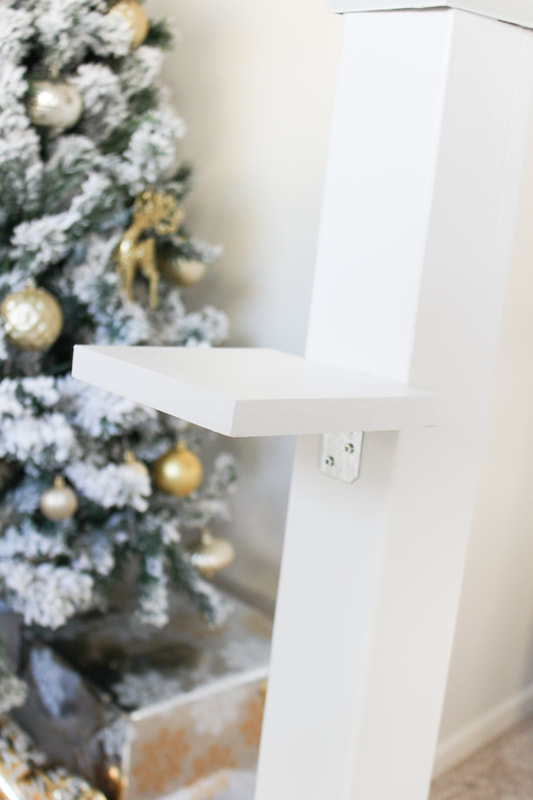 Add a cute “Santa Stop Here” or “Cookie Station” sign and you’re done!!! 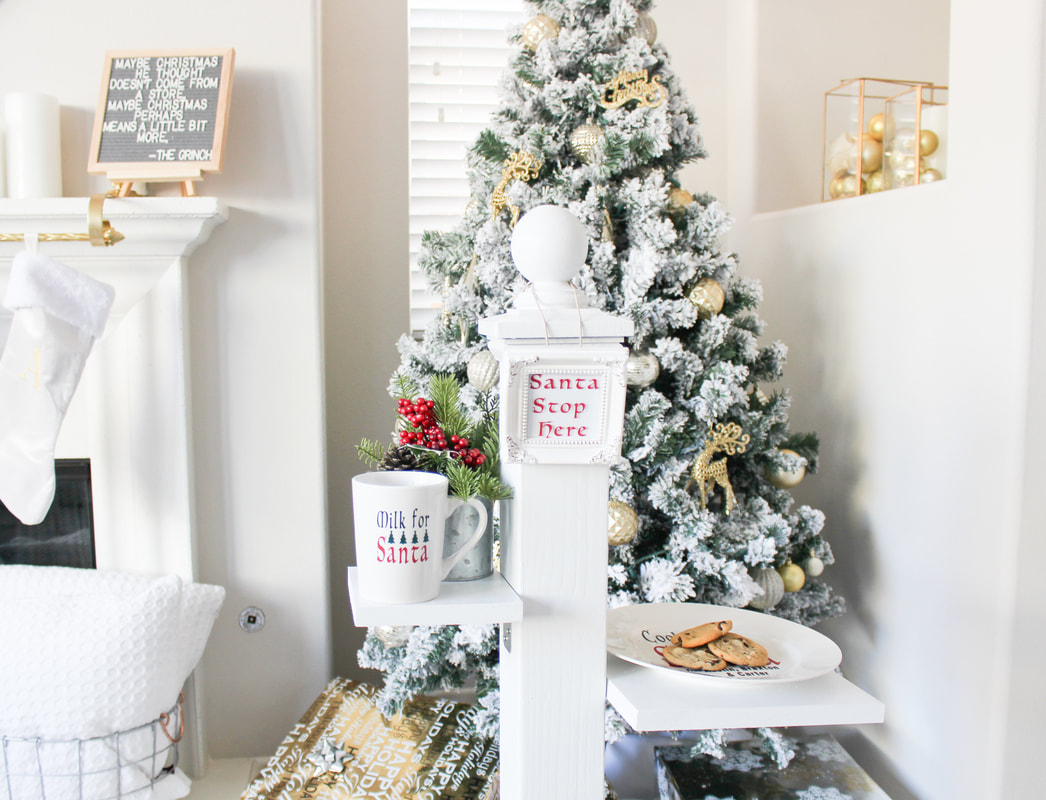 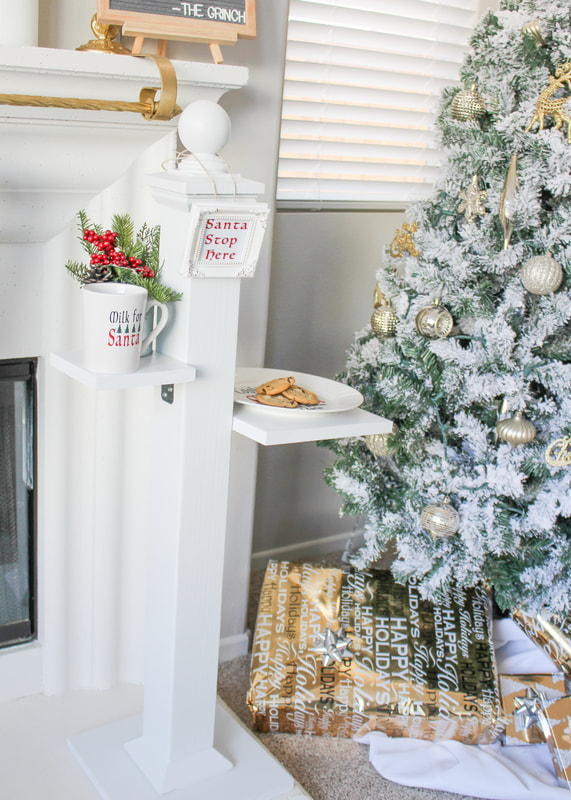 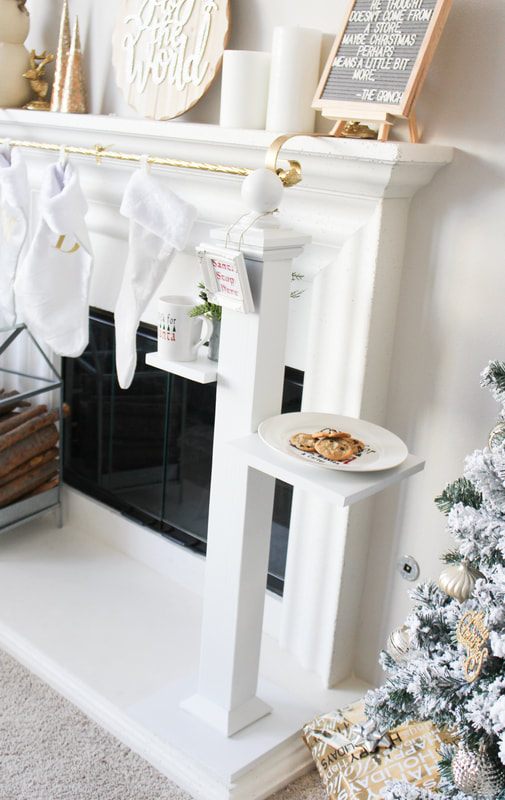  DIY “Milk for Santa” mug and “Cookies for Santa” plate HERE. 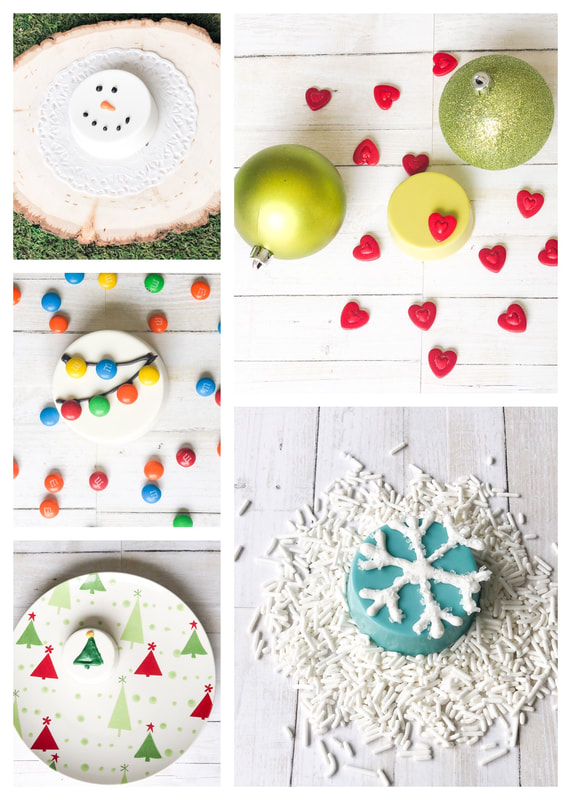 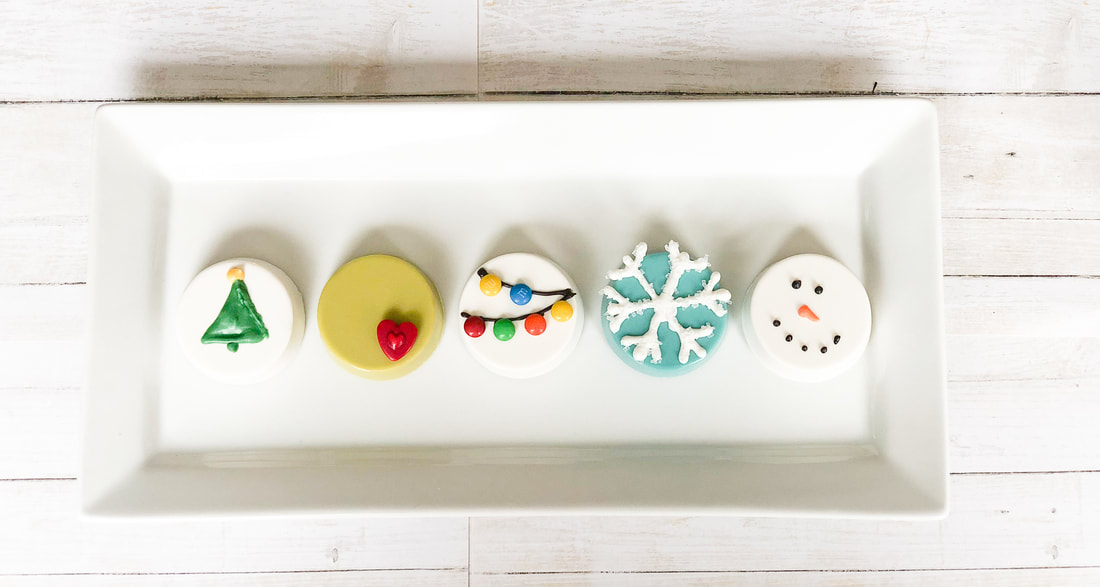 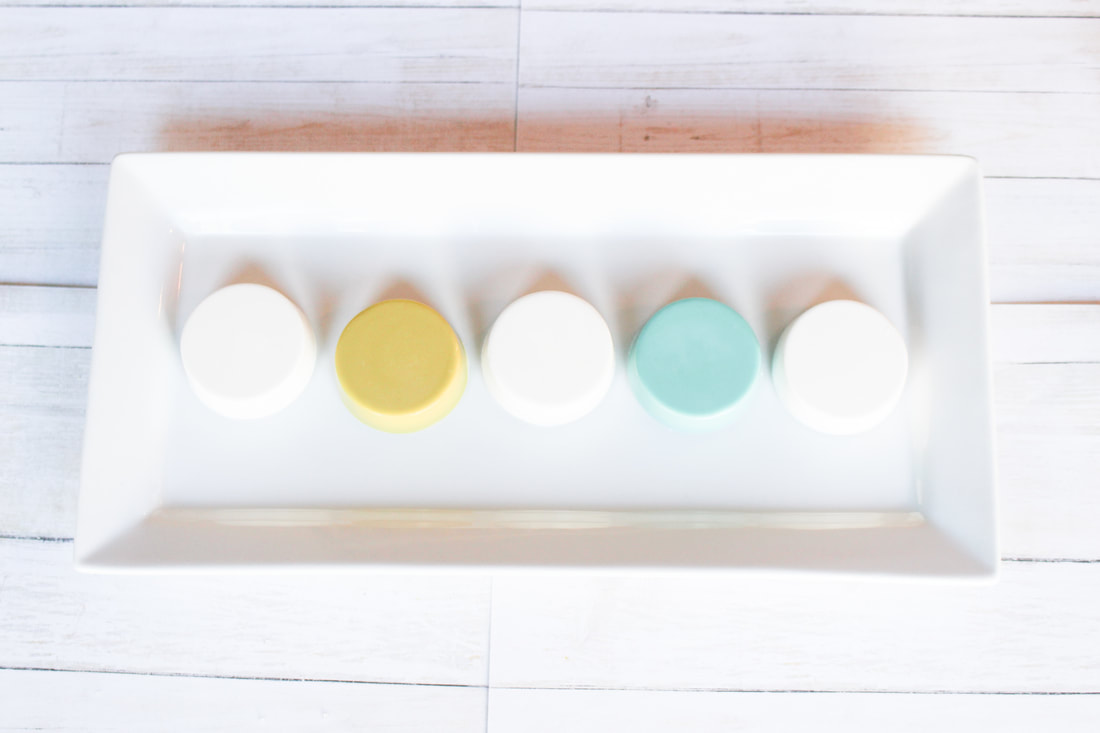 Lets starts with the base. I made a video tutorial on how to make the perfect Chocolate Covered Oreos. Check out the YouTube link below. Now let’s get to the fun part. Decorating! I started with the Grinch themed chocolate covered oreos.  I used bright green Wilton candy melts and Celebrate It! brand red tart candy hearts. Both purchased from Michaels. I used a dab of leftover green candy melts to adhere the heart. This one is probably my favorite...simply because it was the easiest. 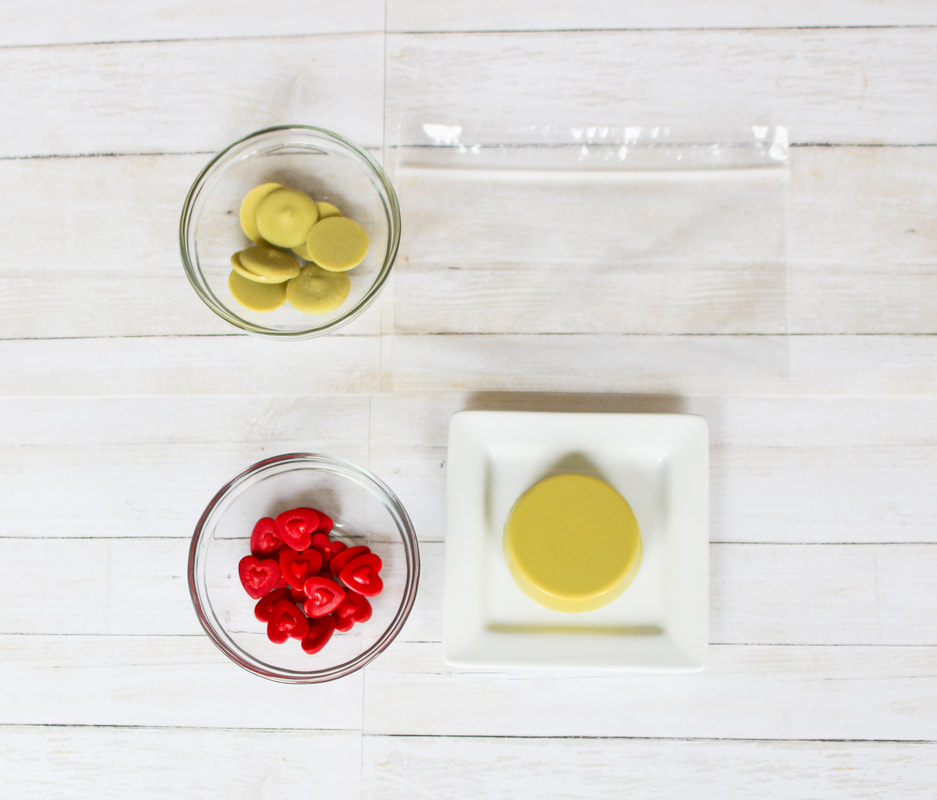 How fun is this Christmas light design?! I used Mini M&Ms for the lights and black Wilton candy melts for the wire. Super cute!  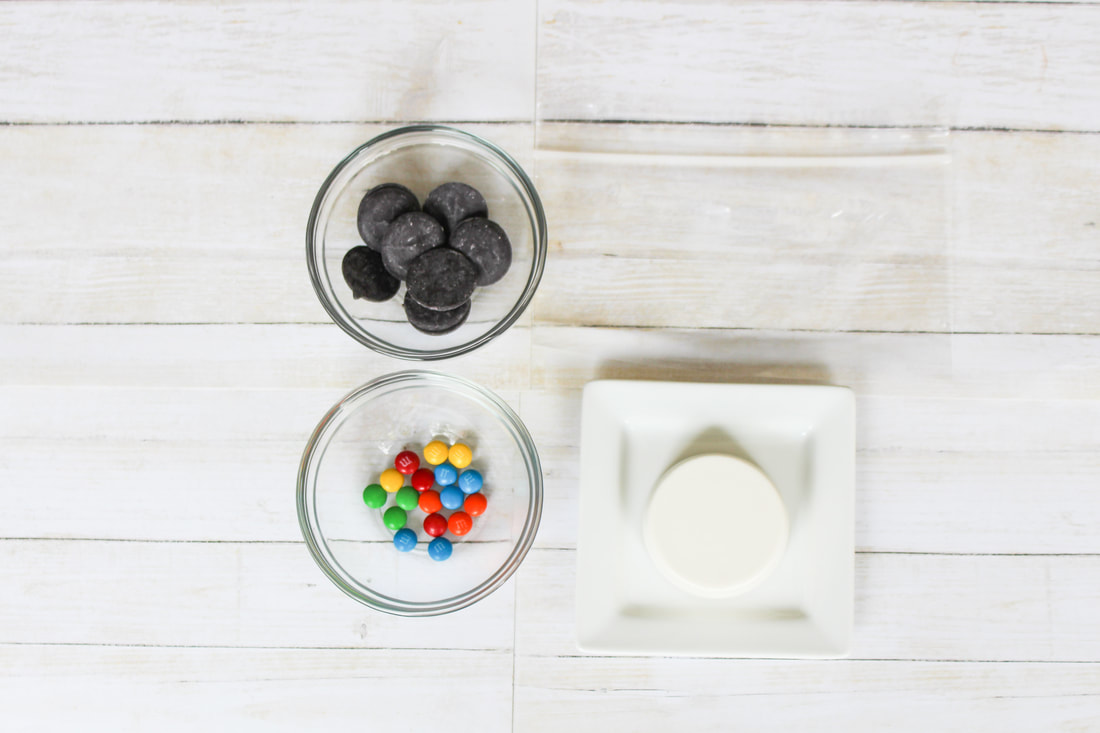 Up next this the Snowflake design! I have the WORST penmanship and equally bad line piping skills. Soooo I drew out a snowflake design on notebook paper, cut it out and used it as a stencil to help me pipe straight. I placed a small piece of wax paper over the stencilI and used white candy melts for the snowflake. I then sprinkled white sugar crystals on top before the chocolate hardened. Sidenote- This would be awesome for a Frozen themed party! 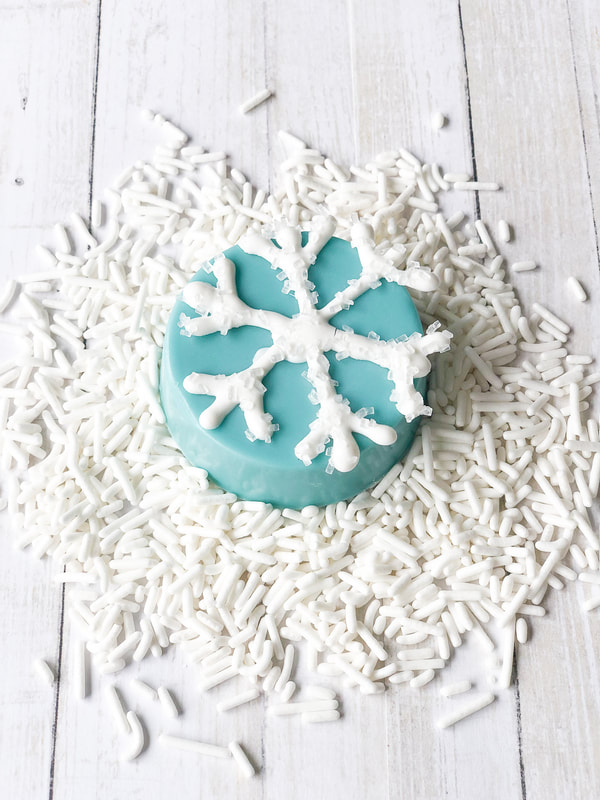 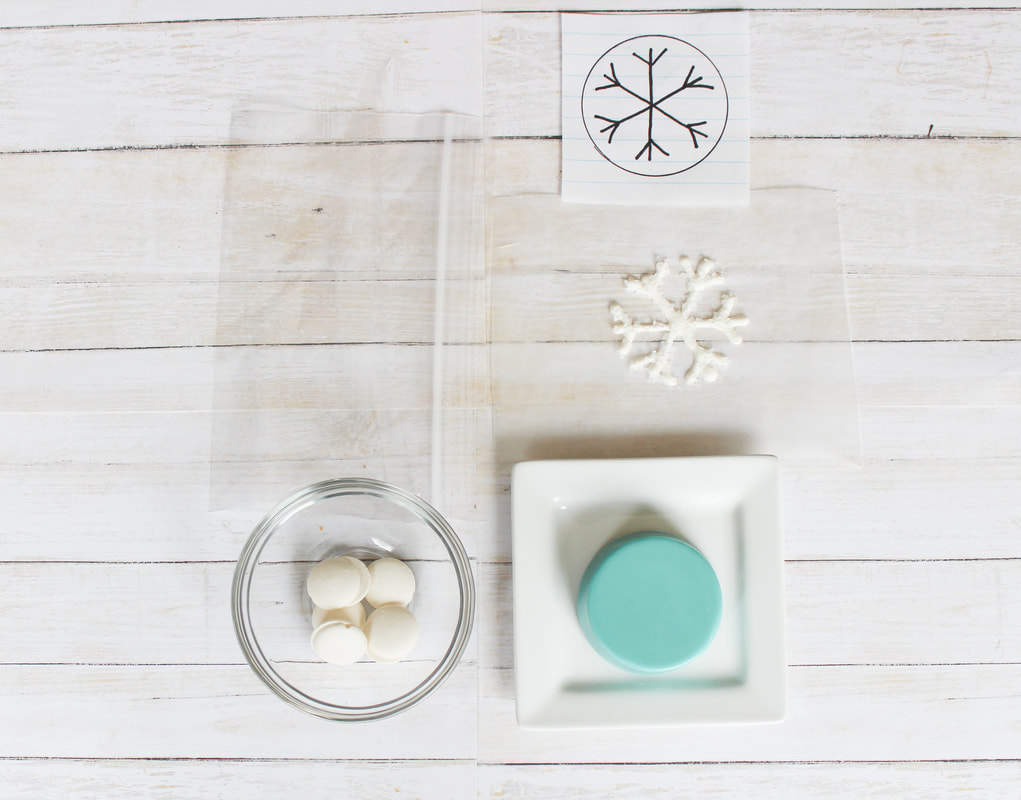 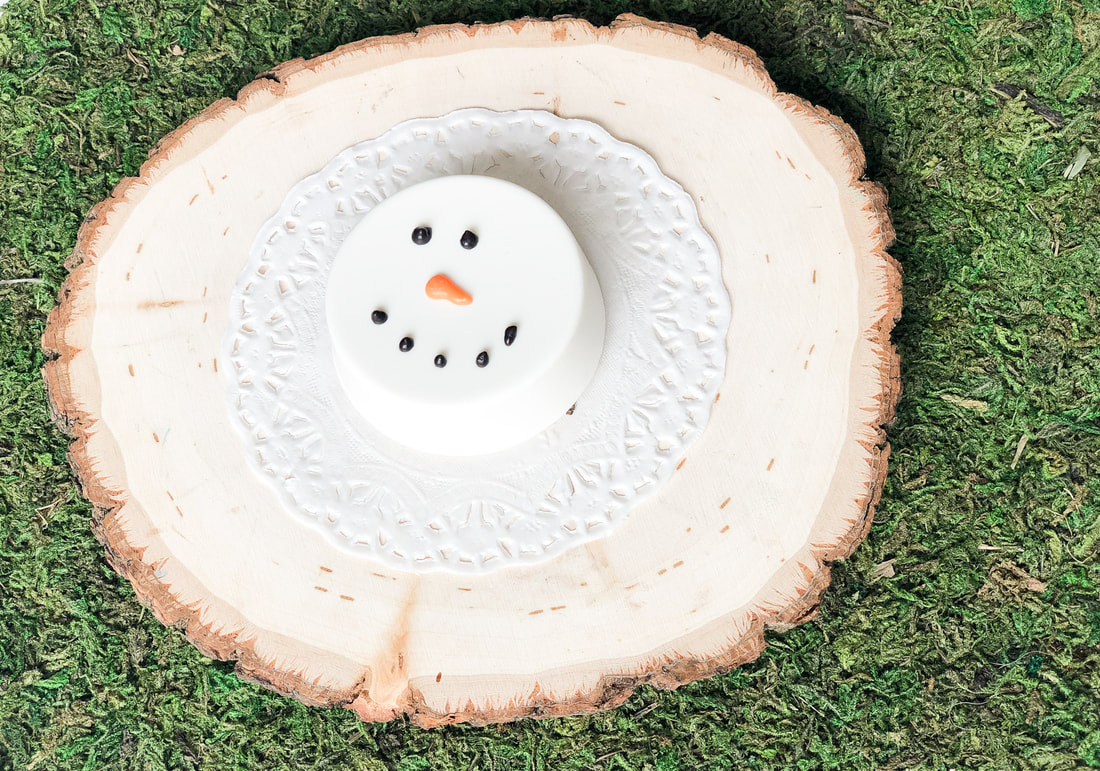 I know I said the Grinch design was easy but this Snowman is pretty close in the running. I used black and orange Wilton Candy melts for the eyes, nose and mouth. 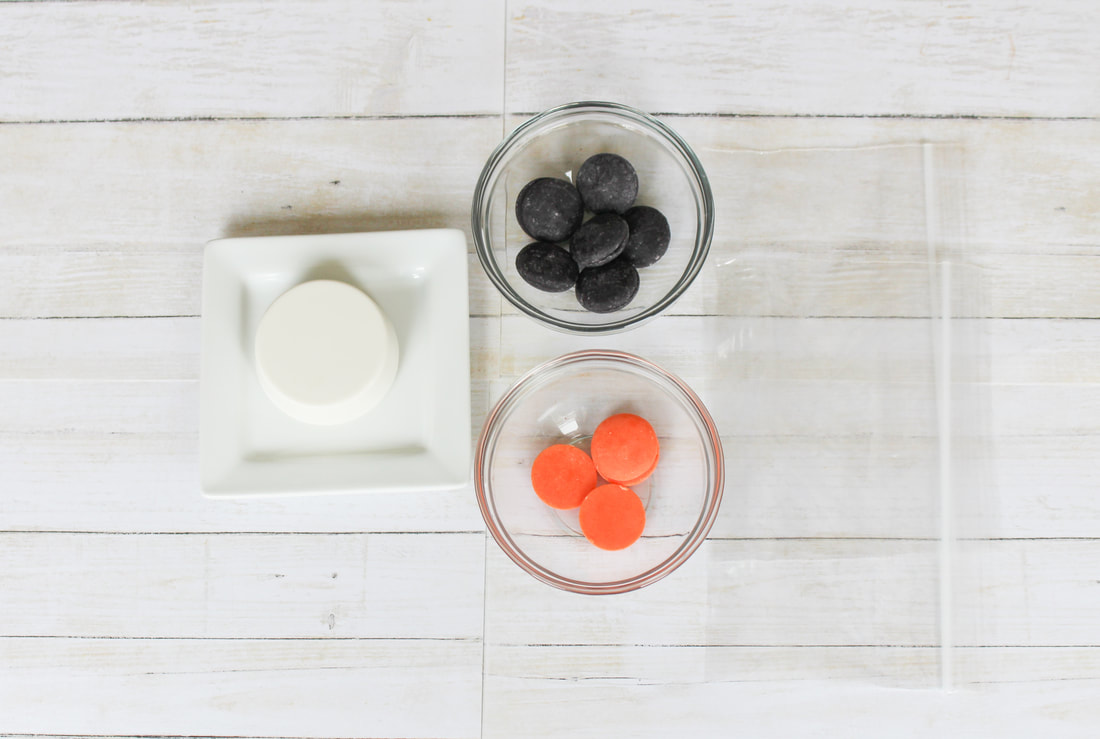 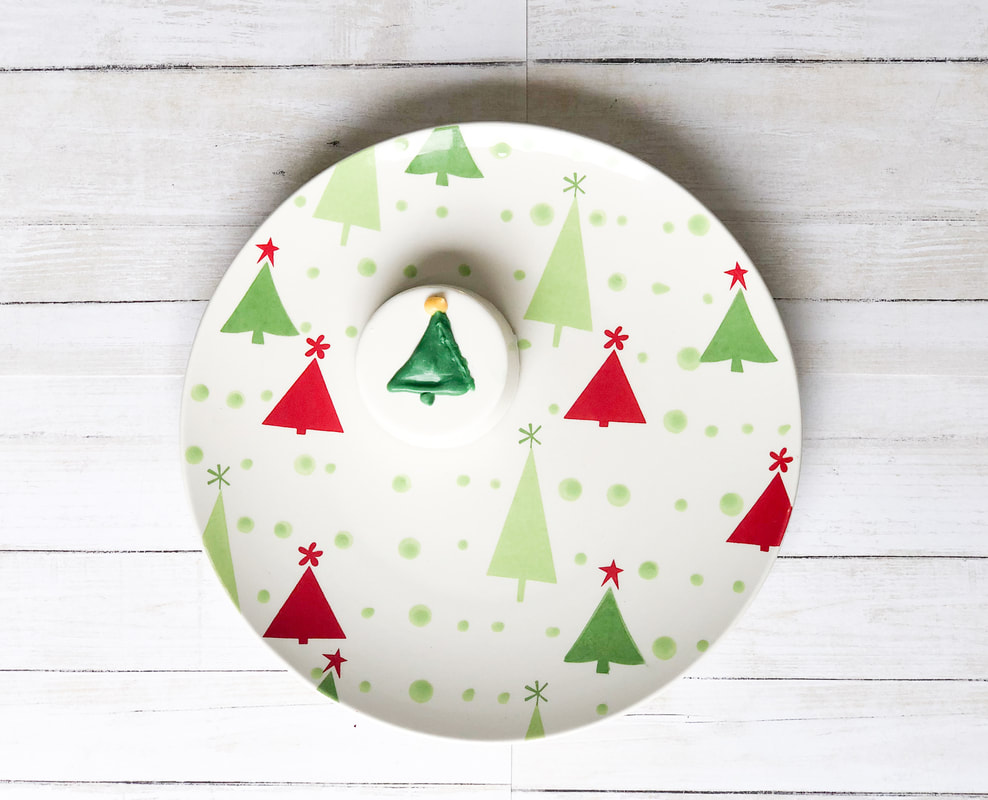 Last but not least, the Christmas tree design. I put it last for a reason. Not my best work. Looks a little sad and depressed. Say something nice to cheer this little tree up. He needs all the support he can get. I think you guys get the gist of the design. I used green and yellow Wilton candy melts for this design. 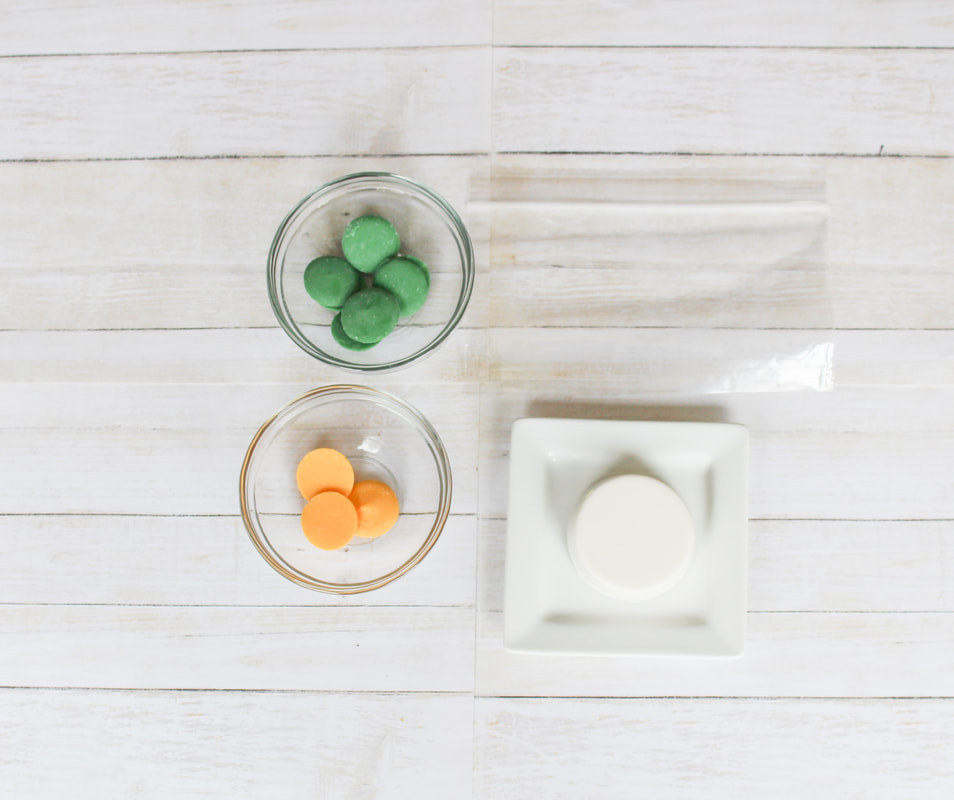 If you make this set, I'd absolutely LOVE to see it! Tag me or use #AshleighNicoleEvents
Until next time! 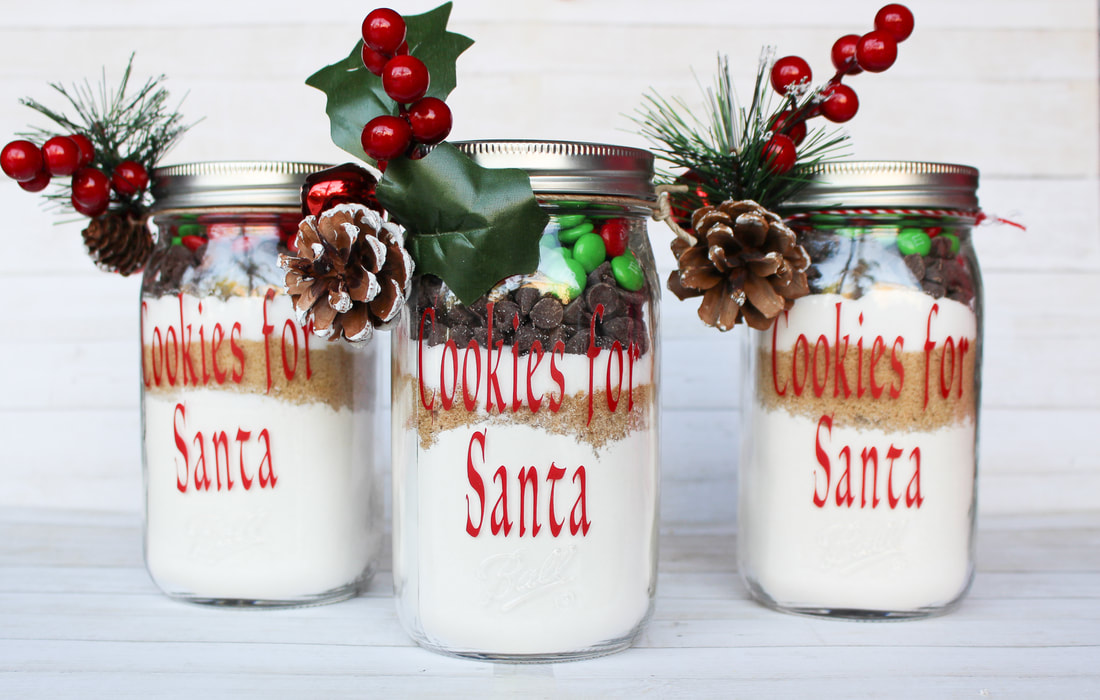 Rumor has it that Santa loves cookies! I heard that if you leave yummy cookies and milk out for him, he'll leave even MORE gifts! I'm not sure if it's true or not but I want to be prepared... just in case 😊 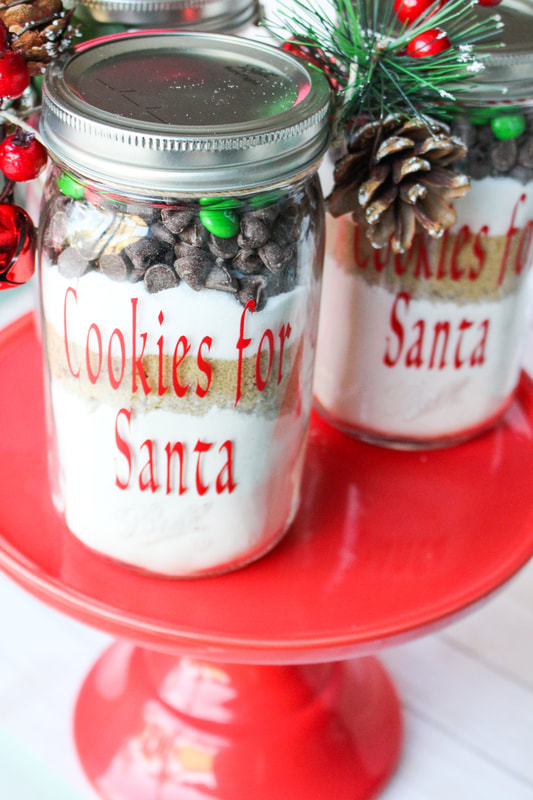 I made these Cookies for Santa mason jars for all of my local friends with kiddos. Each set includes a personalized "Cookies fo Santa" plate, "Milk for Santa" mug and a mason jar filled with all the dry ingredients needed to make Christmas cookies... for Santa, of course. These are the perfect gifts for neighbors, teachers, friends and relatives! 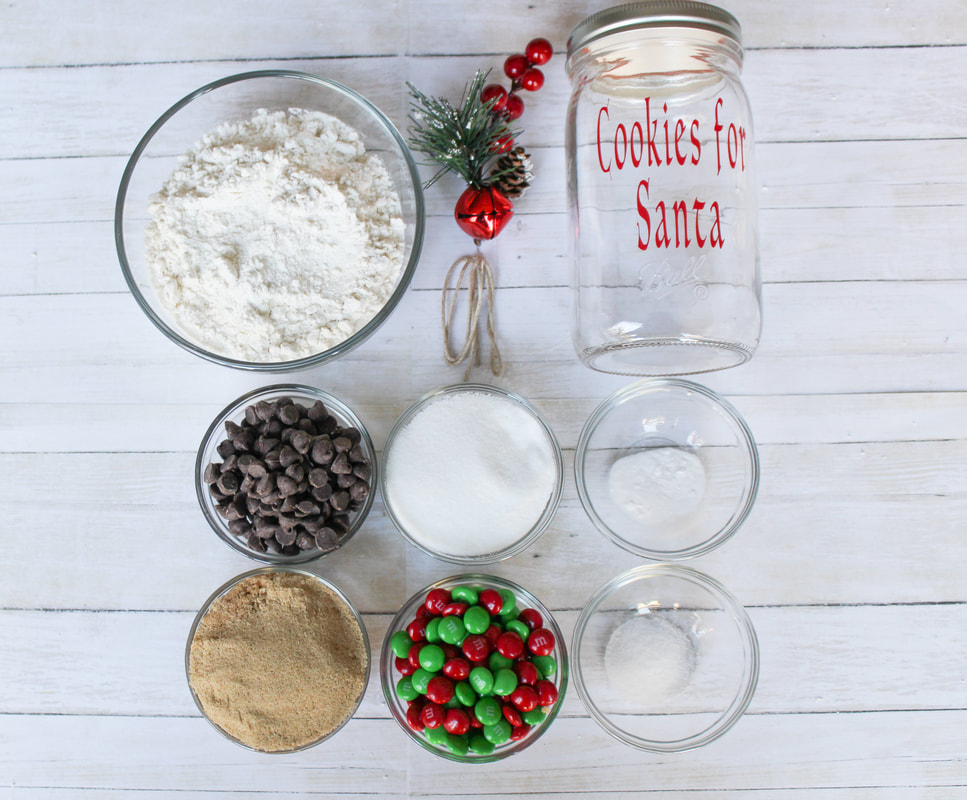
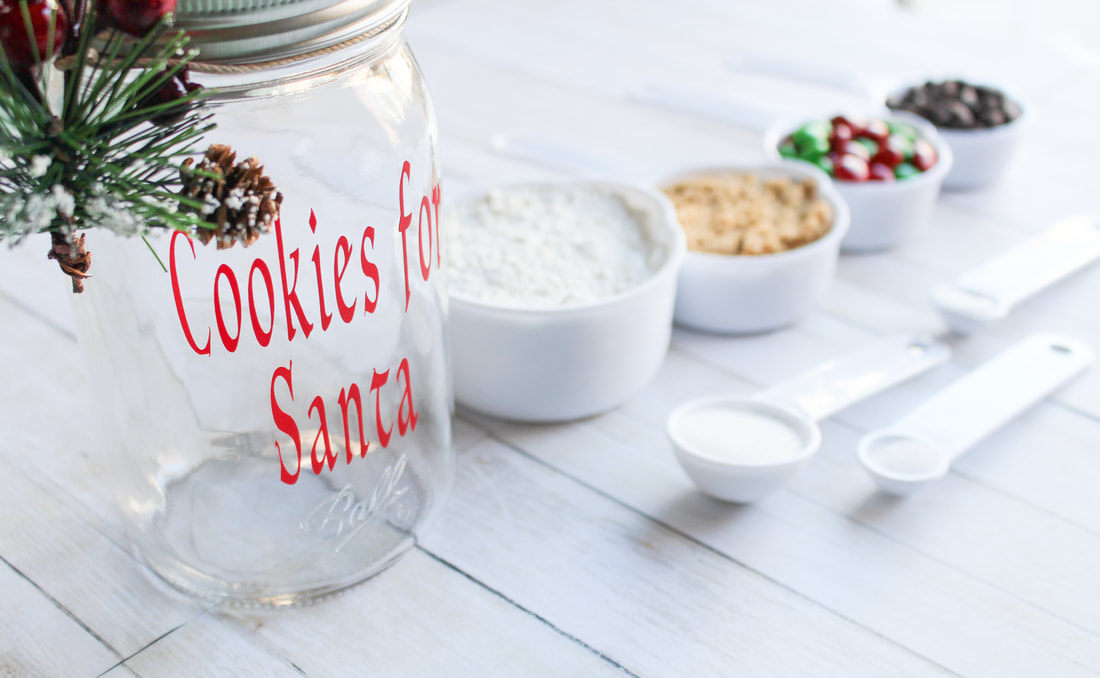 Details... In a quart size mason jar, carefully pour in the flour. I used a ladle but using a funnel would be extremely helpful. Gently tap the jar on the table to settle the flour. (Or tap against your hand) Add the baking soda and salt. Next, add the brown sugar. Use a spoon to press and smooth out evenly. Add the white sugar. Smooth out using a spoon. Layer the chocolate chips on top of the sugar. Finish by adding holiday m&ms to fill the remaining space in the jar. Tie on the ribbon and holiday greenery.... You’re done! 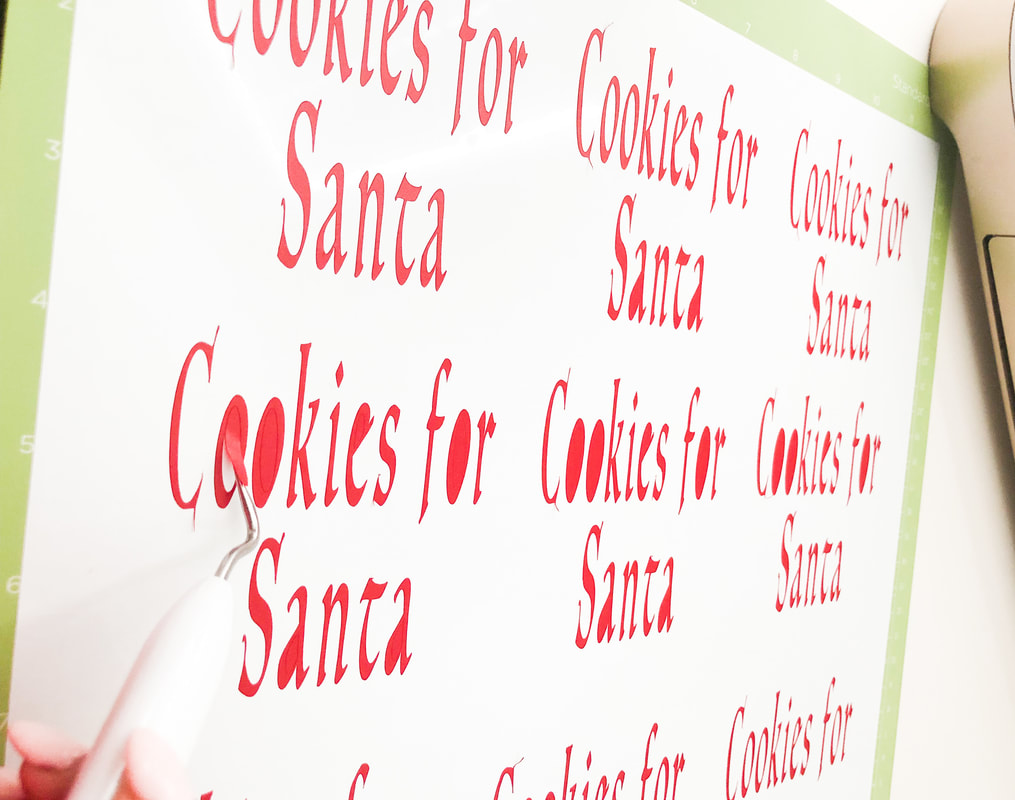 Now lets chat about all this beautiful vinyl work! You can't see it but Im definitely patting myself on the back right now. I haven't used my Cricut Explore Air in over 2 1/2 years. Just a couple YouTube tutorials to refresh my memory and I was good to go! 9 sets designed, sized and cut an less in 30 minutes. (Yup, still patting) :) 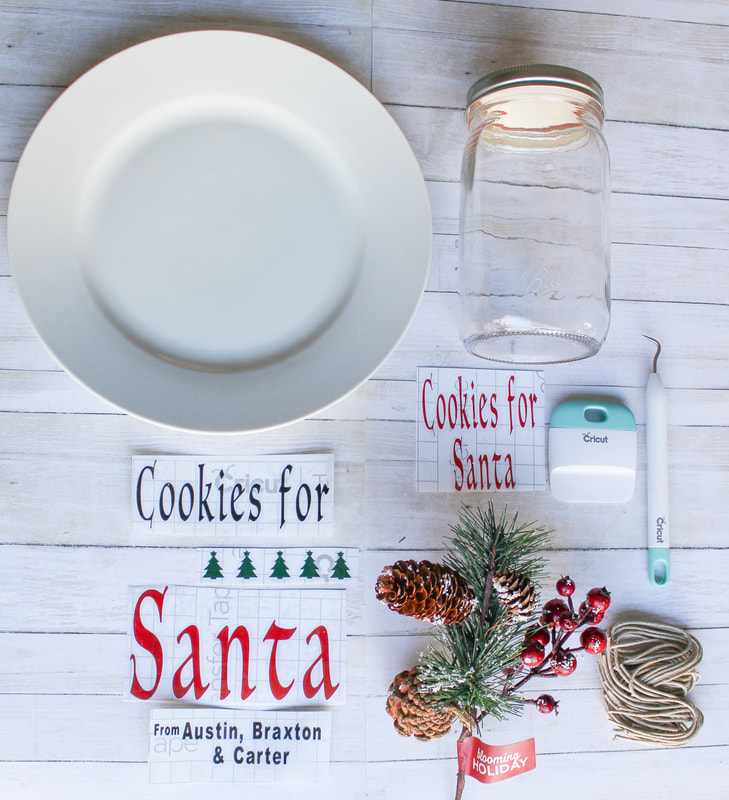 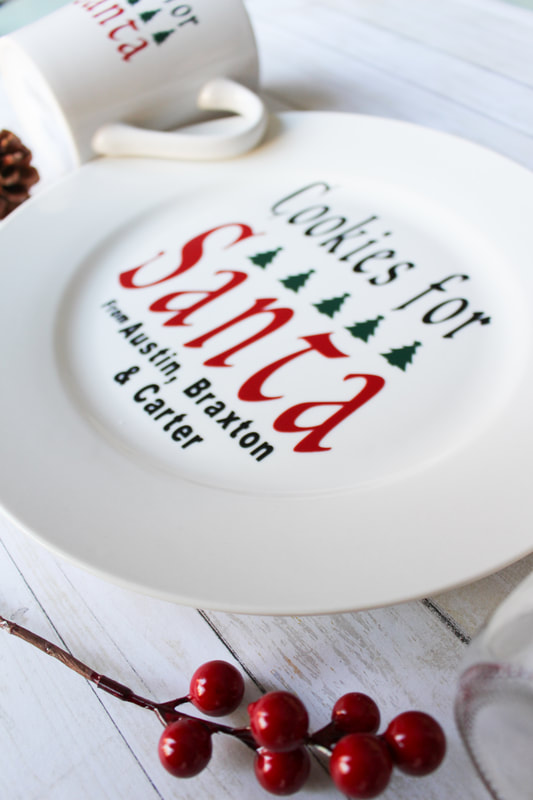 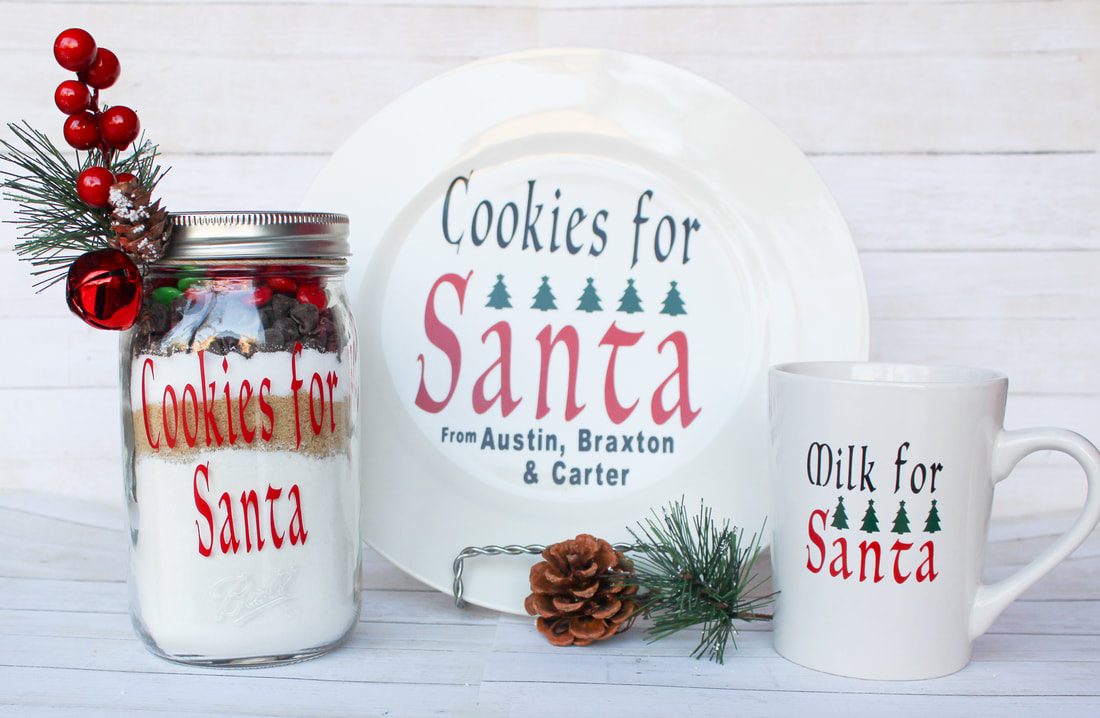 I found these cute wire baskets in Joanns. 60% off + military discount... needless to say, I grabbed them all! 9 total. No shame here. 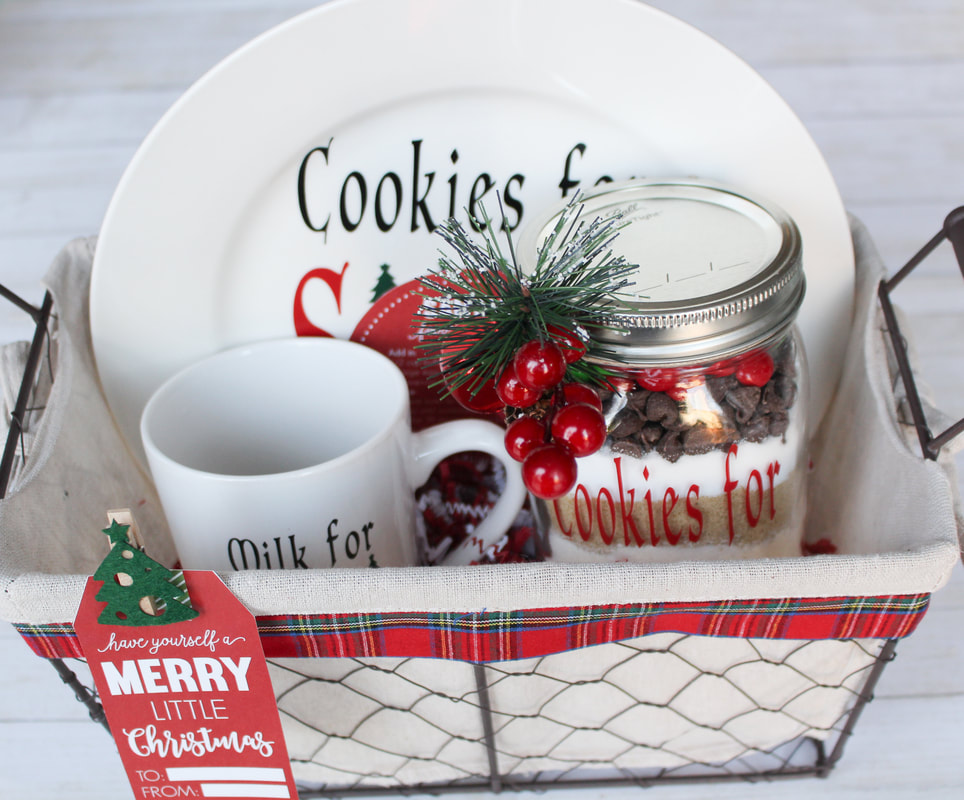 Those adorable little tags are free from @iheartnaptime. Yup, free! Happy Holidays everyone!!!
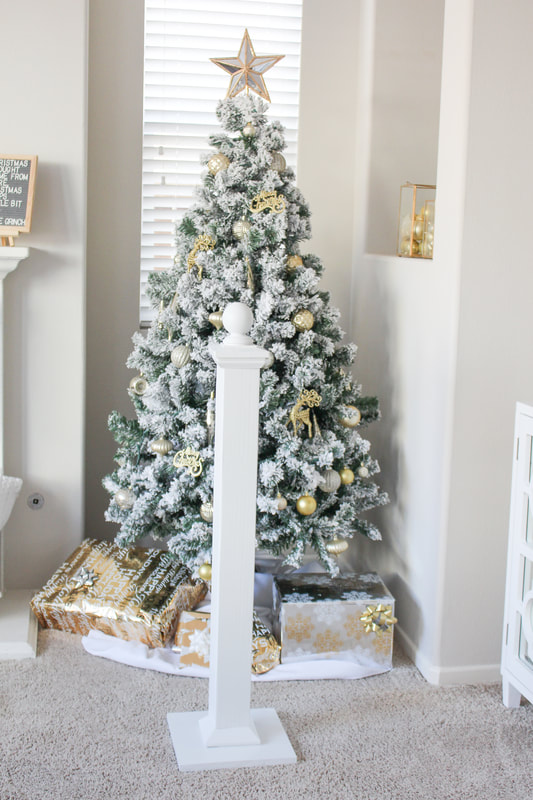
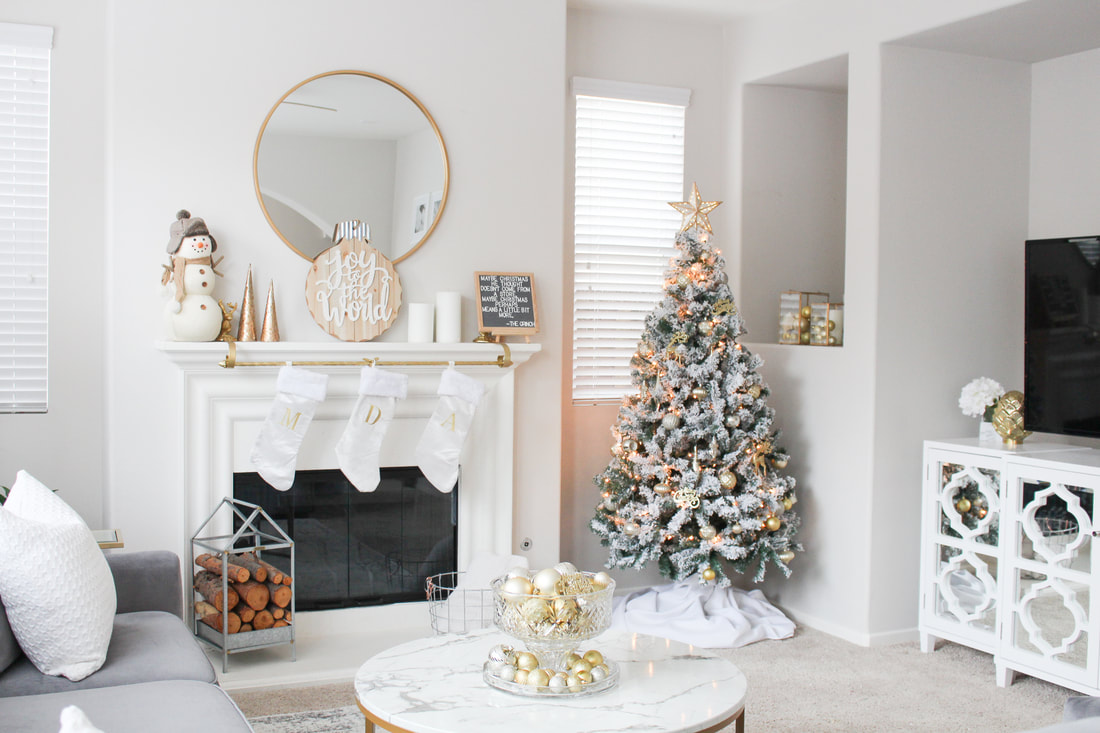 LOVE LOVE LOVE Christmas! It's my absolute favorite time of year! I had so much fun decorating our home this season. I kept the color scheme the same as it is all year around. (Gold, silver, gray and white) 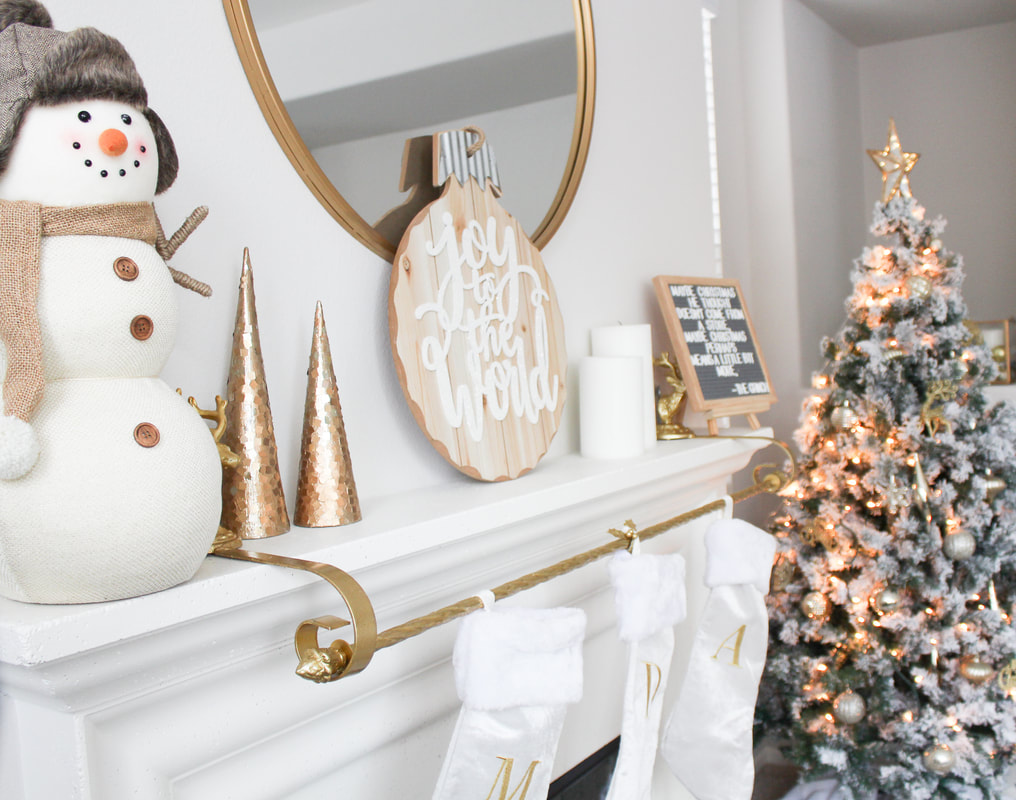 Lets start with this awesome gold stocking hanger I purchased from Kirklands. It is the perfect size for my mantle. I only hung 3 stockings but I think it would comfortably fit 5, possibly even 6! I saw an almost identical gold stocking hanger at Pier One as well. The adorable little snowman is from Target. It surprisingly held up pretty well. Two coast to coast moves and he's still hanging on. Proud of you little snowman. Moving right along... The "Joy to the World" wooden sign is another Kirlands find. (Can you tell I really like Kirlands?) 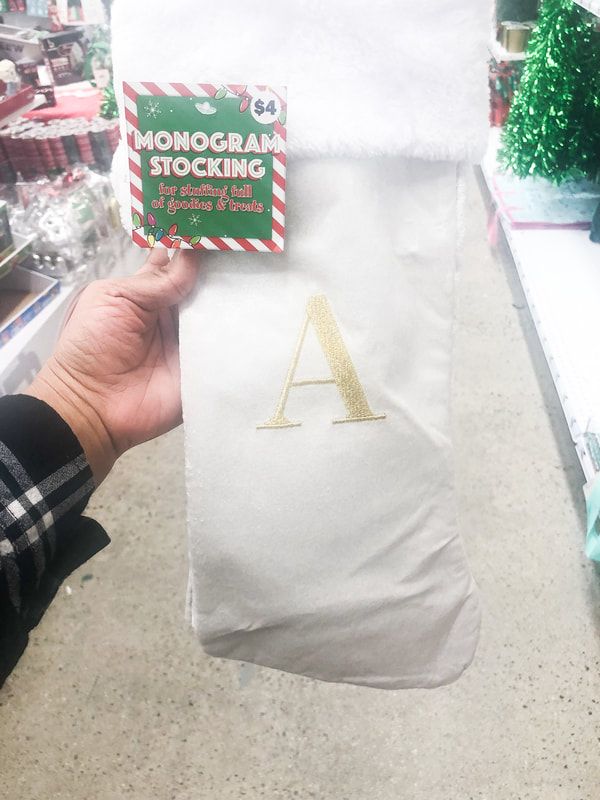 Love a good bargain, aka cheap find! $4 stockings form Five and Below. Cant beat that! The ONLY bad thing about this find is that I could only find 3 of my 5 family members initial. No biggie, the kids have their own stocking post in their playroom. Problem solved! 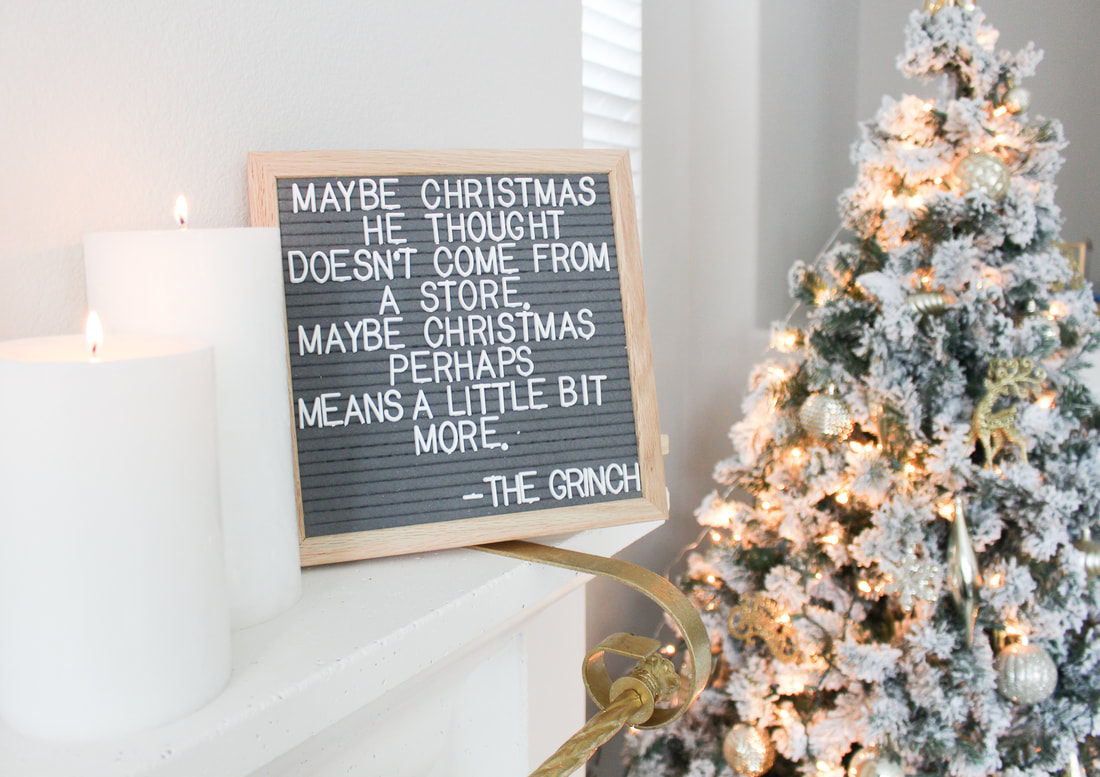 Favorite Christmas quote of all time! 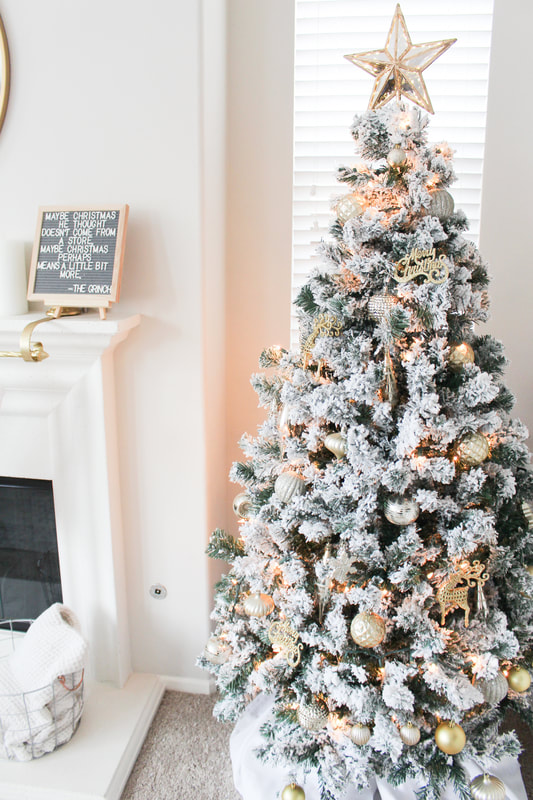 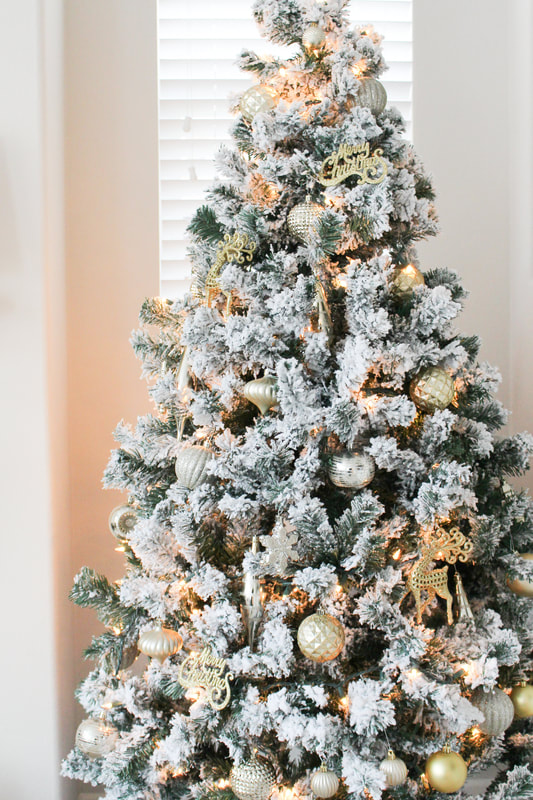 Lets chat about this tree for a sec... Isn't she pretty? Ive never had a flocked tree before. It makes such a statement, even without lights and ornaments. Its only a little shy over 5ft, although I ordered a 6ft. Bummer. The tree skirt is a white linen tablecloth that I loosely wrapped around the base. Nothing fancy. I purchased the ornaments from Target and guess where else..... the Dollar Tree! Honestly my Dollar Tree ornaments are my favorite ones! Oh and the gold tree topper star is also from Target. I just couldn't wait to tell you about the ornaments! 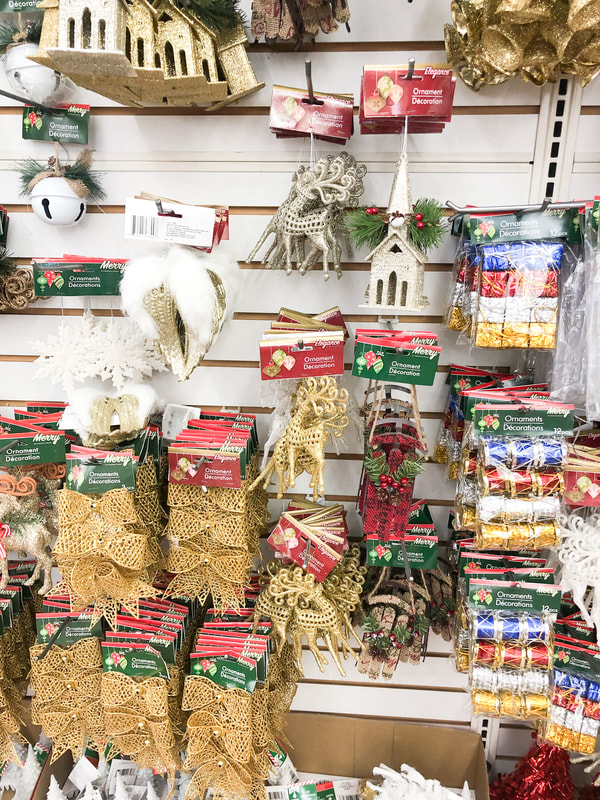 Look at those pretty gold reindeer! Love them! 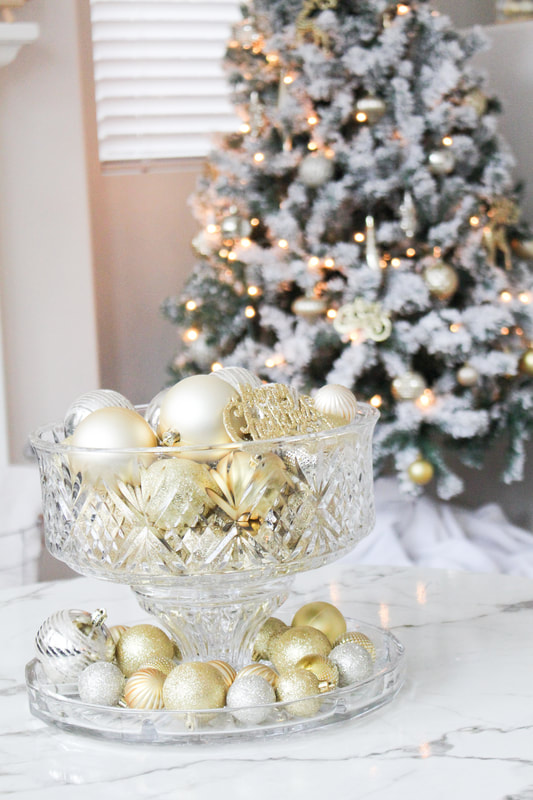 Extra bulb storage or pretty bulb centerpiece? Ill never tell :)
|
The Ashleigh Nicole Blog!
DIY - Events - Motherhood - Home Decor - Lifestyle Archives
October 2019
Categories
All
 
  
|

 RSS Feed