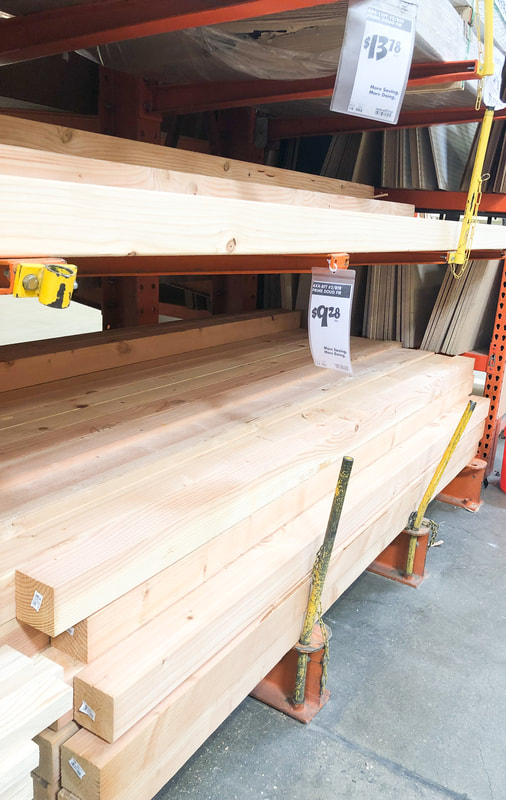
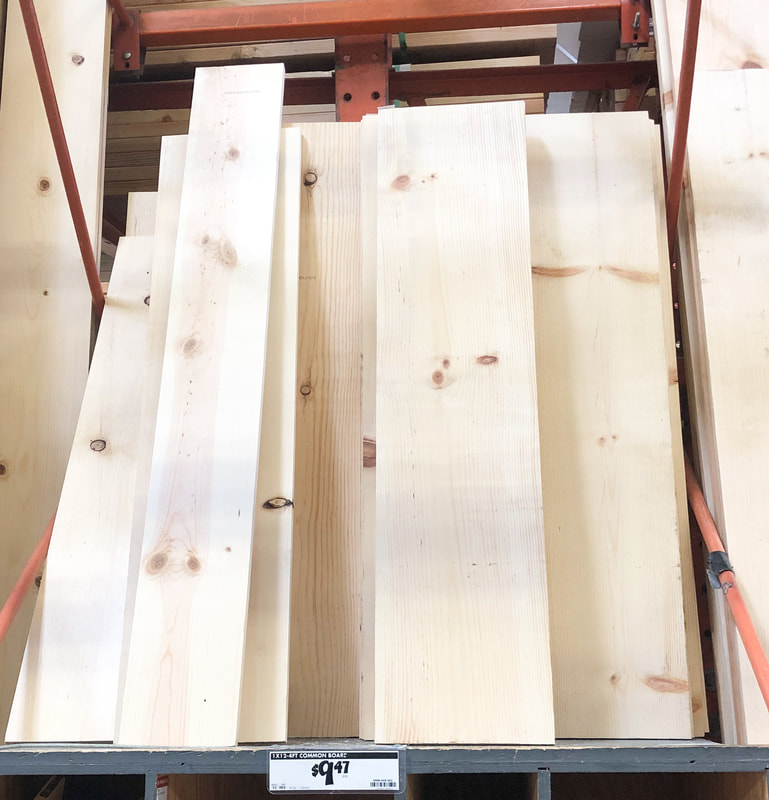
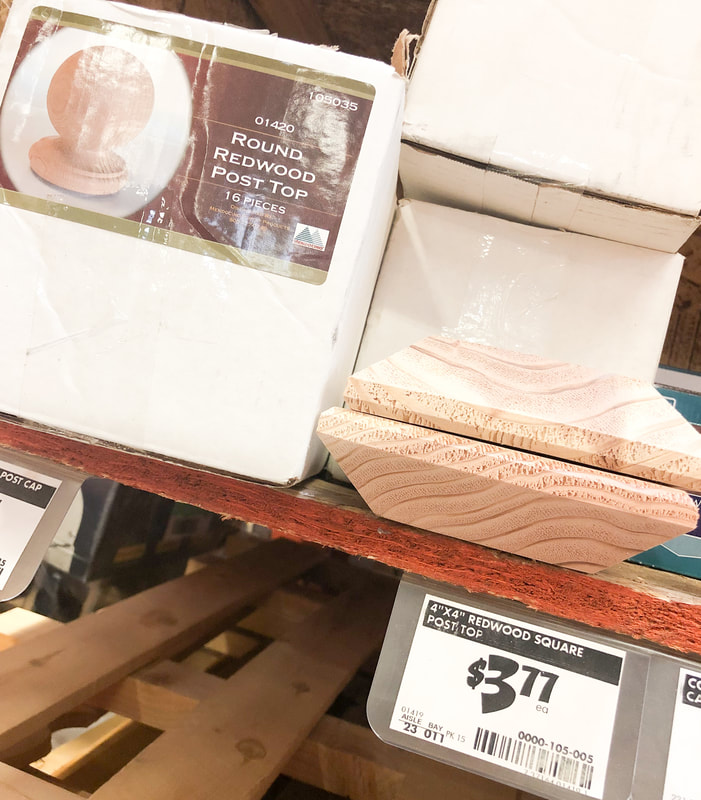
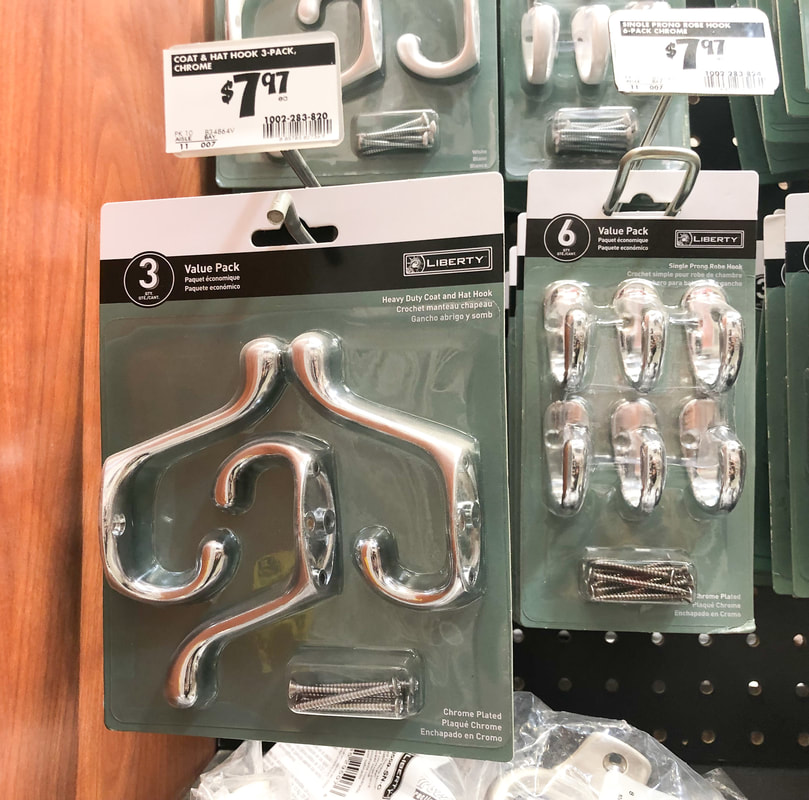
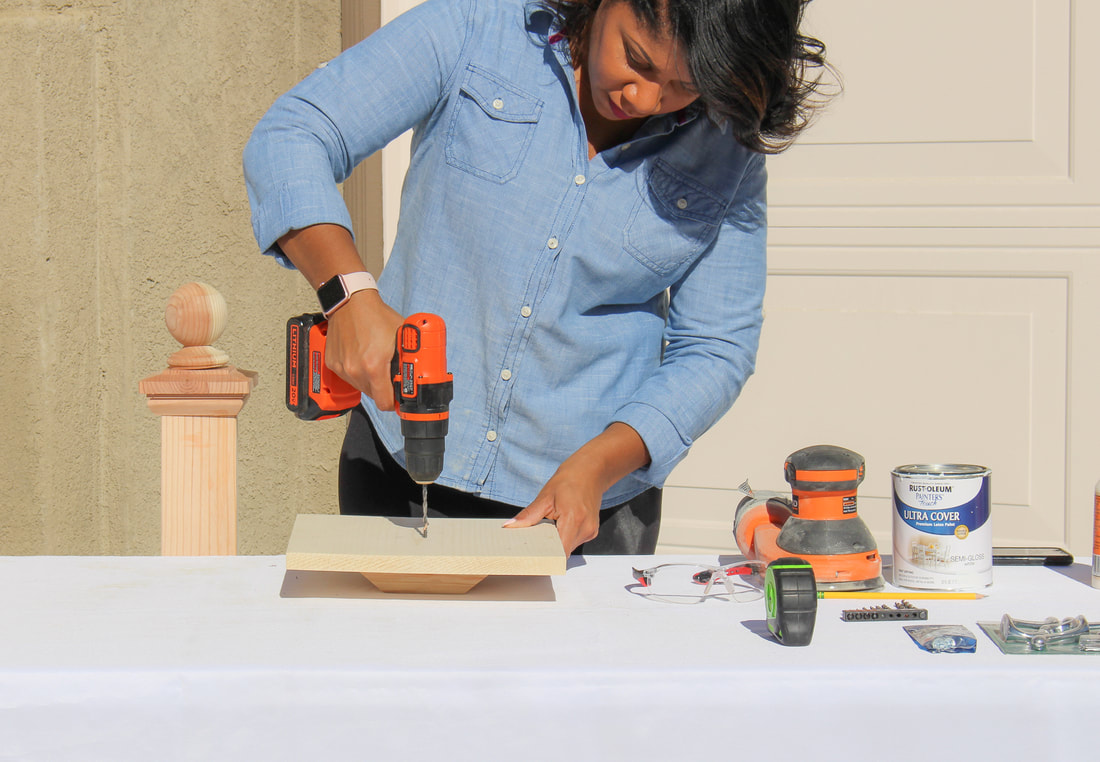
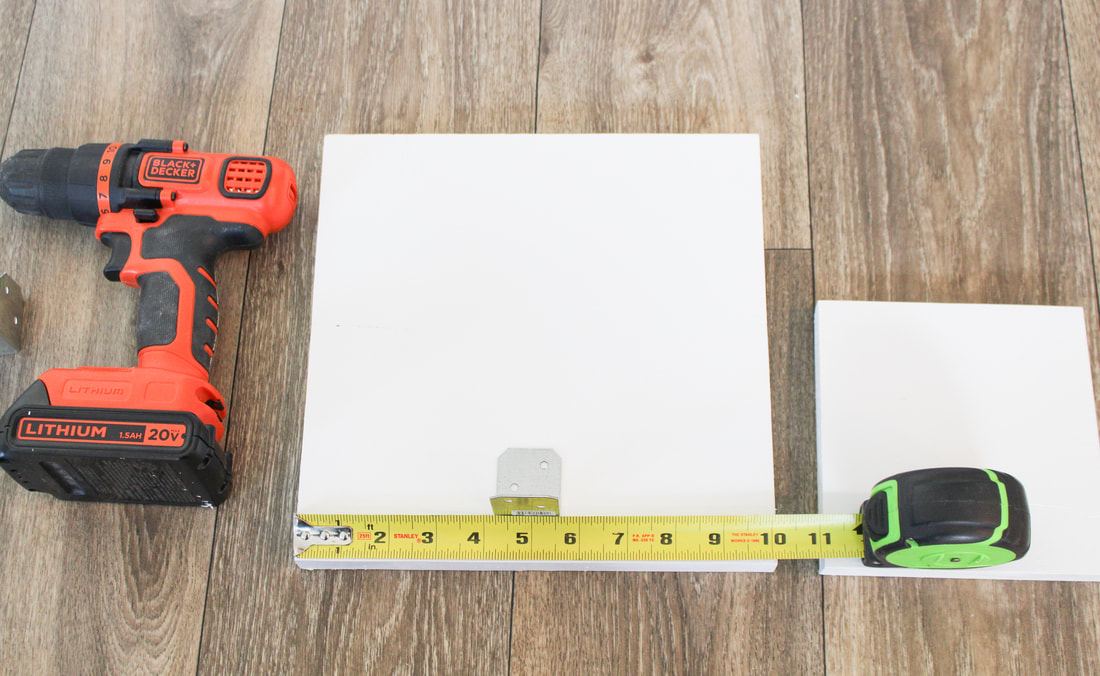
Guys, look at this stocking post! Just look.... Nice right?! My husband made one for our sons playroom but forgot to take pictures of the steps. 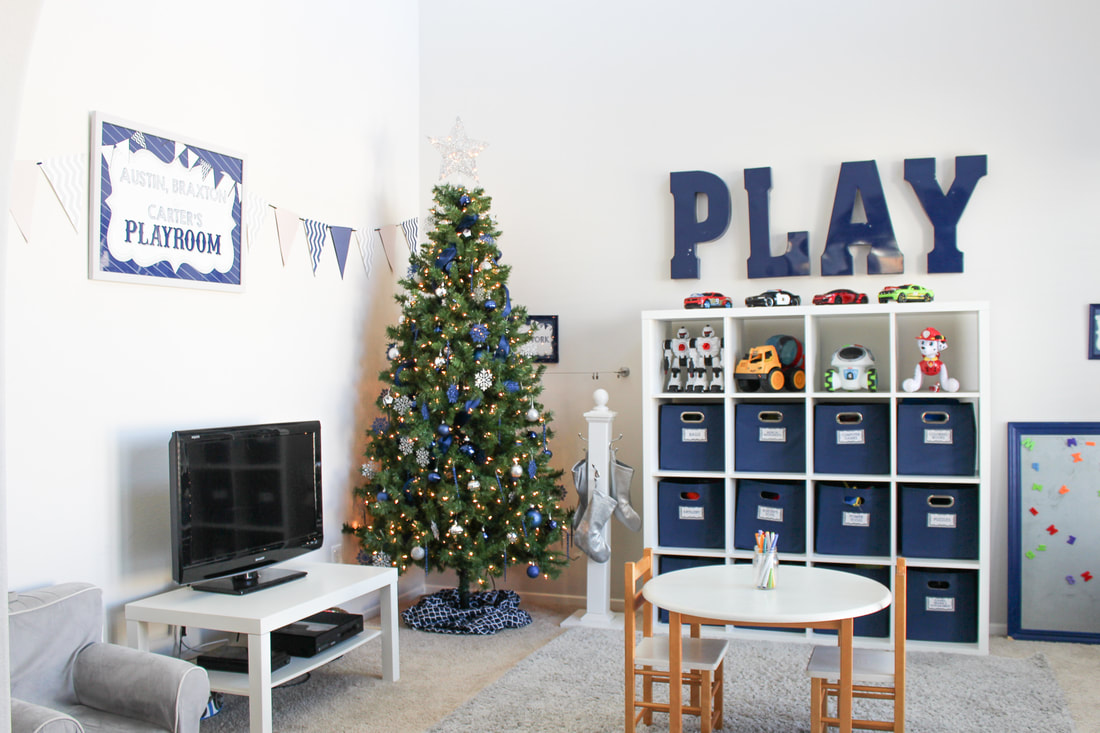 Rest assured, I got your back. We had enough lumber to make another one! All I needed to get was another post cap. Easy peasy. This time I’m going to make it by myself with my husband only giving me verbal help.... if needed 😉 #girlpower Here we go..... 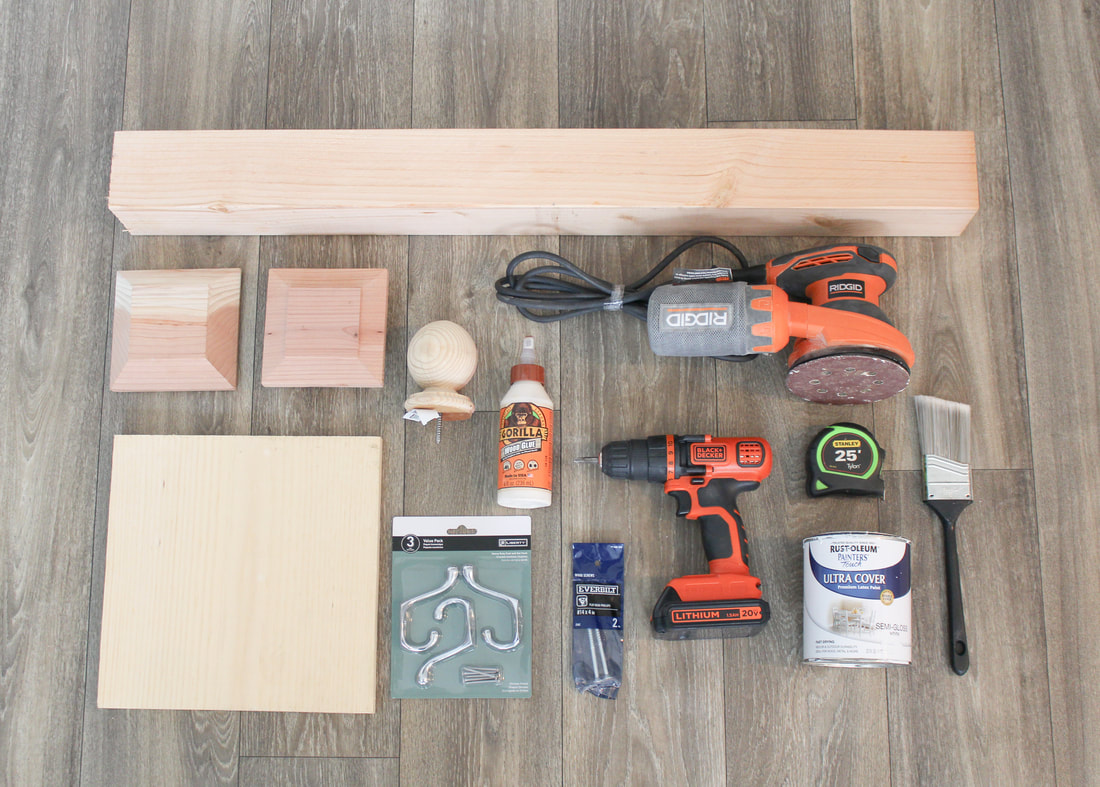 Materials 4x4x8 post 1x12x4 Common board Top Post cap (with indentation) Bottom Post cap (without indentation) Round post top 2- 4” Wood Nails Wood glue Hooks Paint/Stain of your choice Paint brush Tools Sander Drill Drill bit Measuring tape
Cut List (Home Depot will gladly cut your wood for you) 4x4x8- Cut at 4ft. 1x12x4 common board- Cut at 12x12 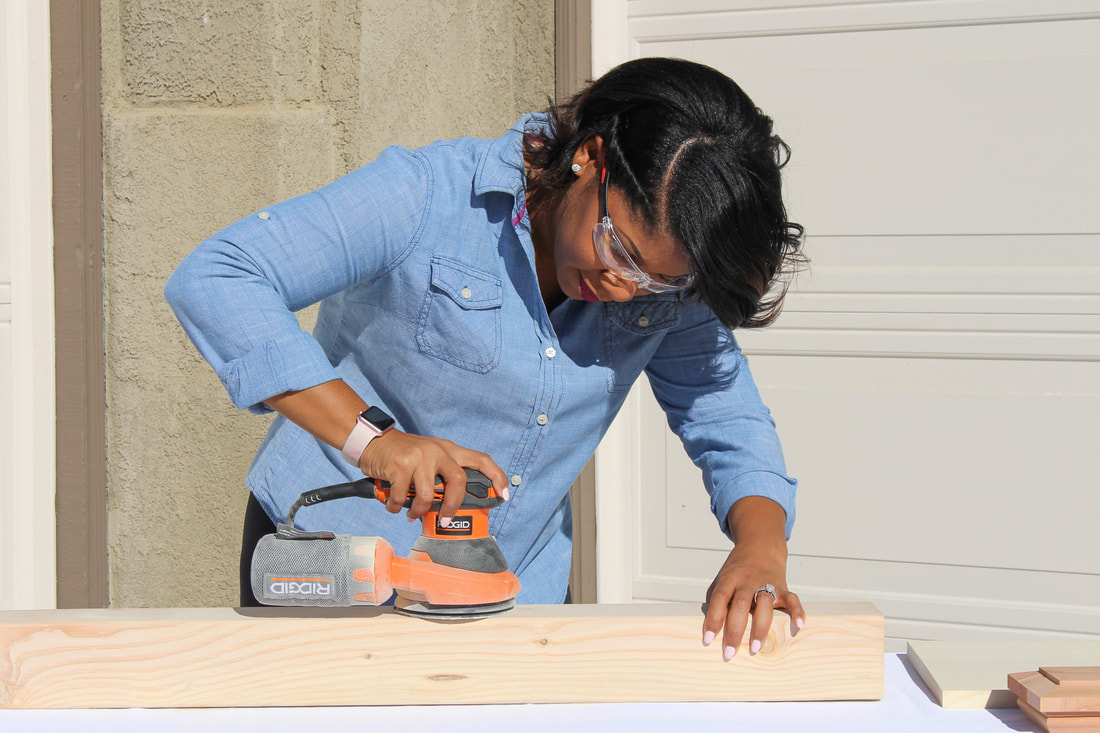
Steps
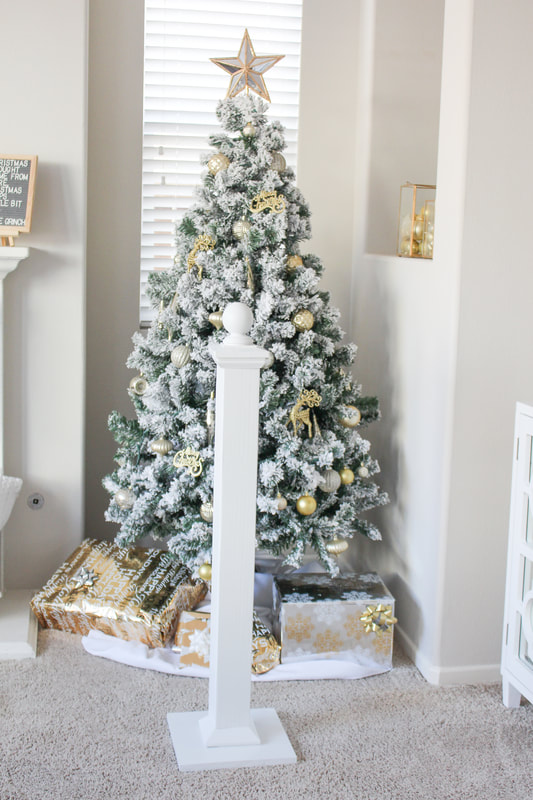
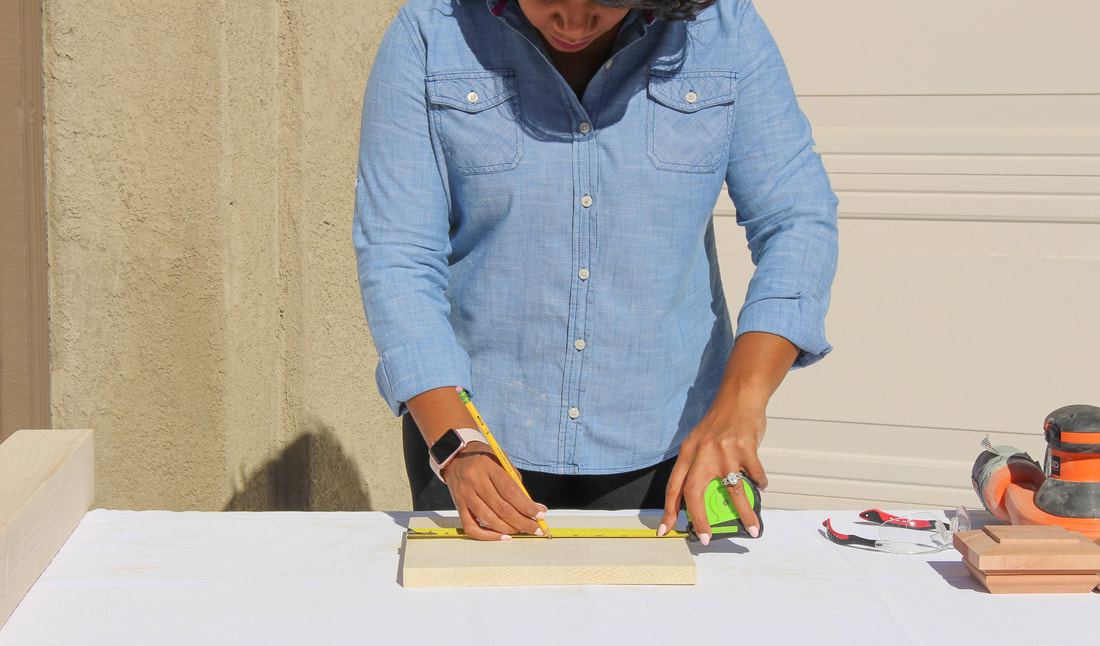
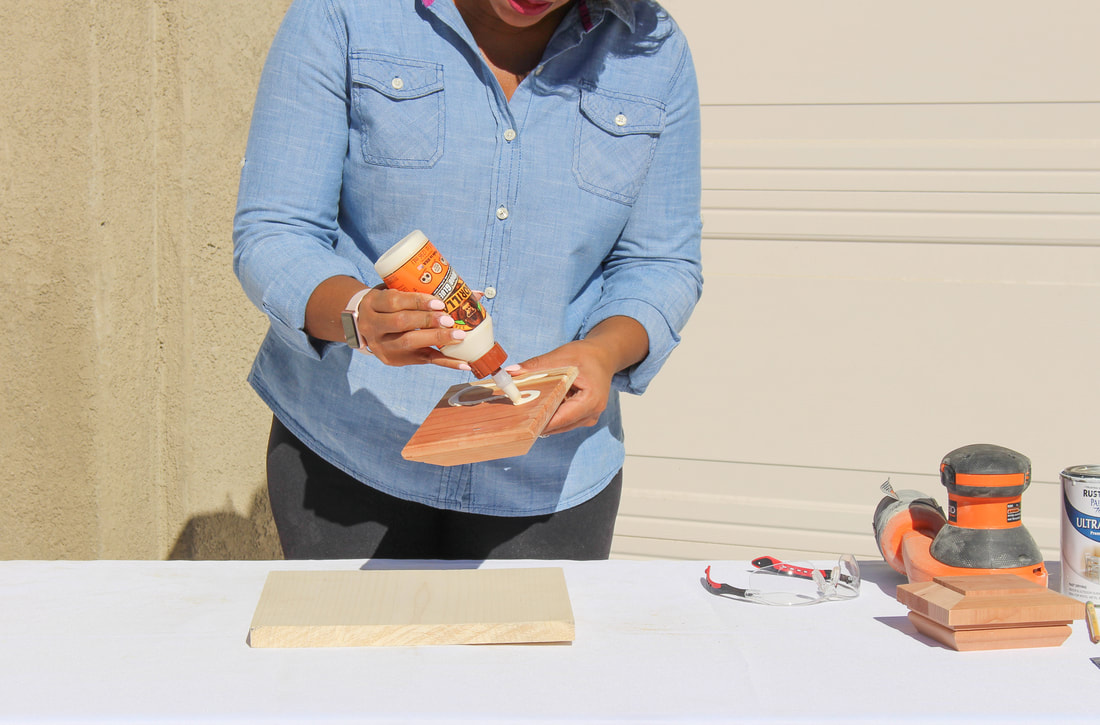
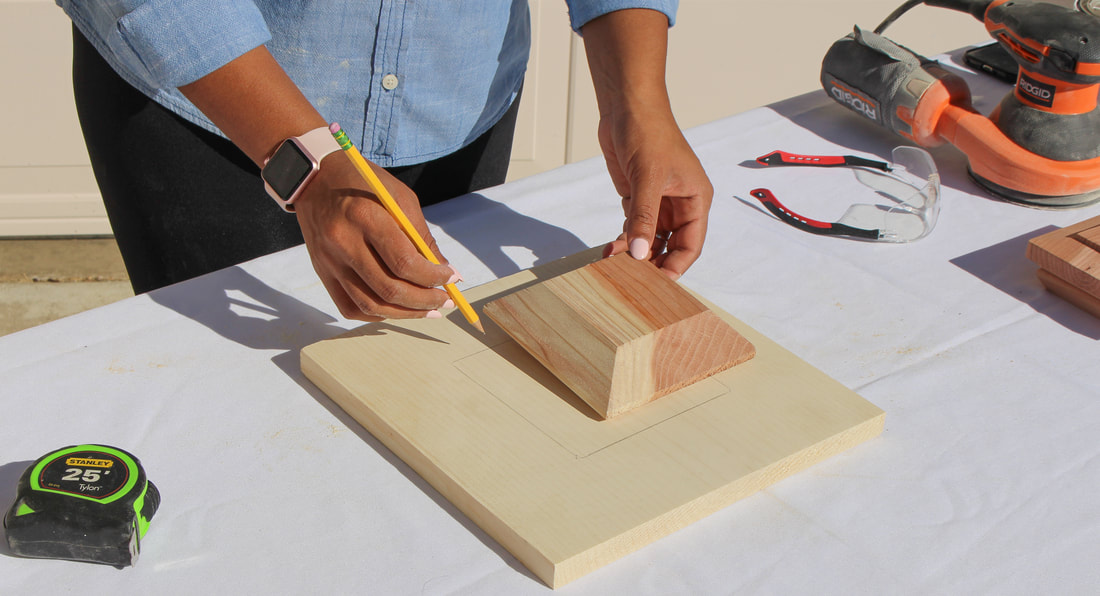
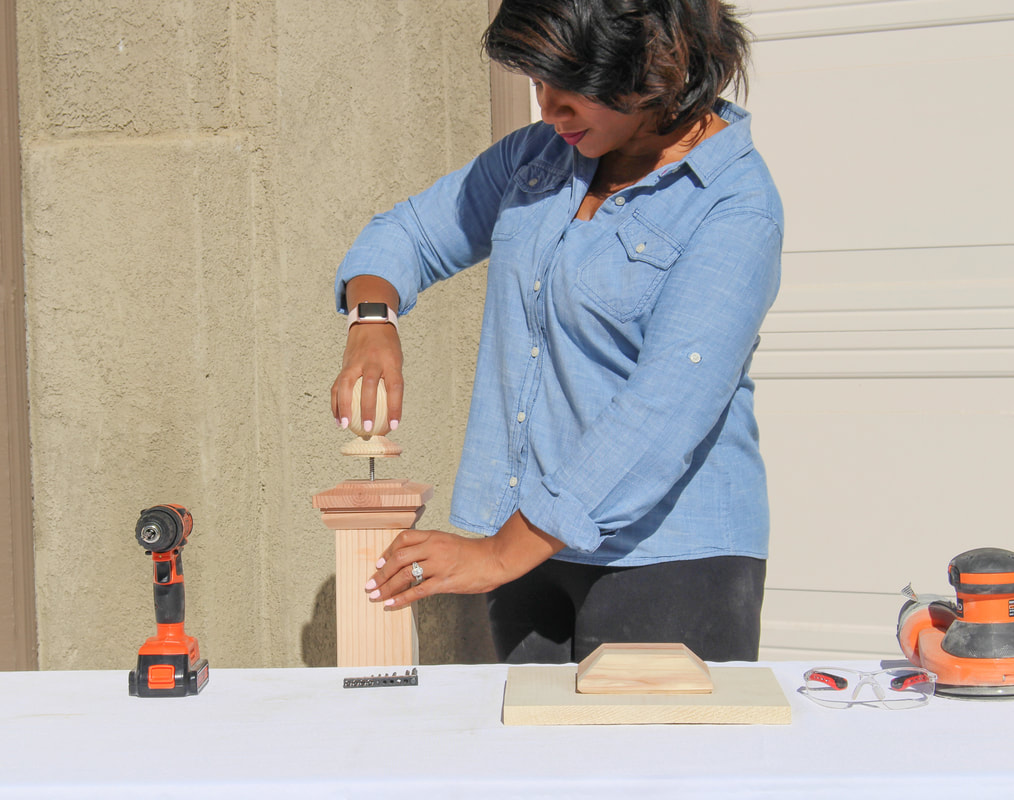
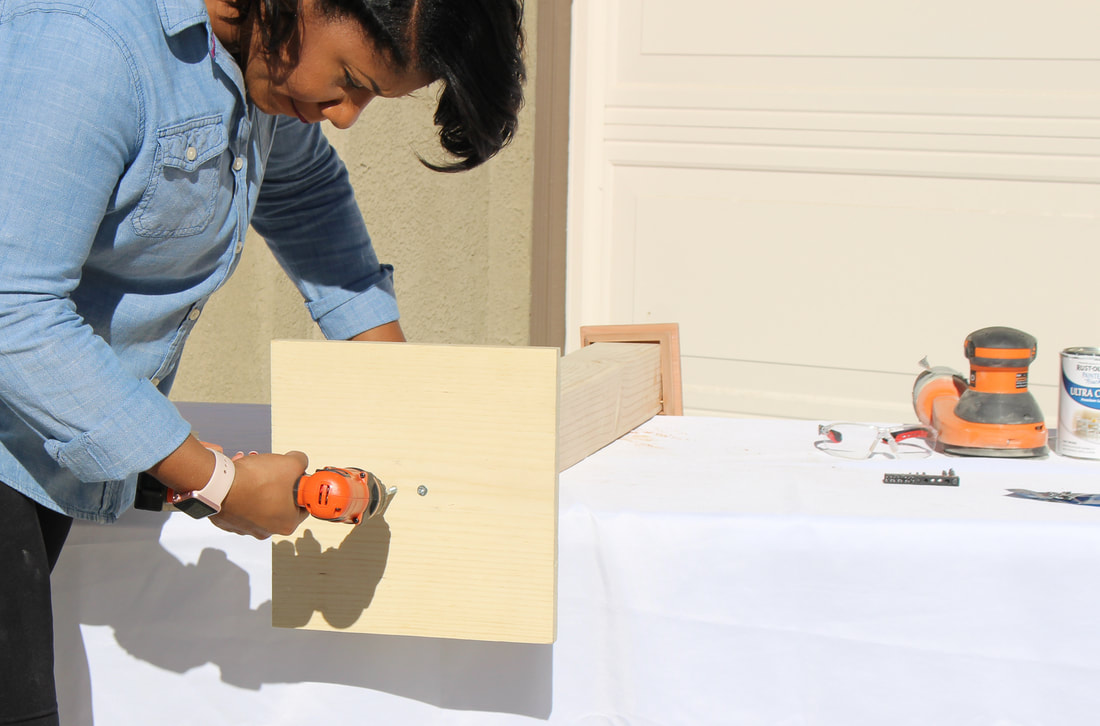
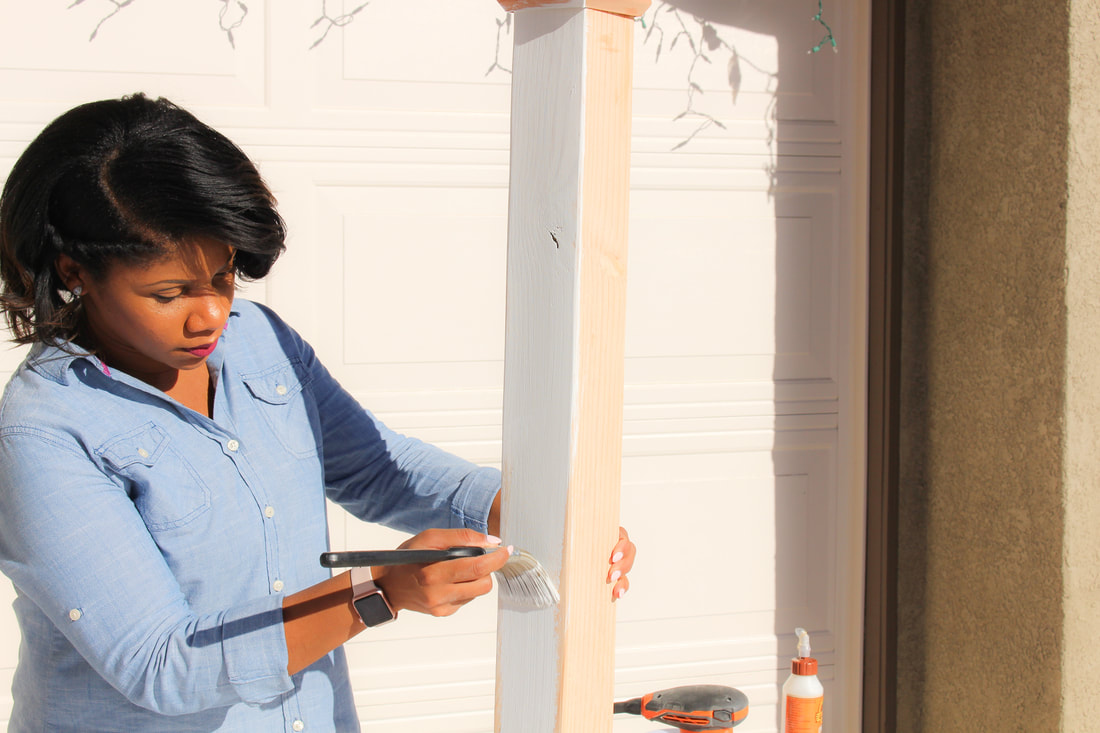
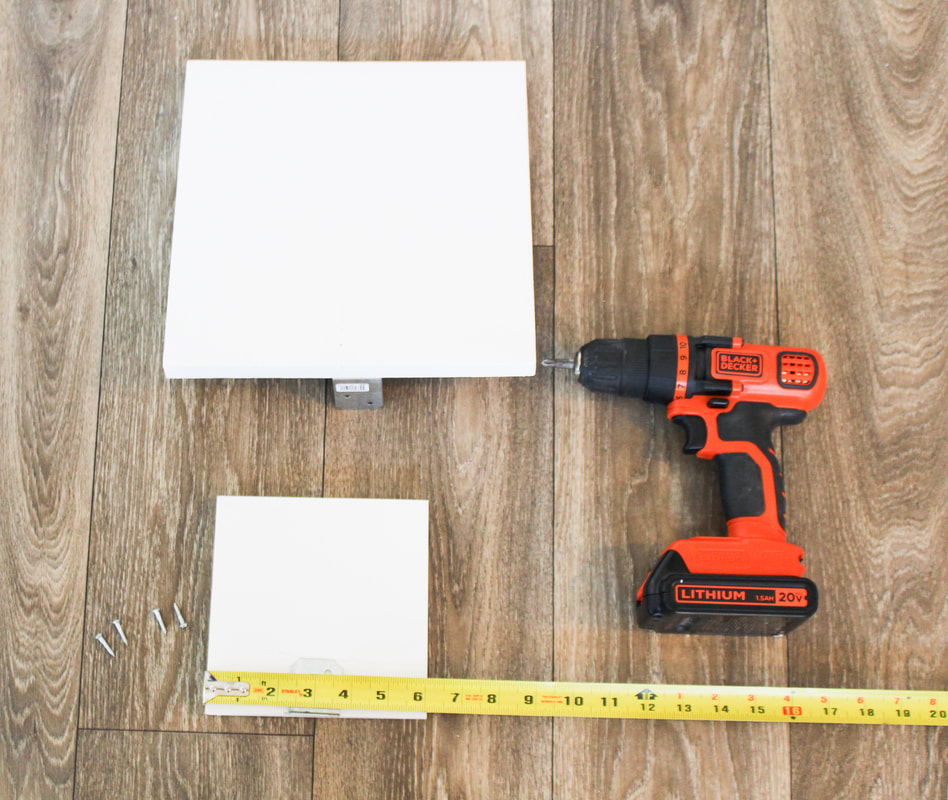
Sand 4x4 post and 12x12 board until smooth. Measure and mark the drill spots on the 12x12 base, bottom post cap. Tip- Once measured, draw a box in the center to show exactly where to glue bottom post cap. Pre-drill to avoid splitting any wood. Now add wood glue to the bottom post cap and place in the pre-measured area on the 12x12 base. Adhere top post cap with wood glue. Allow to dry. Stand up the 4x4 post vertically and position base pieces on pre-measurements area. Make sure your pre-drill holes line up. Drill the two 4” nails through the bottom of the 12x12 base and bottom post cap, all the way through to the post. Tip- if drill bit isn’t long enough to pre drill through the base and 4x4, create a small indent using the holes through the bottom post cap and pre-drill directly into post. We’re nearing the finish line! On top of the top post cap, make another pre-drill hole. This is where the round post top will go. The round post topper already came with screw so just twist it into your pre-drilled hole. Tip- Make sure you test you drill bit sizes on a spare piece of wood to ensure the the perfect fit. Dust off any sawdust and choose a paint or stain of your liking. I chose white to coordinate with our Playroom furniture colors. Last, add your hooks! I used 3 hooks total. I hope your enjoyed this tutorial! Please don’t hesitate to ask any questions!!!
1 Comment
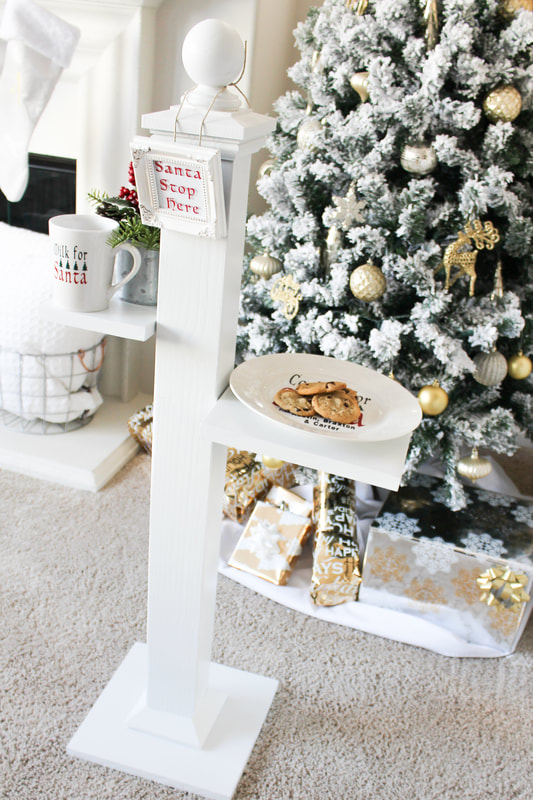 Soooo I did a thing. A good thing. I had extra wood leftover from the Christmas Stocking Stand so I made a Cookie Stand for Santa’s milk and cookies! Cute right? 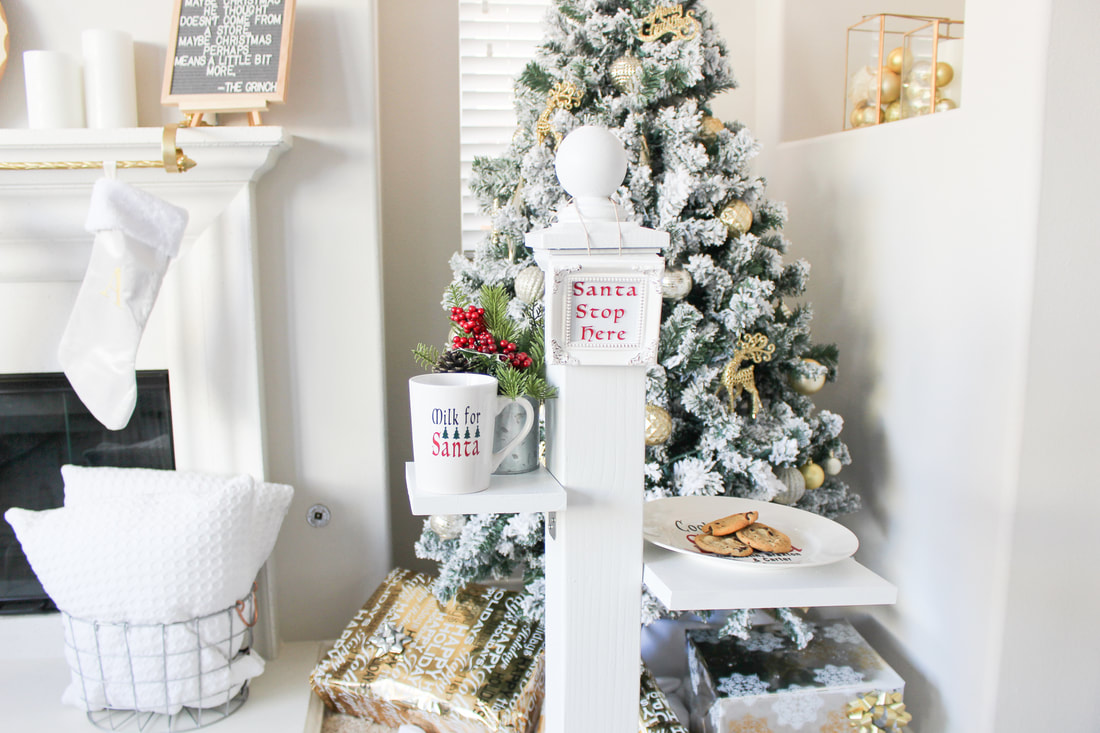 This tutorial will start at the assembled post. Learn how to make the post using the YouTube tutorial below! Materials 10x10 common board 6x6 common board 2 L shaped brackets 8 wood screws Ruler Drill 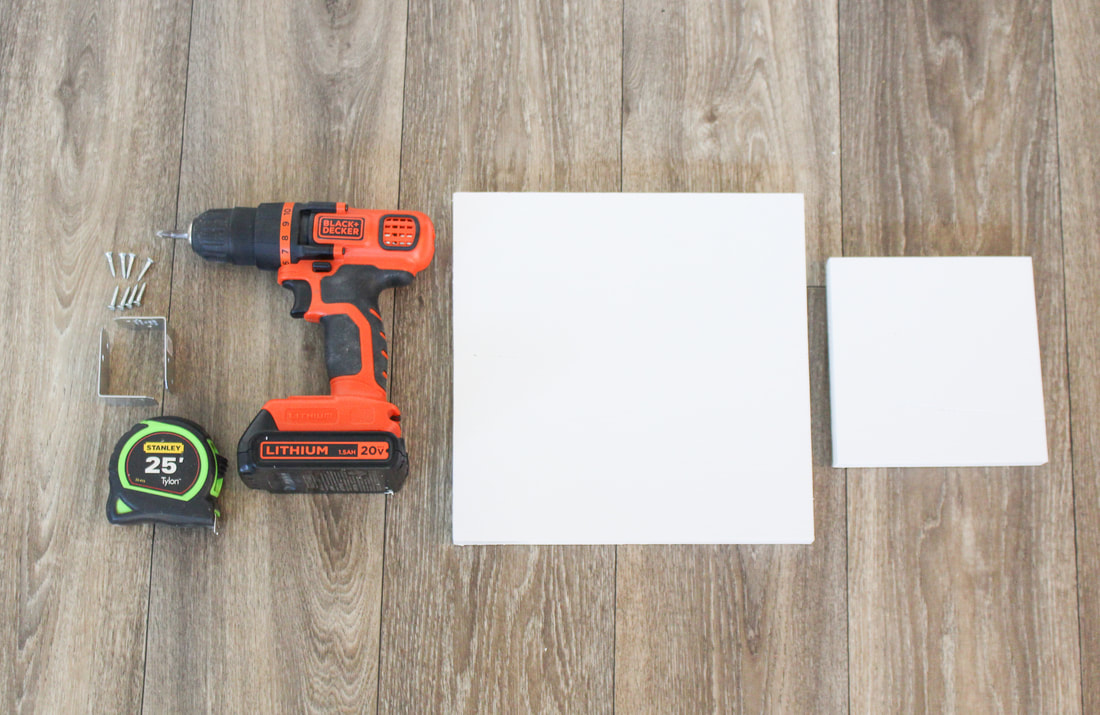
 Measure and align the 10x10 and 6x6 boards in the position you’d like on the post. I staggered my alignment by putting the smaller board slightly higher then the larger board. 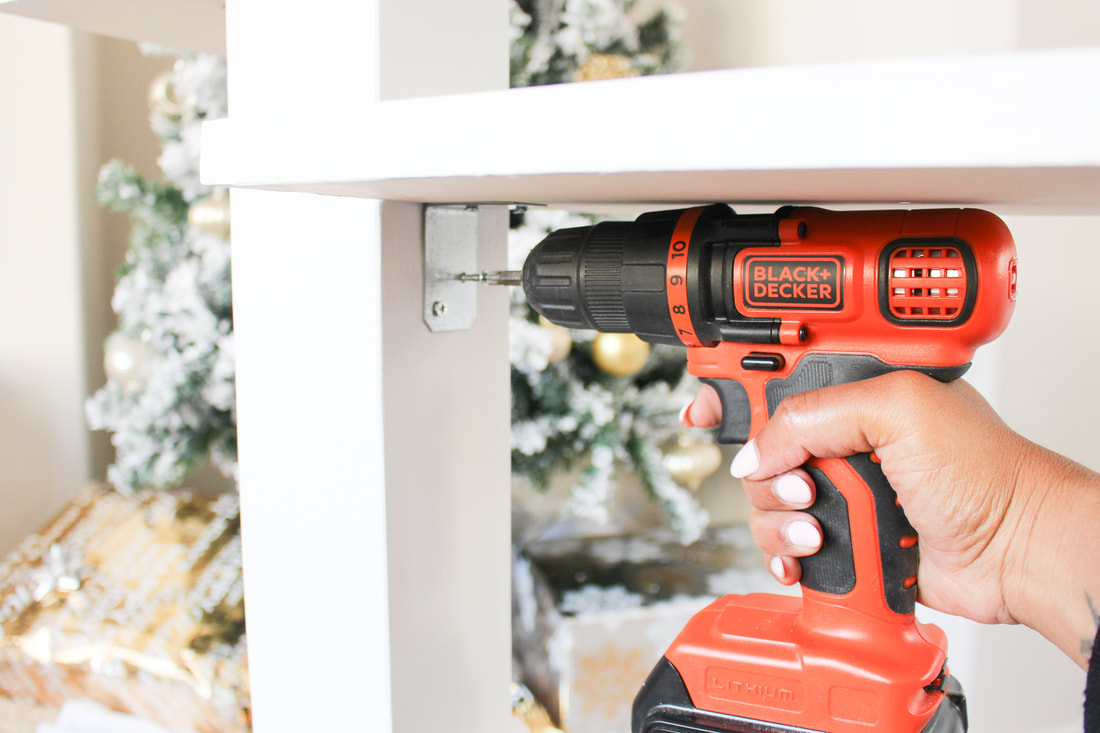 Attatch with wood screws. 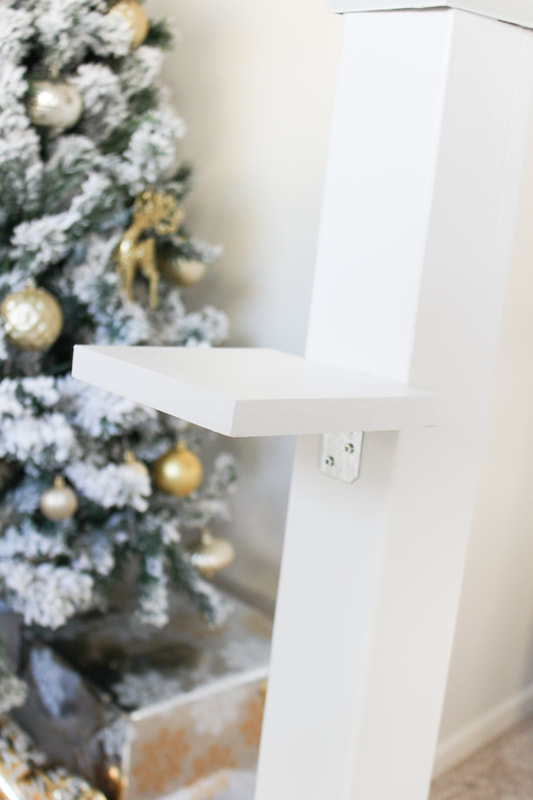 Add a cute “Santa Stop Here” or “Cookie Station” sign and you’re done!!! 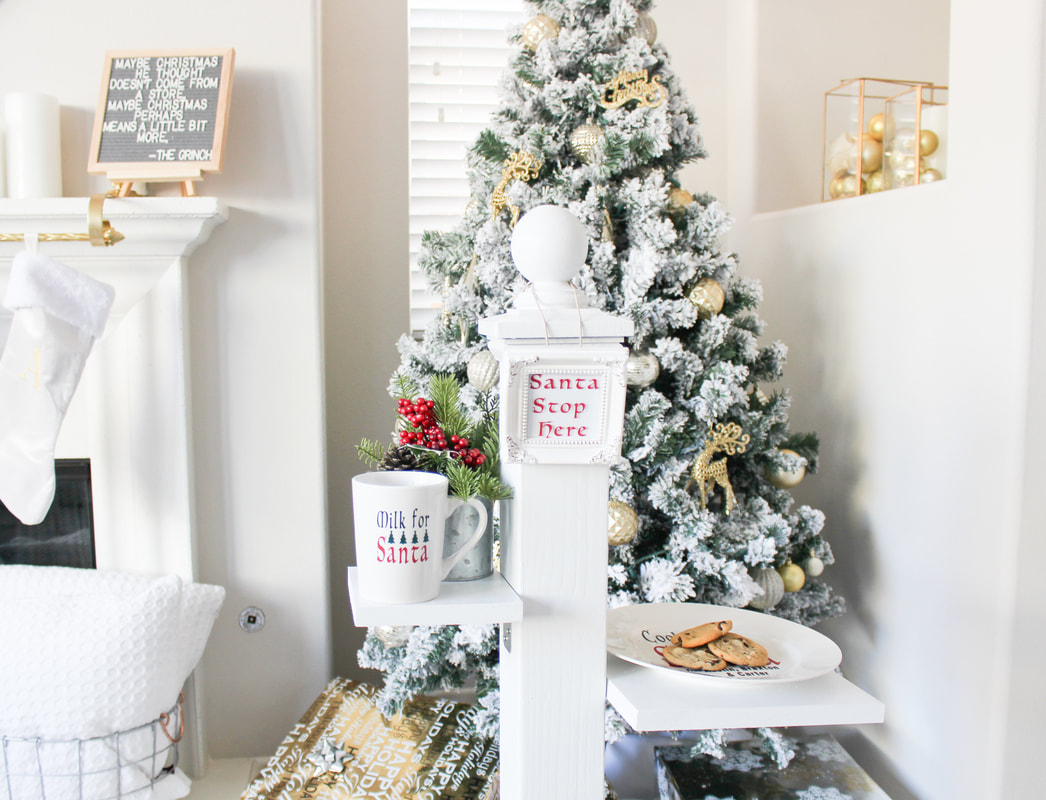 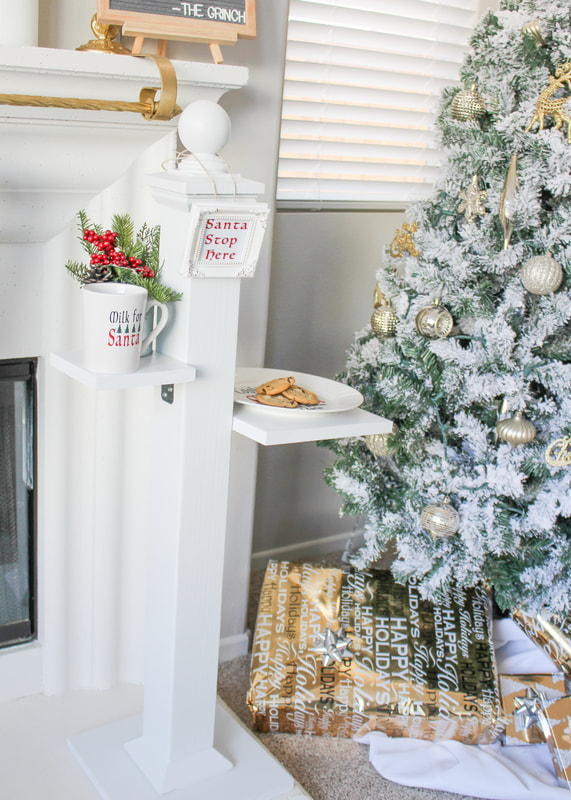 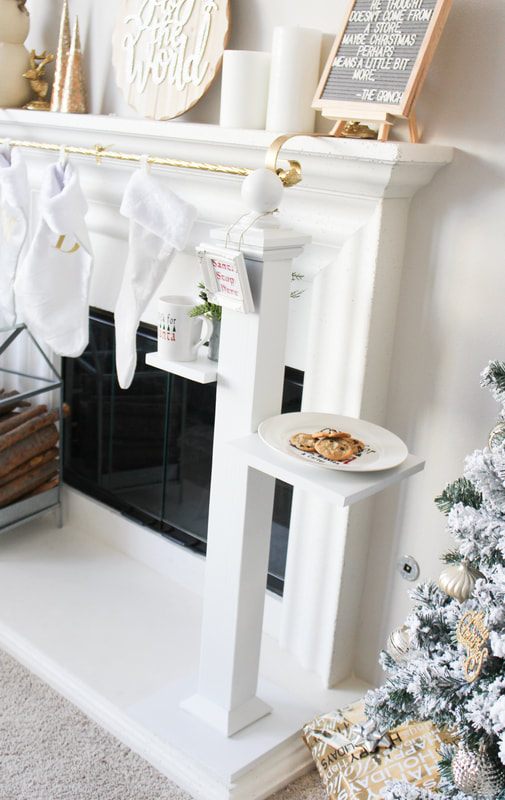 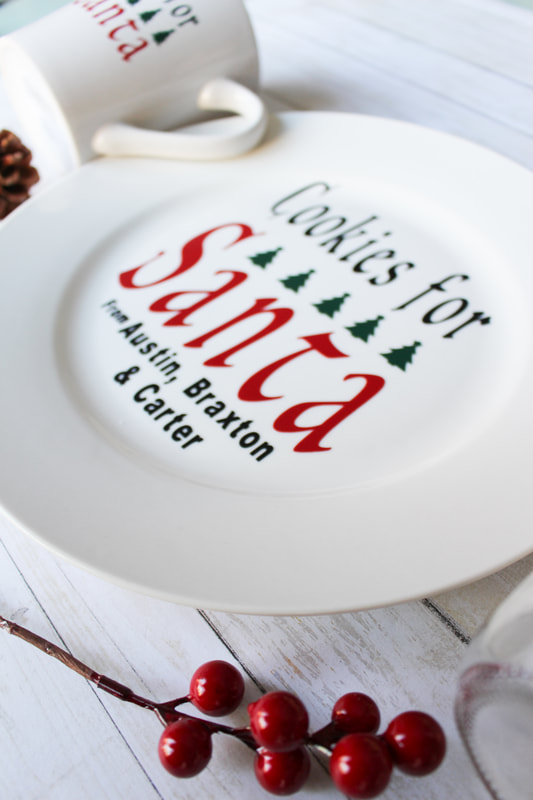 DIY “Milk for Santa” mug and “Cookies for Santa” plate HERE. 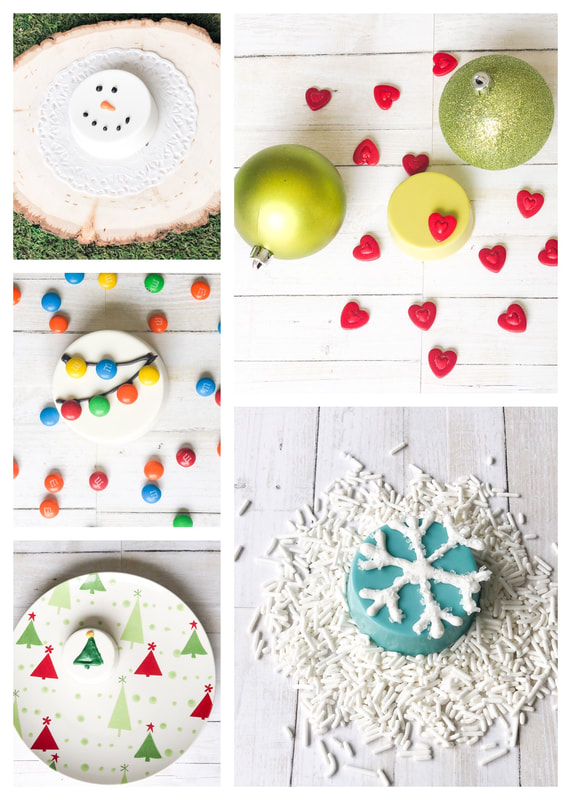 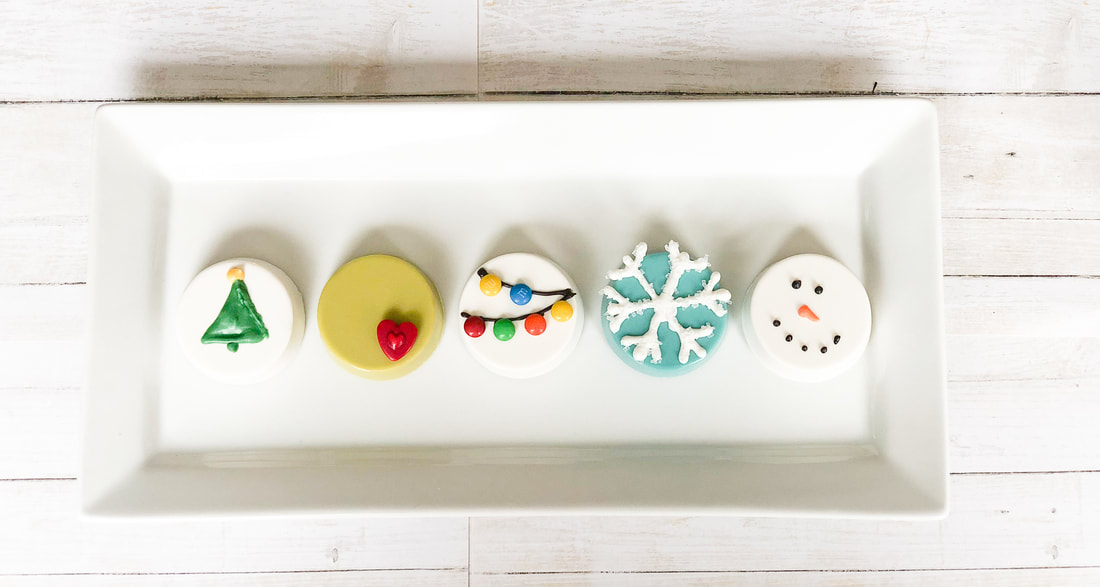 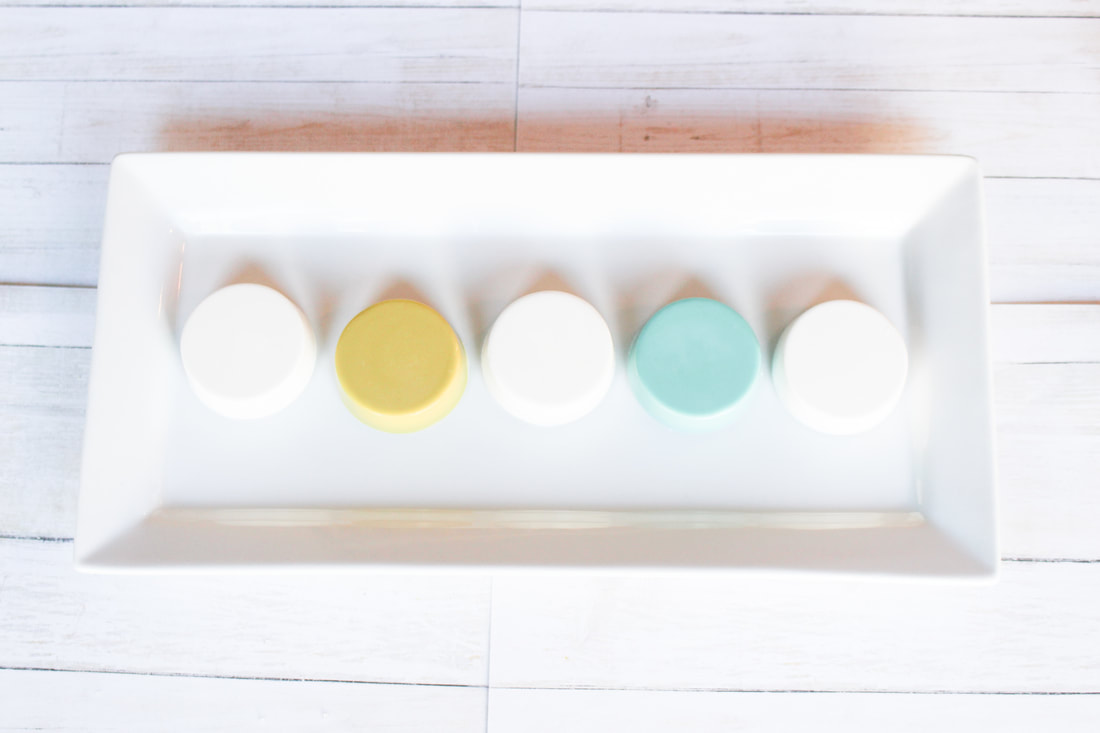 Lets starts with the base. I made a video tutorial on how to make the perfect Chocolate Covered Oreos. Check out the YouTube link below. Now let’s get to the fun part. Decorating! I started with the Grinch themed chocolate covered oreos.  I used bright green Wilton candy melts and Celebrate It! brand red tart candy hearts. Both purchased from Michaels. I used a dab of leftover green candy melts to adhere the heart. This one is probably my favorite...simply because it was the easiest. 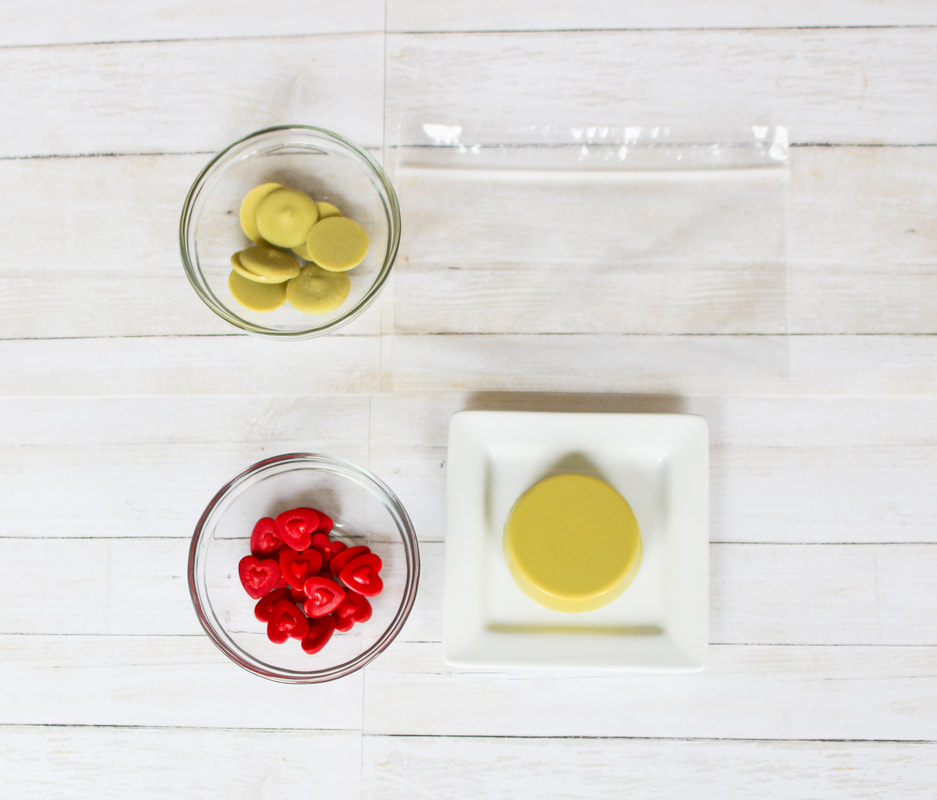 How fun is this Christmas light design?! I used Mini M&Ms for the lights and black Wilton candy melts for the wire. Super cute! 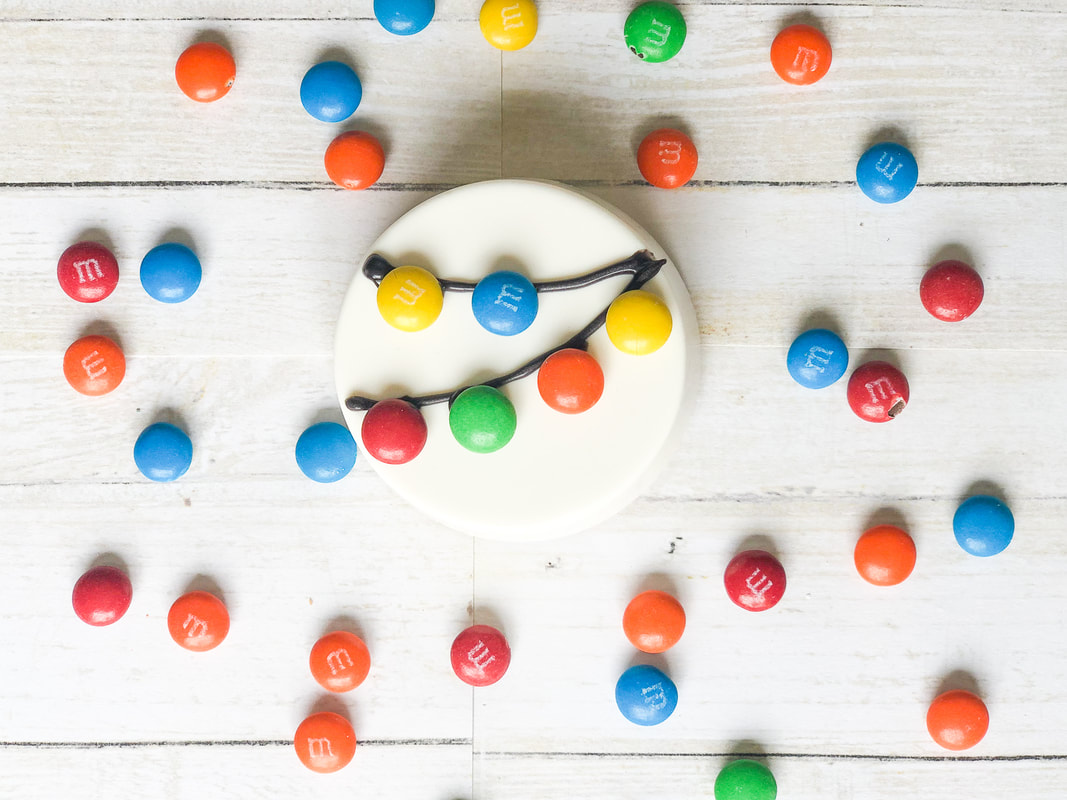 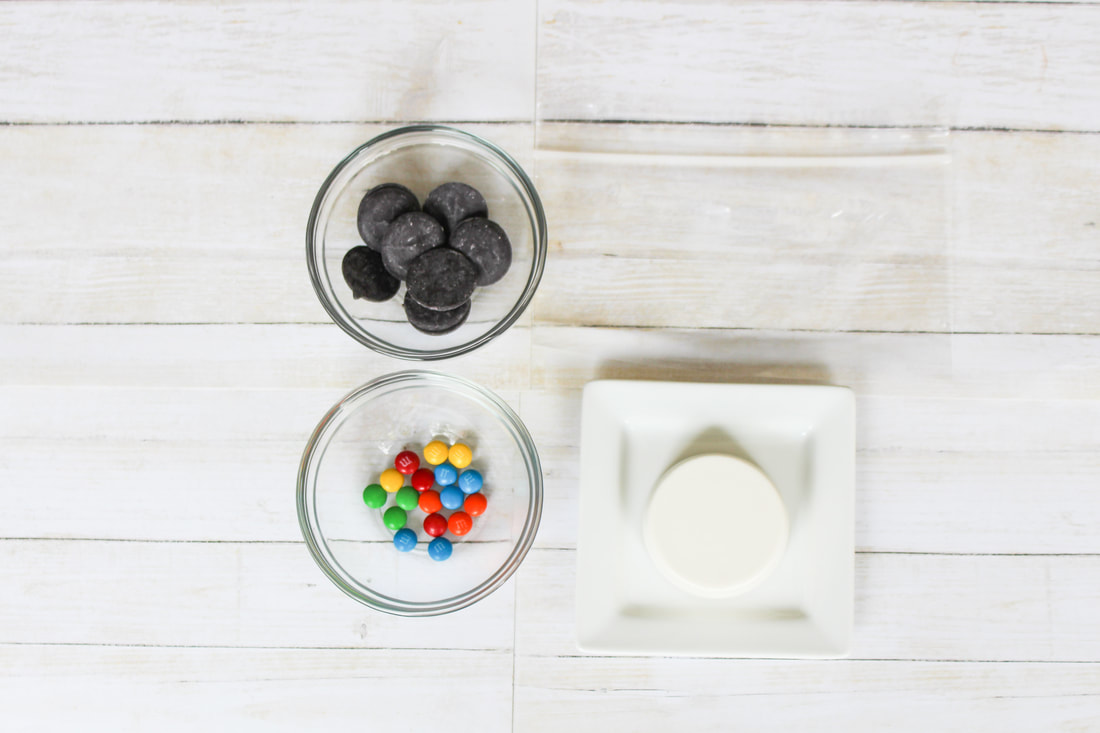 Up next this the Snowflake design! I have the WORST penmanship and equally bad line piping skills. Soooo I drew out a snowflake design on notebook paper, cut it out and used it as a stencil to help me pipe straight. I placed a small piece of wax paper over the stencilI and used white candy melts for the snowflake. I then sprinkled white sugar crystals on top before the chocolate hardened. Sidenote- This would be awesome for a Frozen themed party! 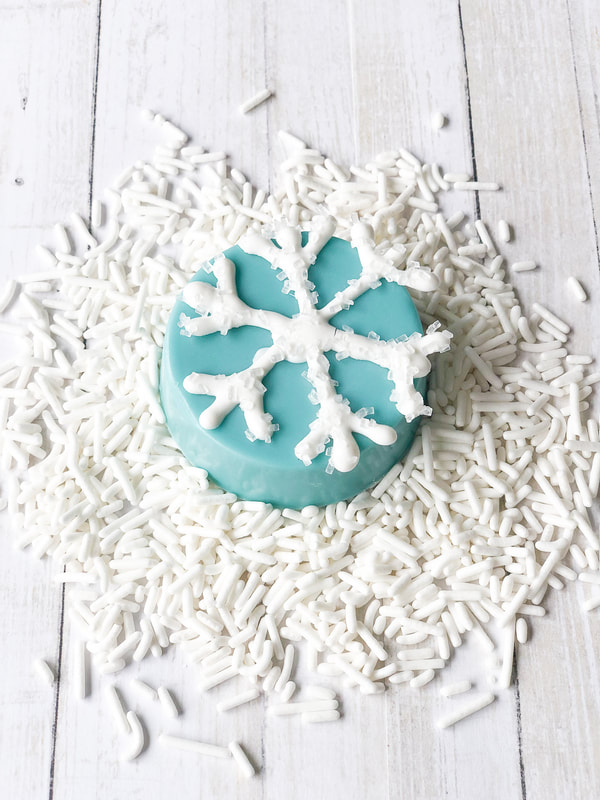 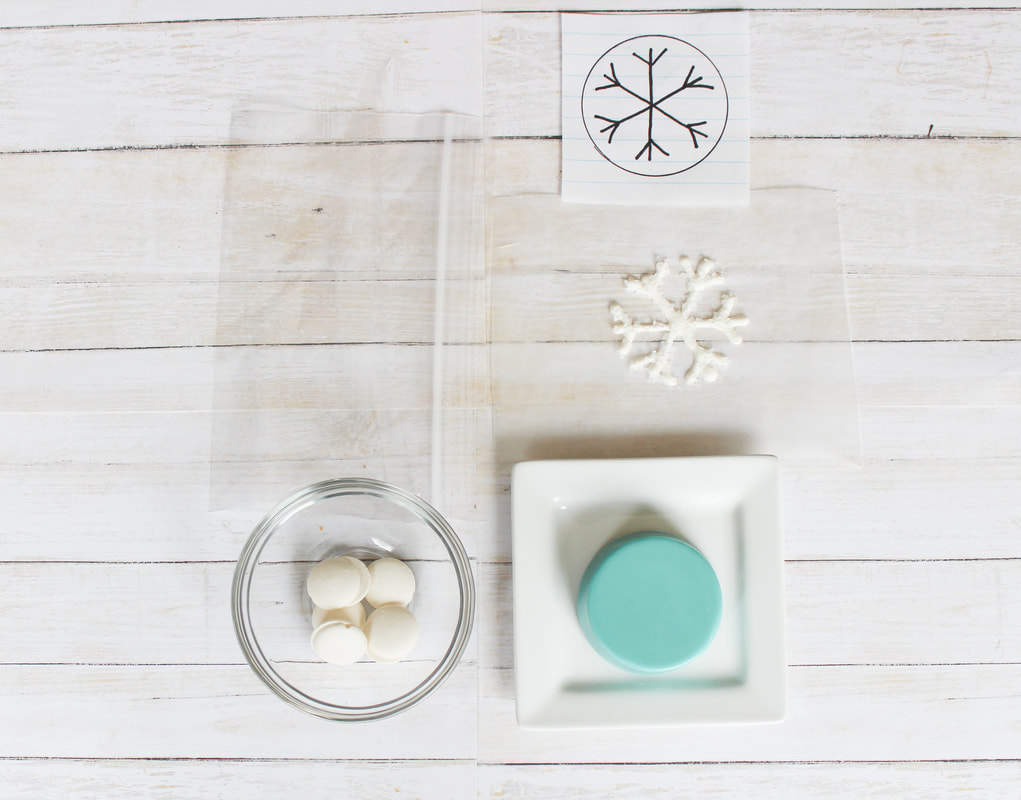 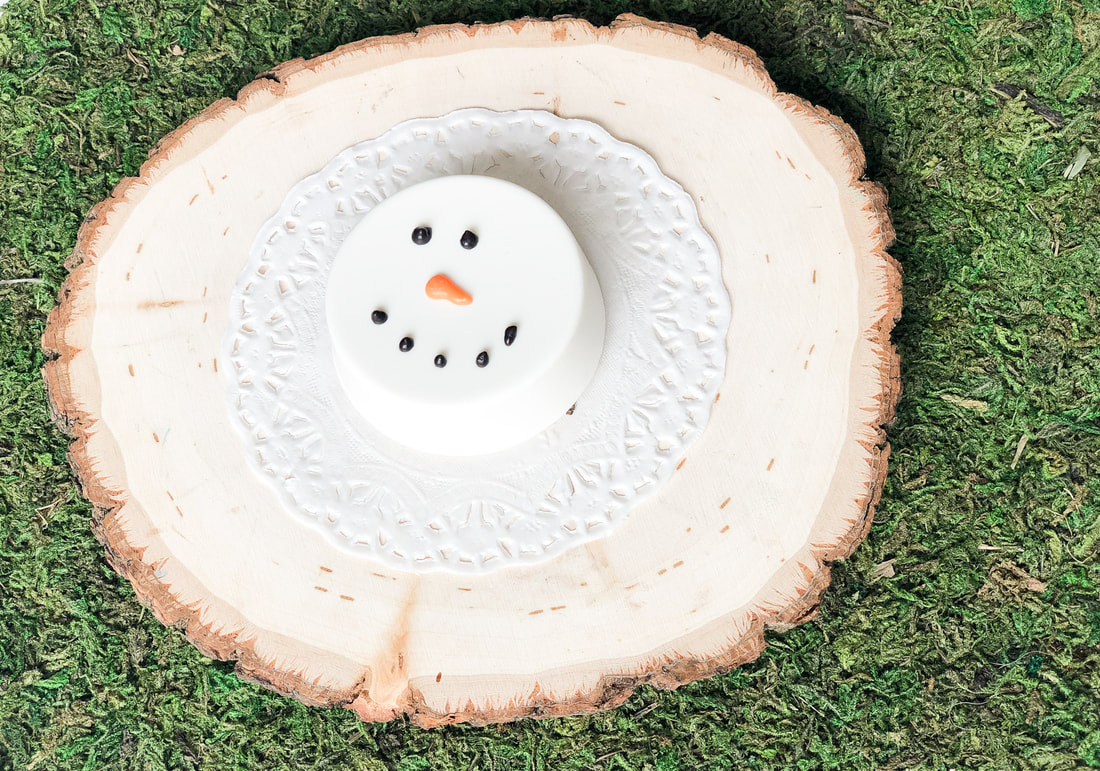 I know I said the Grinch design was easy but this Snowman is pretty close in the running. I used black and orange Wilton Candy melts for the eyes, nose and mouth. 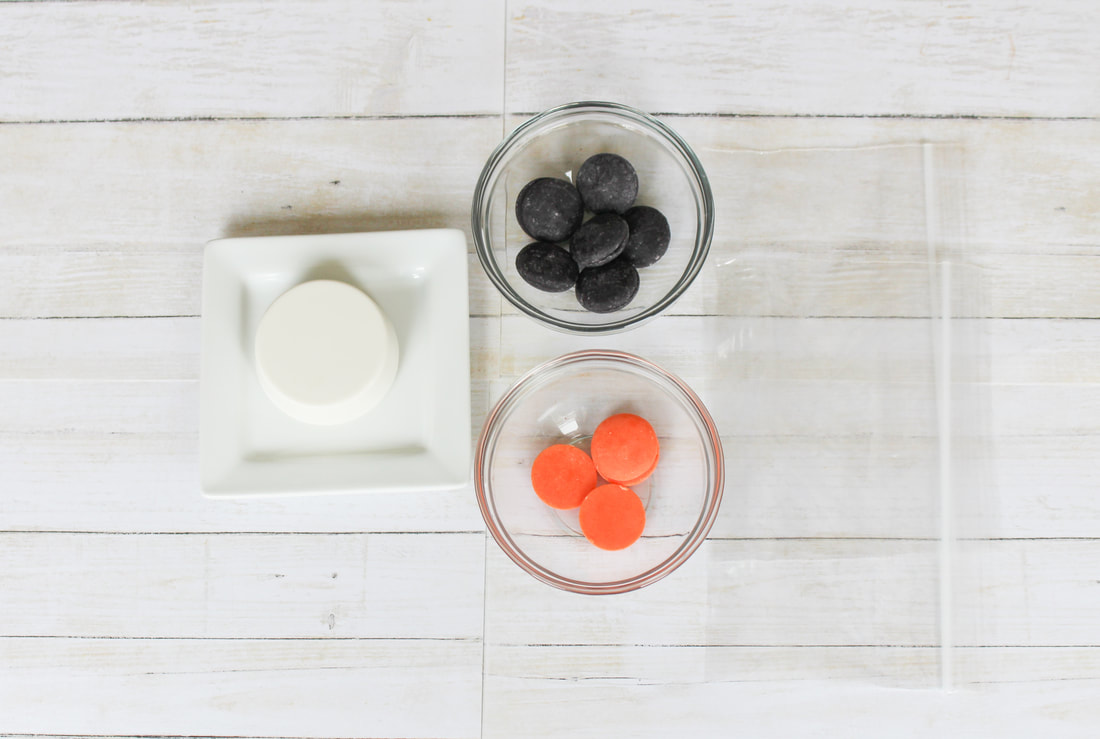 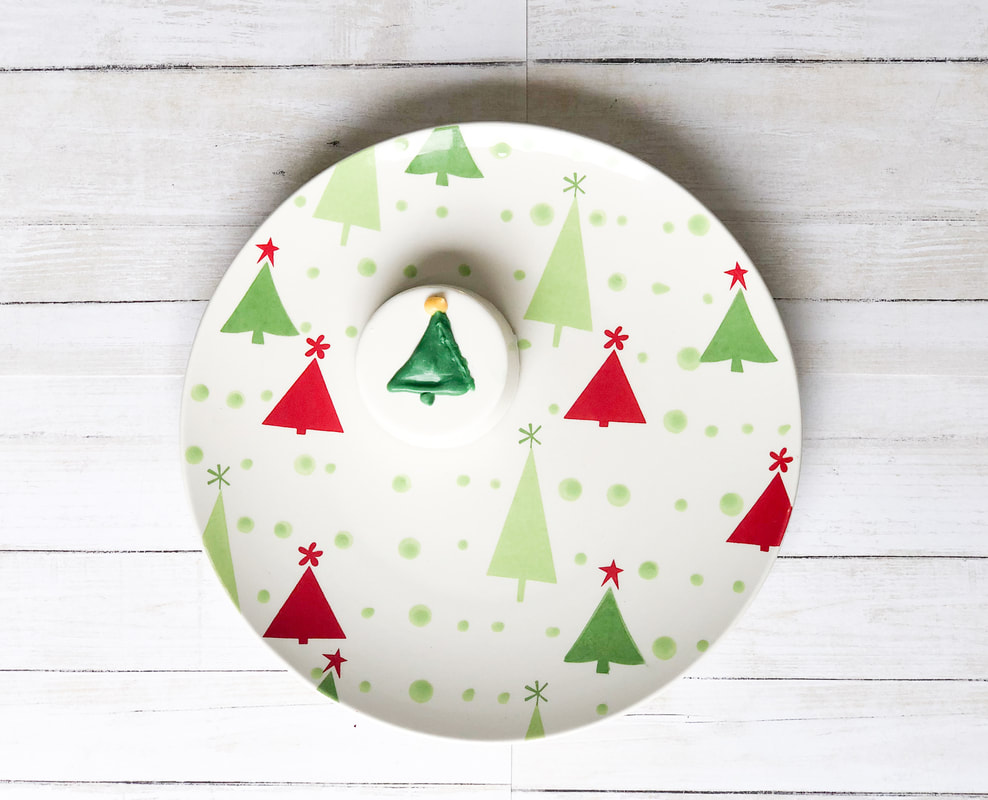 Last but not least, the Christmas tree design. I put it last for a reason. Not my best work. Looks a little sad and depressed. Say something nice to cheer this little tree up. He needs all the support he can get. I think you guys get the gist of the design. I used green and yellow Wilton candy melts for this design. 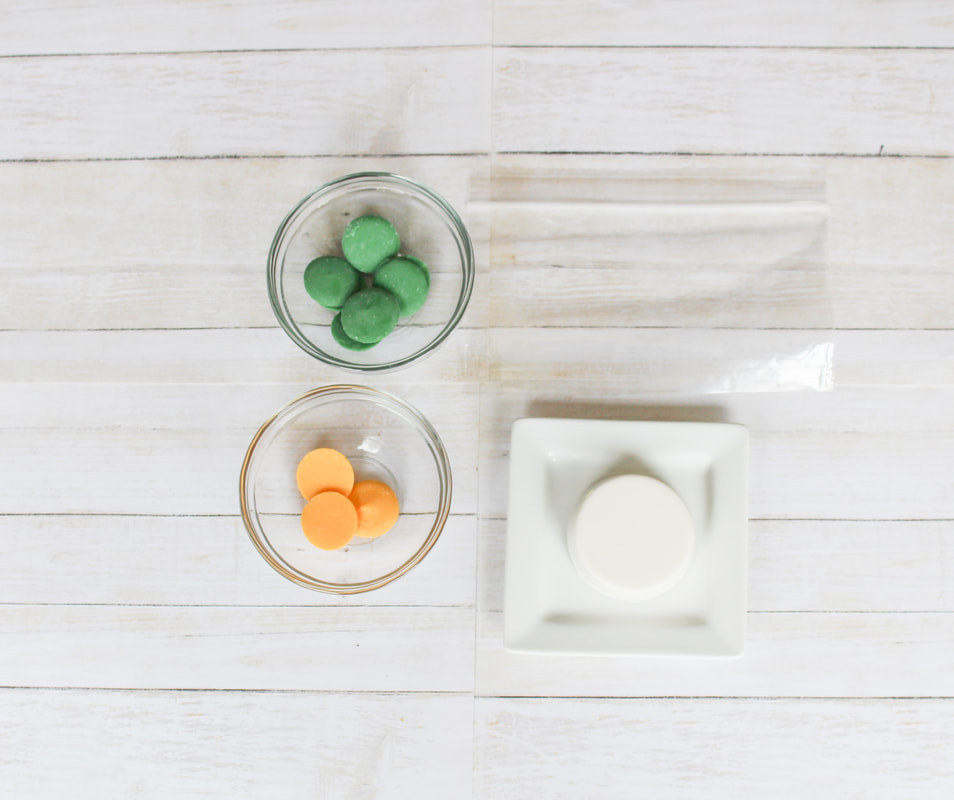 If you make this set, I'd absolutely LOVE to see it! Tag me or use #AshleighNicoleEvents
Until next time! |
The Ashleigh Nicole Blog!
DIY - Events - Motherhood - Home Decor - Lifestyle Archives
October 2019
Categories
All
 
  
|

 RSS Feed